
Introduction
Thank you for purchasing Consultix.
In this guide, you'll find information about installing the theme, setting it up properly on your domain and customizing it as per your need; which includes setting up different pages for the site and everything from scratch. No prior knowledge of design and coding is required.
You can follow different topics listed here and follow this step-by-step guide to setup your site with Consultix. We keep updating tutorial and knowledge base with vital tips and ‘help articles’. Therefore, we recommend you to check online version of this tutorial .
Things worth mentioning: Kindly note, that we cannot provide the support until you specify your envato username by which you used to purchase the theme and Item Purchase Code.
We also offer One time theme setup and site installation service for a nominal price of $50. Most theme installation and setup is done within 1 working day.
General Guidelines
We wish to thank you for purchasing Consultix! We're incredibly pleased and overwhelmed that you have chosen Consultix for your website. I’m sure you won’t be disappointed! Here, we outline all types of necessary information, and provide you with all the essential details you require for using Consultix. Consultix can only be used with WordPress and we presume that you already have WordPress installed and ready to go.
Essential Requirements and Recommended Settings
Recommended Hosting
We recommend using a cPanel or Plesk based hosting from a renowned hosting service provider. Many low cost providers provide their custom web based panel which most of the time don’t have required configuration to run websites smoothly.
We recommend using Hostgator for any hosting related need. Order plain cPanel based hosting. Don't order just Wordpress Hosting from any hosting provider. Wordpress hosting has lots of limitation and you might not be able to accomplish everything.
Ideally cPanel, Plesk driven control panels works seamlessly. Also, make sure that your provider uses latest version of phpmyadmin. The older version of php and phpmyadmin might not support.
We can troubleshoot and help, if you use cPanel, Plesk, Webmin, web panel, zpanel types of control panel. Also, when you ask for our help, please consider to send control panel access. Only FTP access might not be sufficient always.
Requirements
To work with Consultix, please ensure that you are running WordPress 4.7 or higher, PHP 5.6 or higher, and MySQL 5.6 or higher. We have tested it with Mac, Windows and Linux.
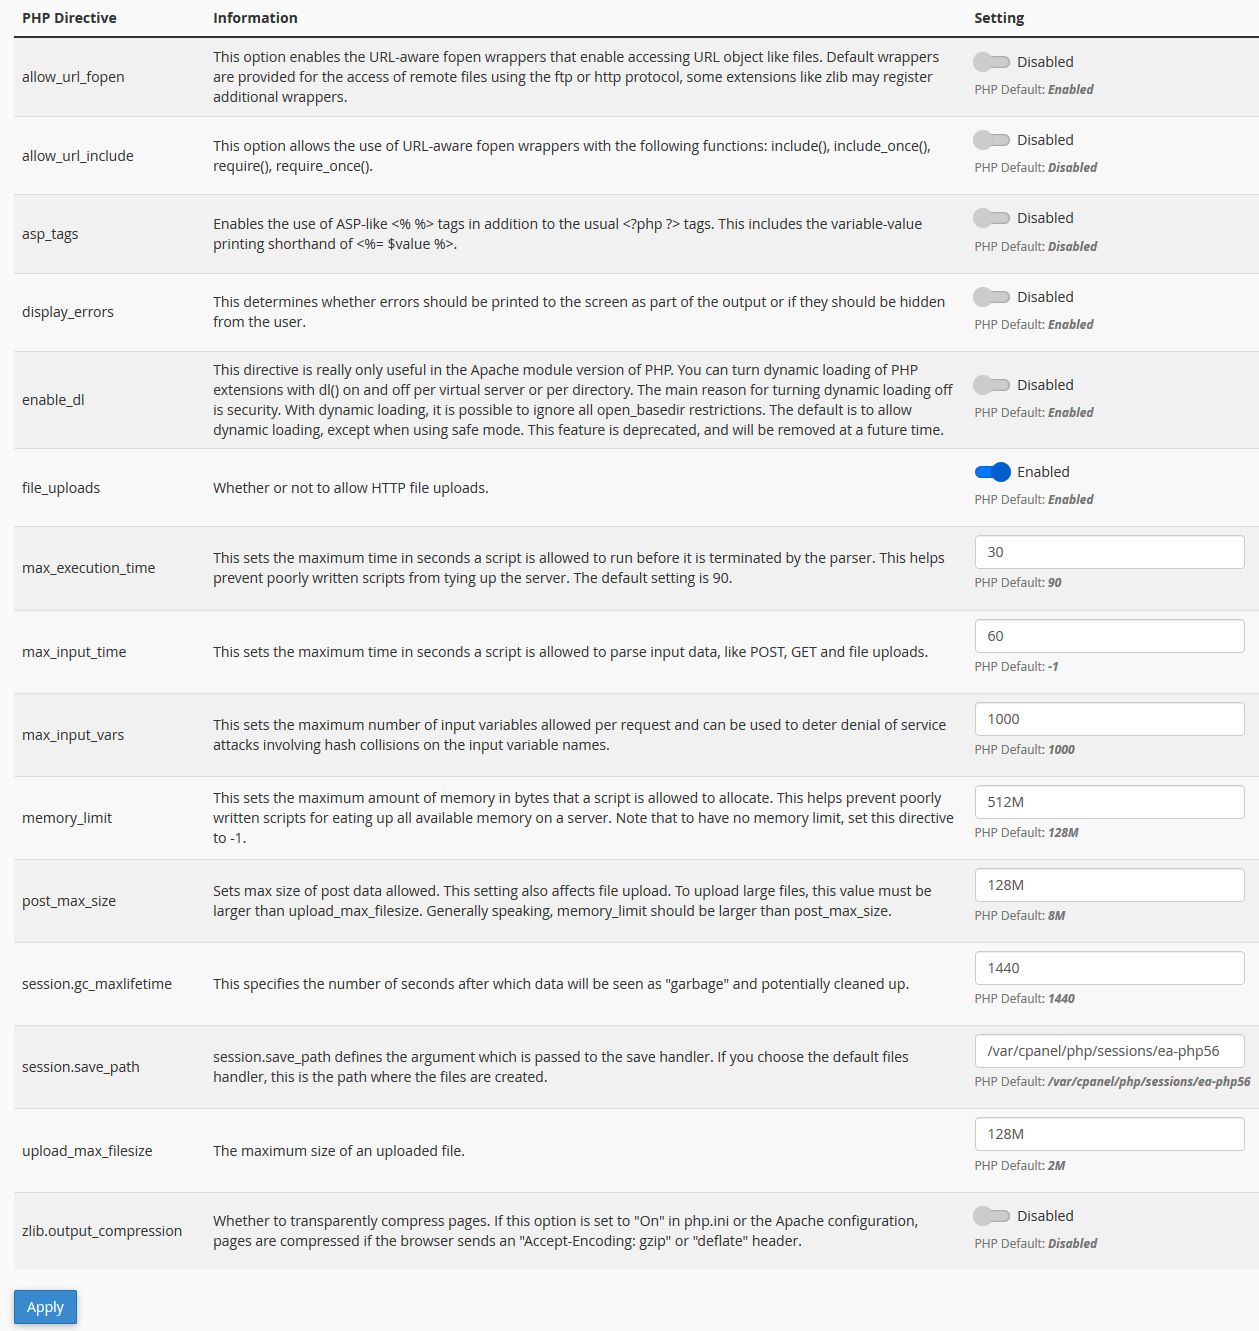
Recommended PHP Configuration Limits
Various issues that you may run into are: white screen, your demo import fails, empty page content and other similar issues which are all related to low PHP configuration limits. The best way is to increase the PHP limits of hosting account.
- max_execution_time 300
- memory_limit 128M
- post_max_size 32M
- upload_max_filesize 32M
Edit PHP Configuration
Generally, there are two popular types of CPanel. You can change PHP configuration limits on your own, by follwing these steps. If you're using a CPanel which is different from these two types, then you need to contact your hosting provider to increse the above mentiond PHP configuration limits(especially 'upload_max_filesize' which should be 32MB).
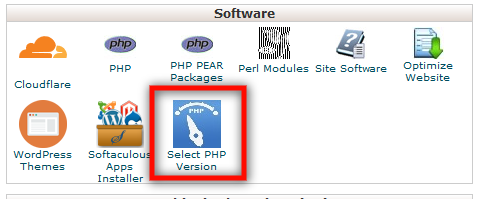
Steps for the 1st type of CPanel:- Login to your CPanel
- Click on 'Select PHP Version' under Software section.
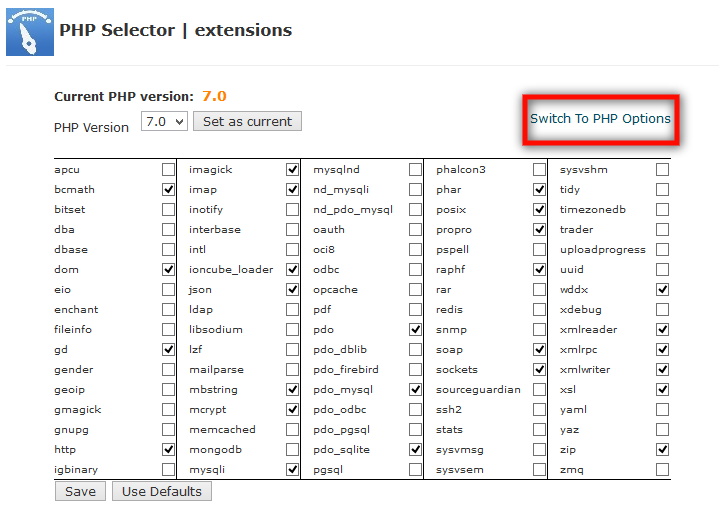
- Click on 'Switch To PHP Options'.
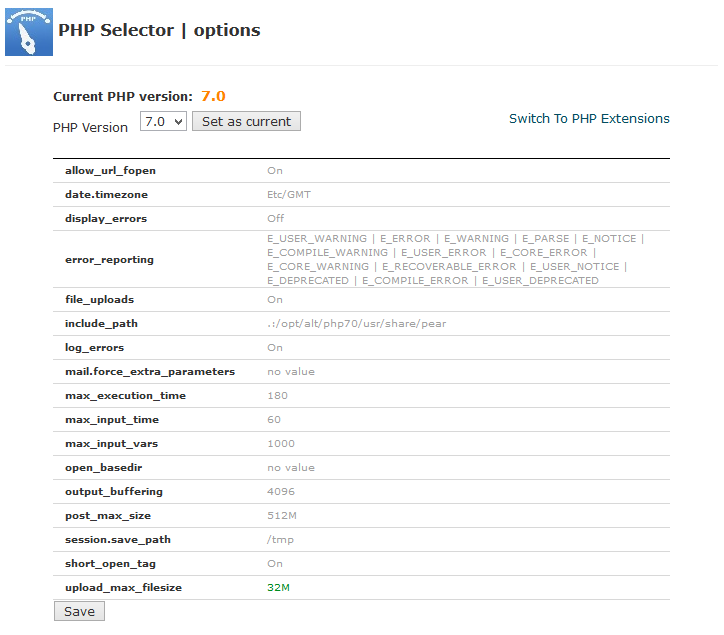
- Now, change the PHP configuration limits as we have mentioned above and click on 'Save' button to save all. You can also change PHP version here.
- Login to your CPanel
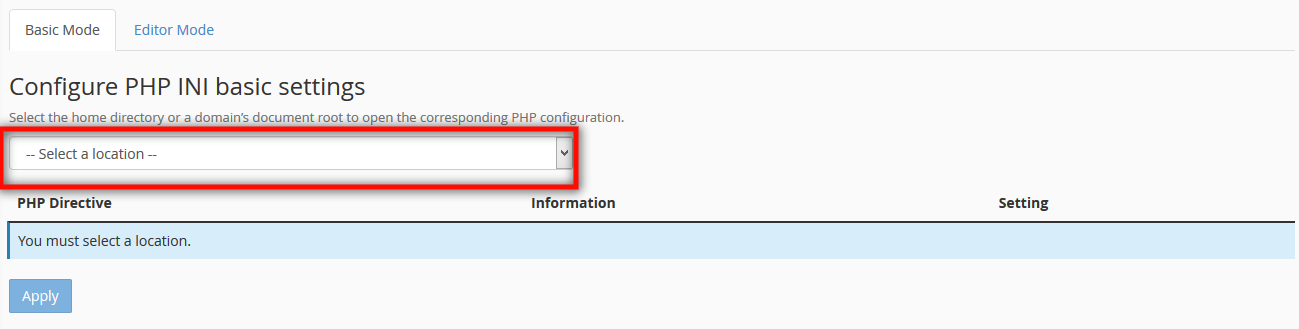
- Click on 'MultiPHP INI Editor' under Software section.
- Choose your domain from the dropdown, under 'Configure PHP INI basic settings'.
- Now, change the PHP configuration limits as we have mentioned above and click on 'Apply' button to save all.

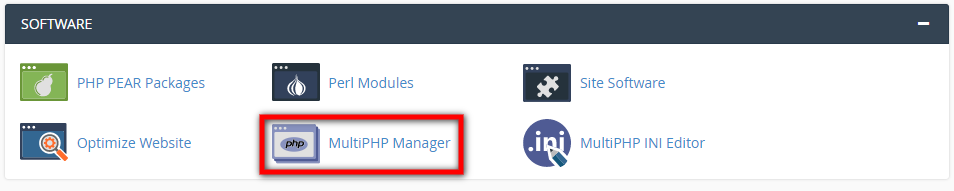
- Login to your CPanel
- Click on 'MultiPHP Manager' under Software section.
- Choose your domain from the list.
- Now, select current PHP version from 'PHP Version' and click on 'Apply' button to save all.

Theme Installation & Setup
- Download the Consultix theme by clicking on 'All files & documentation' of 'Download' button.
- Login to your WordPress Admin Panel.
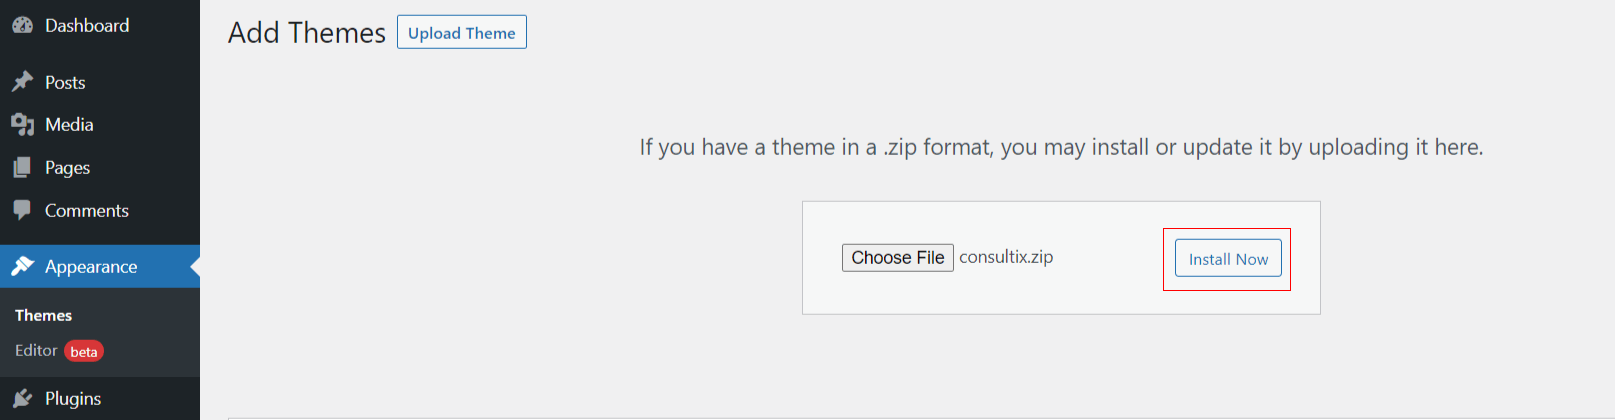
- Click on Appearance -> Themes -> Add New.
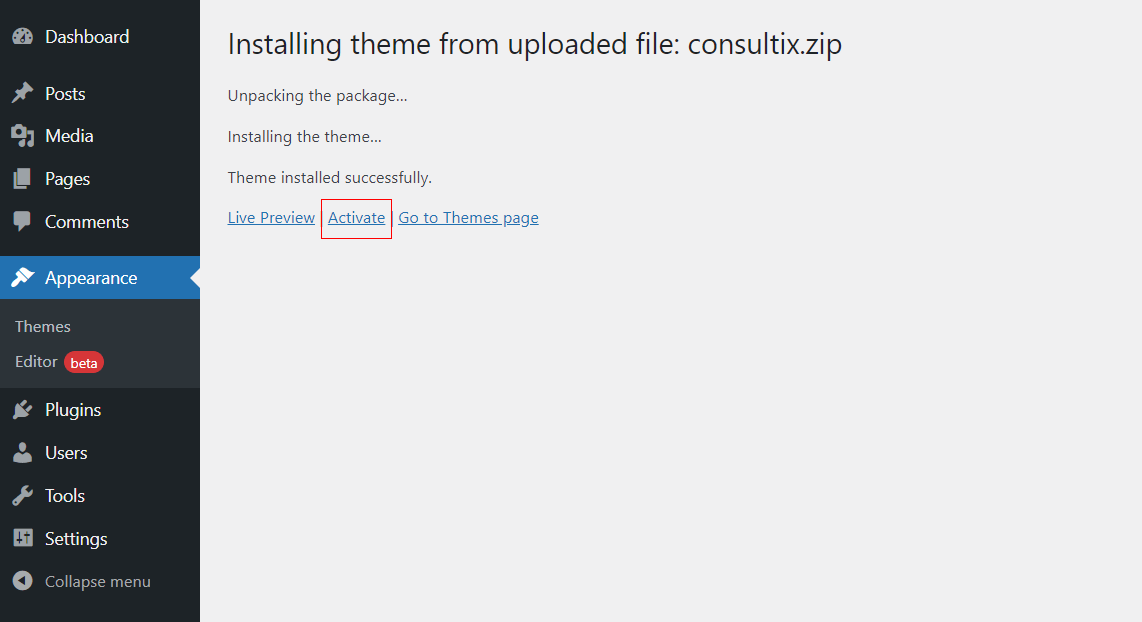
- Click on Upload Theme and choose the theme zip 'consultix.zip' file (Which you already got by downloading the full package) and click on 'Install Now' button.
- Activate the Consultix theme.
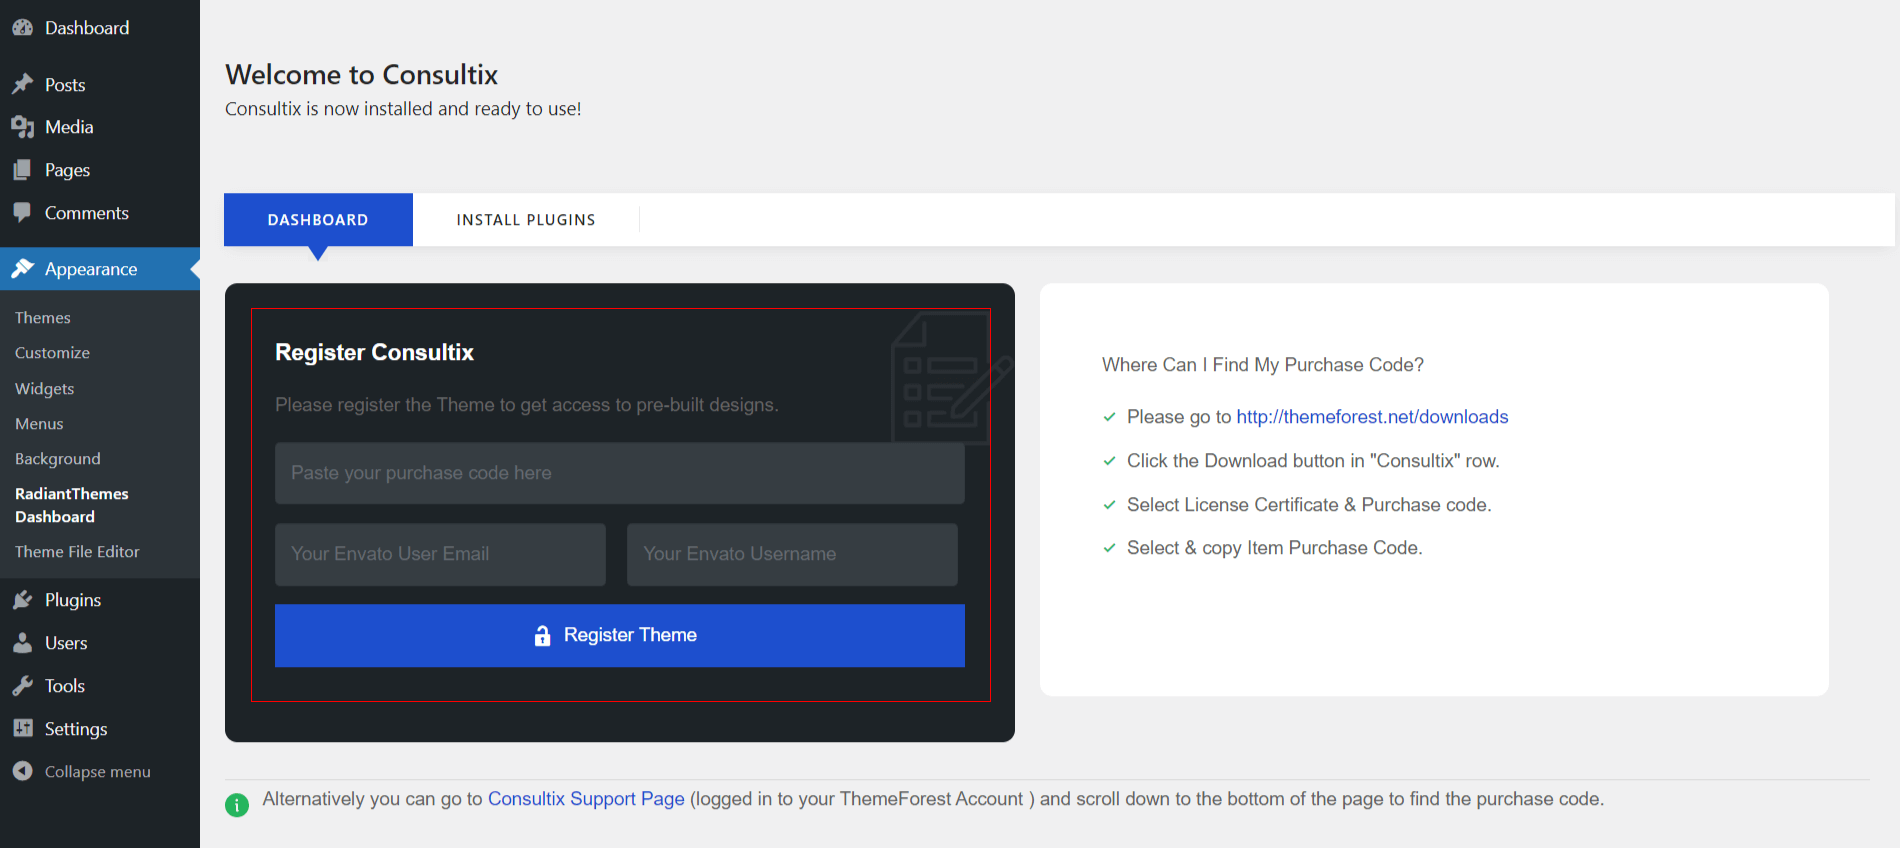
- Register the theme with your Envato username, email id and purchase code (Only one standard license is considered valid for one website since using more than 1 website on a single license is a gross infringement or violation of license).
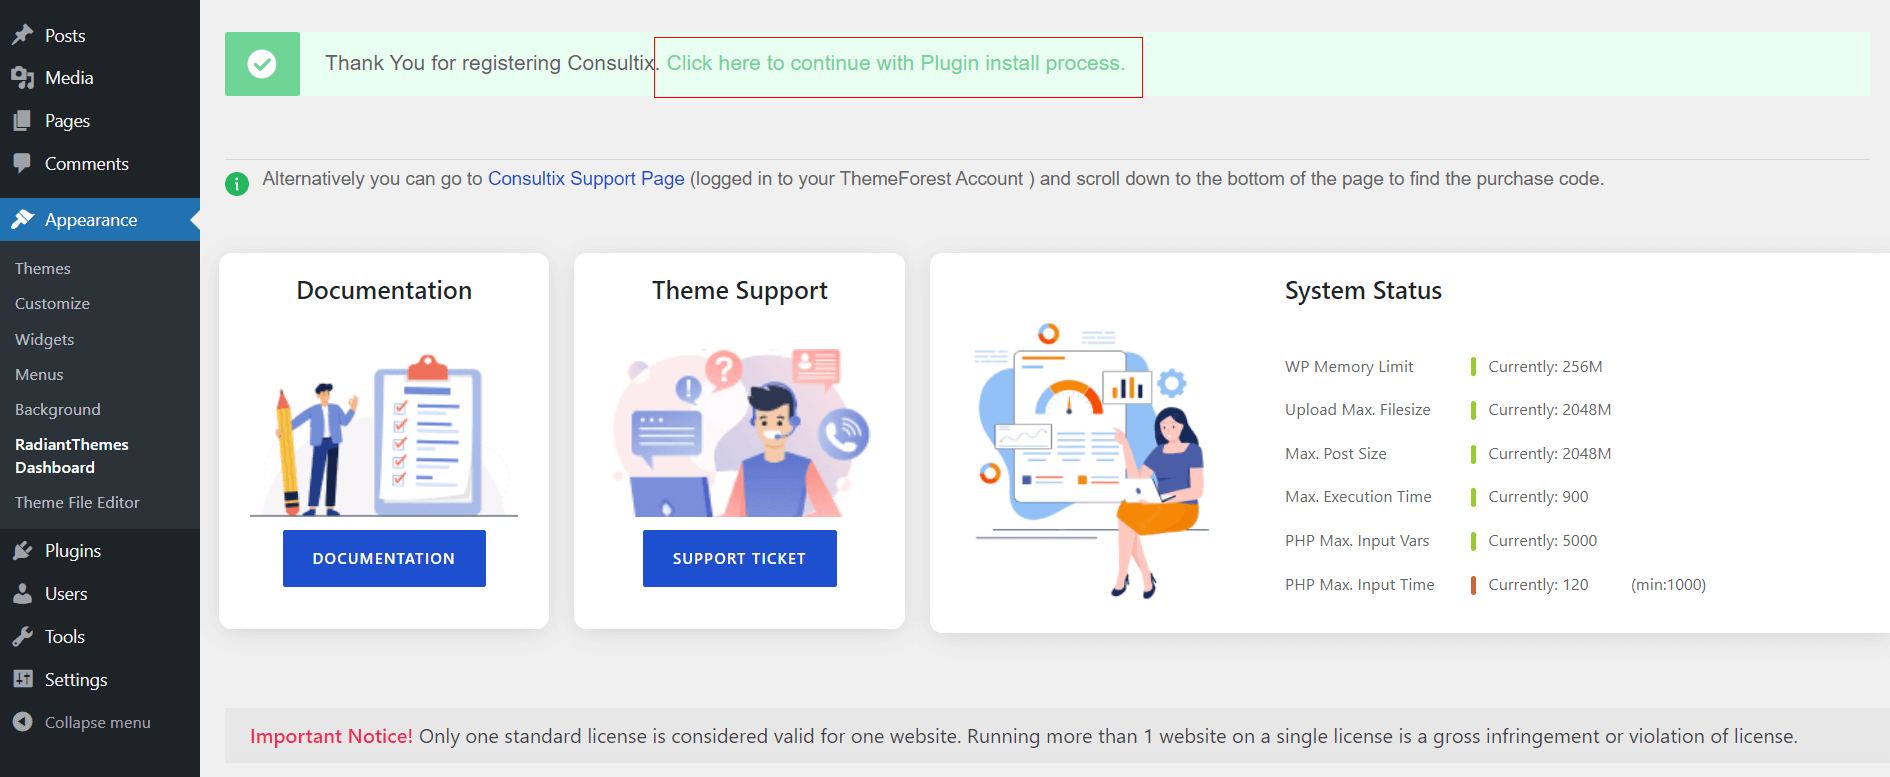
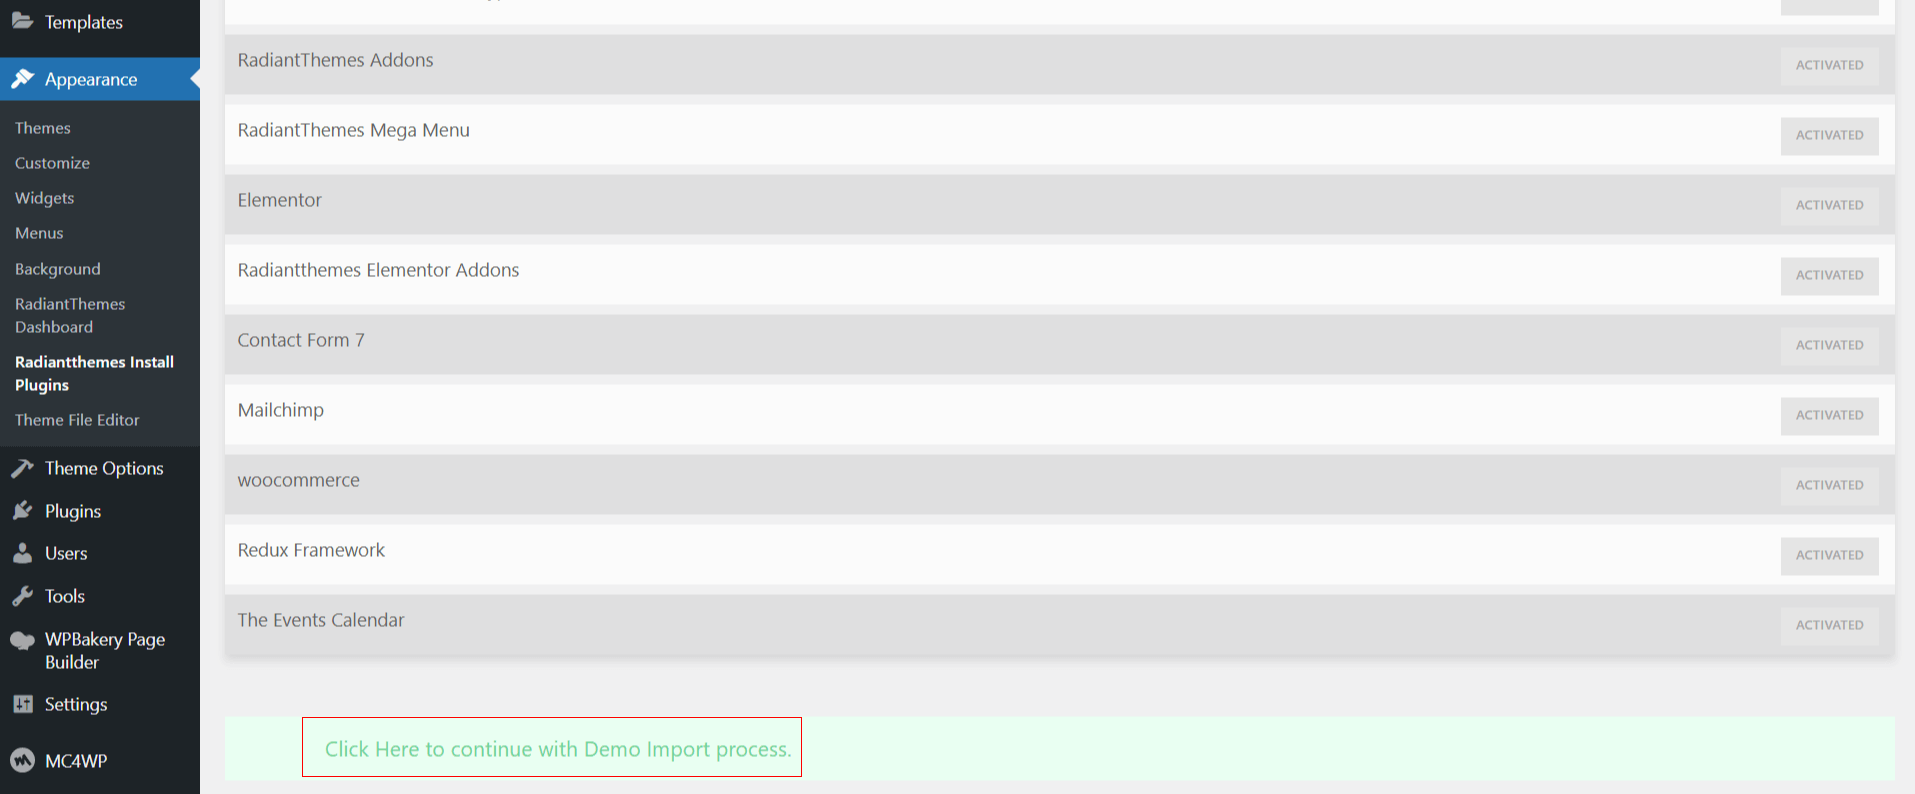
- After the successfully registered, click on Click here to continue with Plugin install process to install plugins.
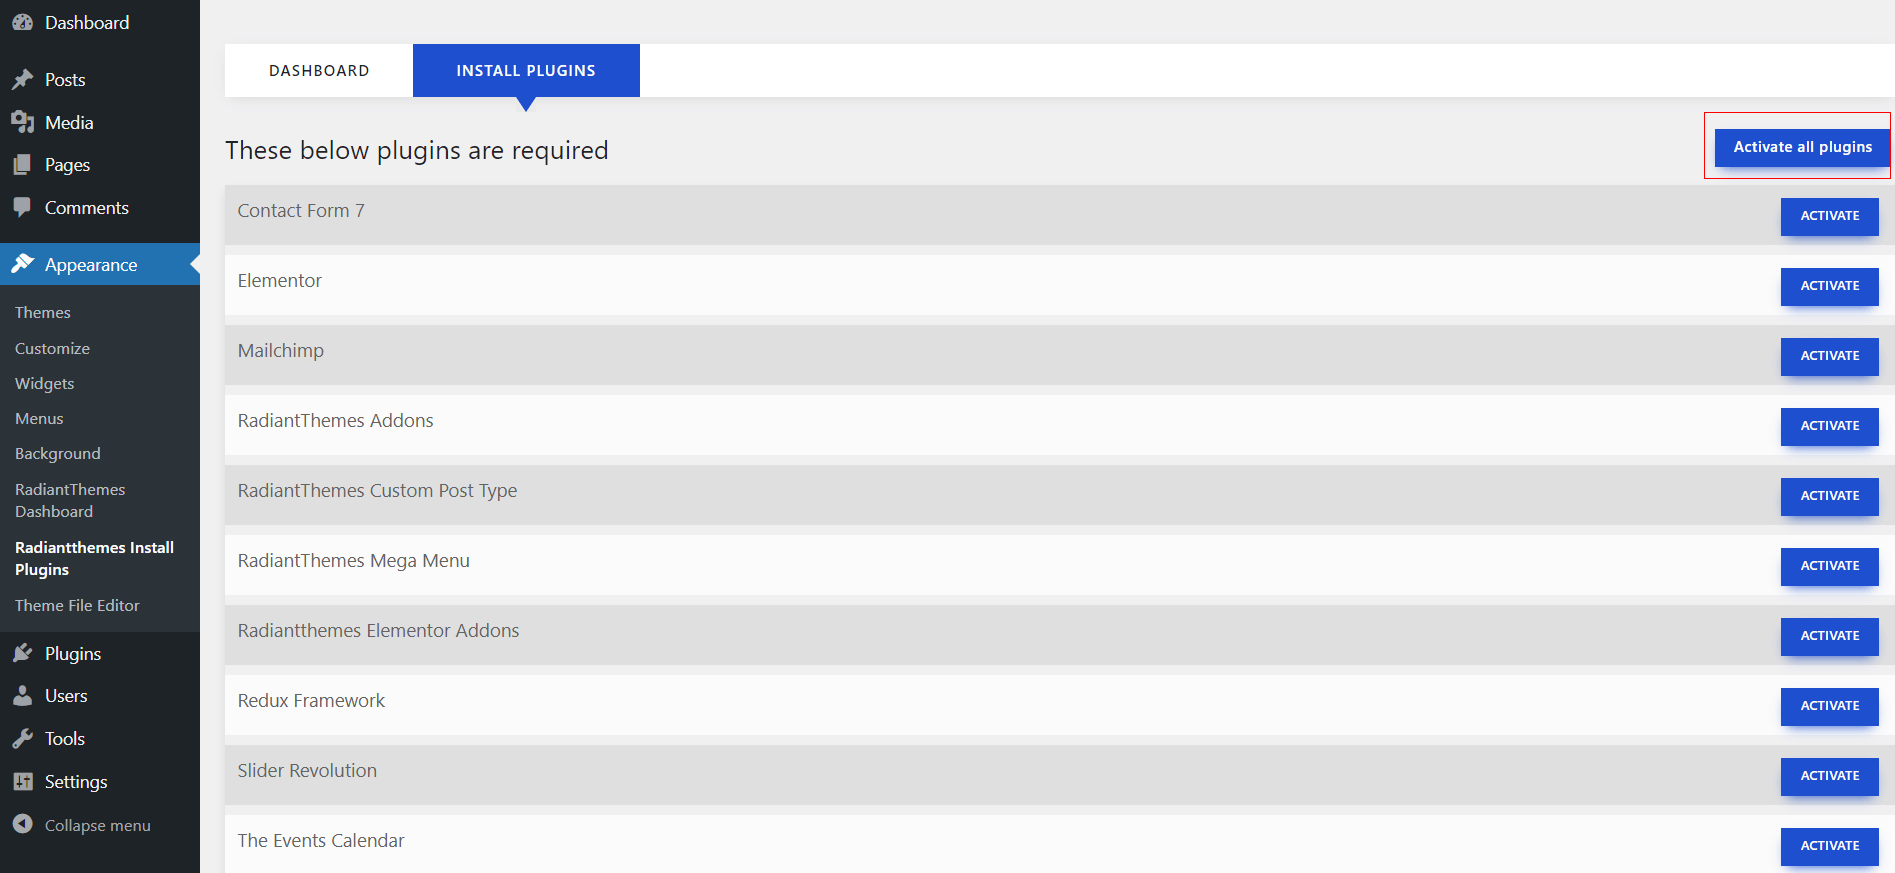
- Click on Activate all plugins to install and activate all plugins.
- Click on 'Click Here to continue with Demo Import process'.
- Here you'll get all the demos. Click on 'Install' and 'Ok' on the dialog box to import demo data. (IMPORTANT: Installing this demo content will delete the content you currently have on your website. However, we create a backup of your current content in (Tools > Backup). You can restore the backup from there at any time in the future.)
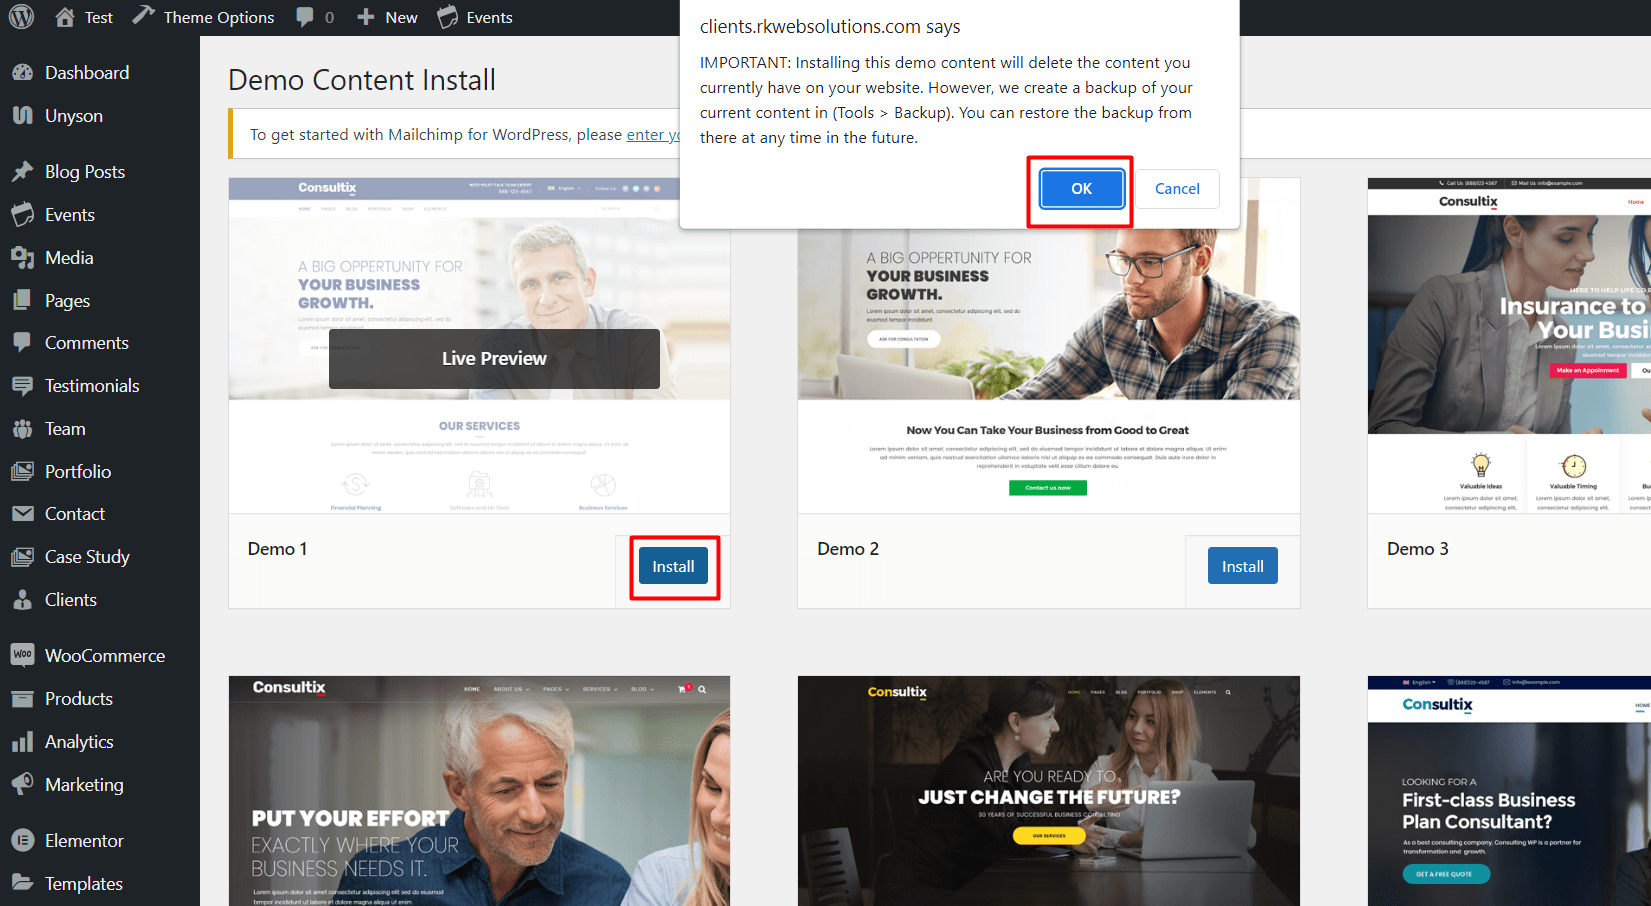
Now relax and import process will automatically finish and will show you progress on screen (via progress bar).
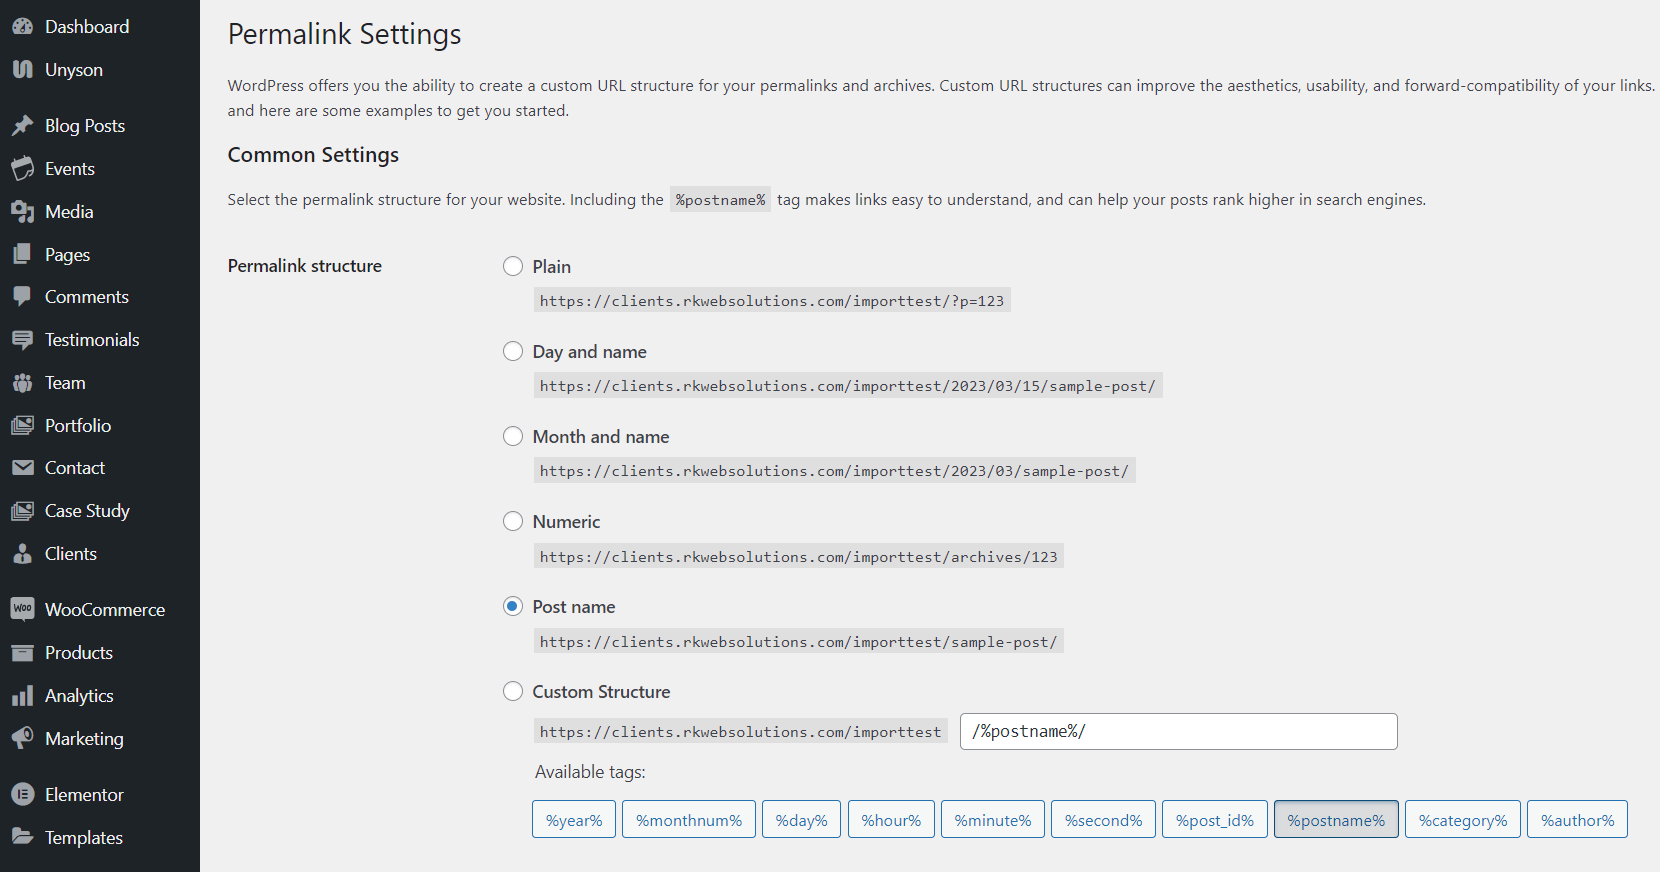
- Now set the permalinks once.
Plugin License Activation
WPBakery Page Builder and Slider Revolution are LICENSED to be distributed with Consultix theme (Template Library is not included with this version of WPBakery Page Builder). So you DO NOT need to PURCHASE any separate license to activate them. We'll continue to provide updated and stable version of all required plugins for the life span of Consultix theme. You DO NOT need to purchase any supporting plugin which is part of the theme bundle.
You can ignore messages like this below.

All premium plugins are distributed under Extended License which have permission to distribute those plugins along with our theme. You can use those included plugins when you use this theme. As you did’t buy those plugins so you won’t be able to activate it. But, those included plugins have all functionalities needed to run along with our theme. We’ll provide updated version of those plugins from time to time.
Theme Update
If you haven't changed any theme files as of yet, then you can update your theme by both Automatically and Manually.
Automatically Theme Update
For updating the Theme automatically with Envato Market plugin please follow the below link https://envato.com/market-plugin/
Manually Theme Update
Download the latest package from ThemeForest, unpack the files, and upload the theme on the server.
You need to upload the theme in your server by following these steps--
- Login to your CPanel
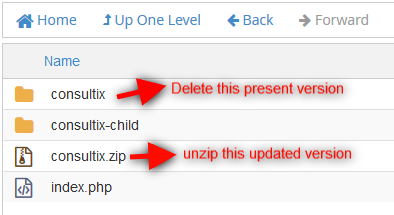
- Go to File Manager > public_html > wp-content > themes
- Upload your updated zip file of 'consultix' theme
- Delete 'consultix' theme folder of the present version
- unzip the updated version of the 'consultix' theme
- After unzip, you may delete the theme zip
Plugin Update
You can update plugin like 'Slider Revolution', 'WPBakery Visual Composer' and others by following these steps--
- Login to your wp-admin
- Go to Plugins > Installed Plugins
- Now, delete those plugins which you want to update. For example, if you want to update 'Slider Revolution' and 'WPBakery Visual Composer' plugins, then delete those plugins first.
- After deleting, you wil get a notice to install those plugins again.
- Now install and activate those plugins. After installing, plugins will be updated automatically.

Child Theme
A Child Theme is specifically for developers who are willing to make changes to the critical functions and codes. If you do not intend to go that far, you can always ignore this lesson or chapter.
IMPORTANT : If you want to edit the templates and functions of a theme, we always advise you to incorporate or install 'Child Theme' and make changes therein. To know more about the need and purpose of creating child theme, visit WordPress Codex on: //codex.wordpress.org/Child_Themes.
In the theme package, you will see materials required for Child Theme. It’s found in the "consultix-child.zip" archive. You can install child theme in a similar way as you install main theme.
A handful of recommendations on how to use Child Theme:
In the child theme, almost all files from main theme can be replaced. It doesn’t concern or affect only .php-files with templates and basic logics, but also .js and .css files from respective files and folders with images, icons etc..
If you are thinking about changing some functions of the theme or adding new ones, you have to create file 'functions.php' in the "consultix-child" folder, and add all requisite functions into it. If our WordPress theme has functions with such names, they will be replaced by yours, if not – your functions will complete the logics of our theme.
IMPORTANT : If you are thinking of replacing some functions from other files (except functions.php), we highly recommend you, NOT to copy-paste respective files into the child theme, but instead create the respective functions in functions.php in the child theme. This should be strictly implemented, so that while updating them, new functions from these files are available for use.
Pages
By following this tutorial you can set Front Page and Posts Page and can easily manage your header, Short header for page.
Set Front Page and Posts Page
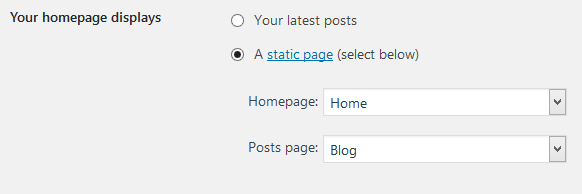
Please go through the following points to learn how to set Front Page and Posts page:
- Login to WordPress admin panel (URL should be www.yourdomain.com/wp-admin )
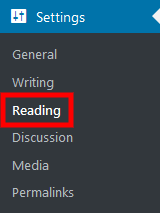
- Navigate to "Settings > Reading".
- From dropdown, select which page you want to set as "Front Page" and which page you want as “blog posts” page. Default Front Page is ‘Home’ and default posts page is ‘Blog’.
- Click on ‘Save Changes’ button to save all.
Set different Header for specific pages
By-default, header is coming from Theme Options of all pages. If you want a different header for a page, then you can do the same by choosing 'Select Header' from that specific page.
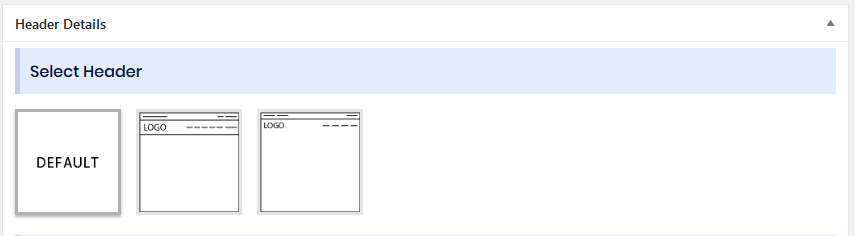
'Default' style is by-default option which is the current header style of your Theme Option. So, if you want same header on all pages, then you don't need to select anything. If you want a different header for a specific page, then you need to choose the other 'Header Style'. After selcting 'Header Style', You can change settings for that header from Theme Options(Heder > General).
Set different Short Header for specific pages
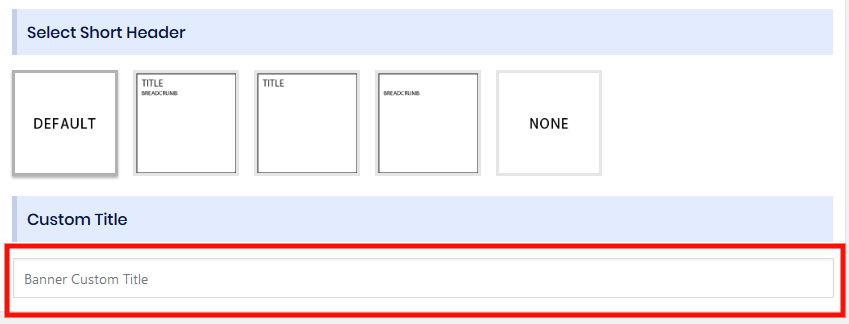
By-default, short header is functioning from Theme Options for all pages. If you want a different short header style for a page, then you can do the same by choosing 'Select Short Header' from that specific page.
'DEFAULT' style is by-default option which is the current short header style of your Theme Option. So, if you want same short header style on all pages, then you don't need to select anything. If you want a different short header style for a specific page, then you can choose any other 'Select Short Header' as your wish. Other than 'DEFAULT' style, you will get 4 different types of short headers--
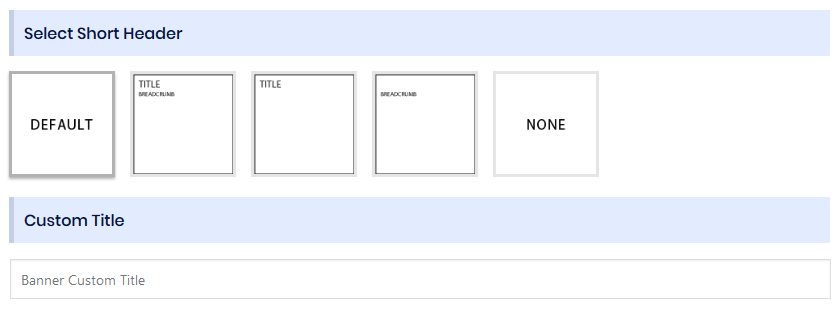
- Short Banner With Breadcumbs-- To get short header with both banner and breadcrumbs.
- Short Banner Only-- To get short header with banner only.
- Breadcumbs Only-- To get short header with breadcrumbs only.
- None-- To remove short header.
You can set your banner image from here--
If you want a title and subtitle for your short header, then you can do the same from here--
Way to work with WPBakery Page Builder
Please click here to watch all videos for better understanding of WPBakery page Builder.
You can also enable “WPBakery Page Builder” for Blog Posts, Team, Portfolio etc. by following these steps--

You may notice an error message on your WordPress dashboard regarding activation of Visual Composer. Please do not worry, we have included fully licensed ‘in-stock’ version of Visual Composer. You don't need to purchase separate license to use it. You will keep getting updated version of the plugin when we release new version of our theme.
- Navigate to WPBakery Page Builder > Role Manager
- Default value on drop-down field of ‘Post types’ is ‘Pages Only’. Choose ‘Custom’ option. Now, choose where you want to enable WPBakery page Builder.
- Click on ‘Save Changes’ to save everything.
Sliders
You will get ‘Revolution Slider’ and ‘Layer Slider’ in Consultix (‘Revolution Slider’ and ‘Layer Slider’ plugins must be installed and activated). Currently, all sliders of Consultix is running with ‘Revolution Slider’. You can add your slider with ‘Layer Slider’ also.
You can manage your ‘Revolution Slider’ by following this video tutorial--
You can manage your ‘Layer Slider’ by following this video tutorial---
You will keep getting updated versions of the ‘Revolution Slider’ and ‘Layer Slider’ plugins when we release new version of our theme.
Contact Form 7
Contact form 7 is used to create ‘easy to handle’ and ‘easy to customize’ forms. Consultix theme has seven pre-built forms. To get all forms, ‘Contact Form 7’ plugin must be installed and activated. You can add/edit/delete the contact form by following this documentation---
https://contactform7.com/getting-started-with-contact-form-7/Events
If you want to enable ‘events’ on your site, then ‘The Events Calendar’ must be installed and activated.
You can manage all events by following this tutorial--
Theme Options
You can manage a lot of things from ‘Theme Options’ easily.
In ‘Theme Options’, there are 3 buttons namely - 'Save Changes', 'Reset Section' and 'Reset All'. After making all the changes in Theme Options, you can save everything by clicking on 'Save Changes' button. In theme options, all options are in the form of tabs, viz; 'General Settings', 'Header' etc. You can click on 'General Settings' (or any other tab) and make changes therein. Now, if want to get back all default data of specific section i.e: 'General Settings' (or any other section), then you should click on 'Reset Section'. Now, if you want to get back to default data/setting for all the Theme Options, then you need to click on 'Reset All'.
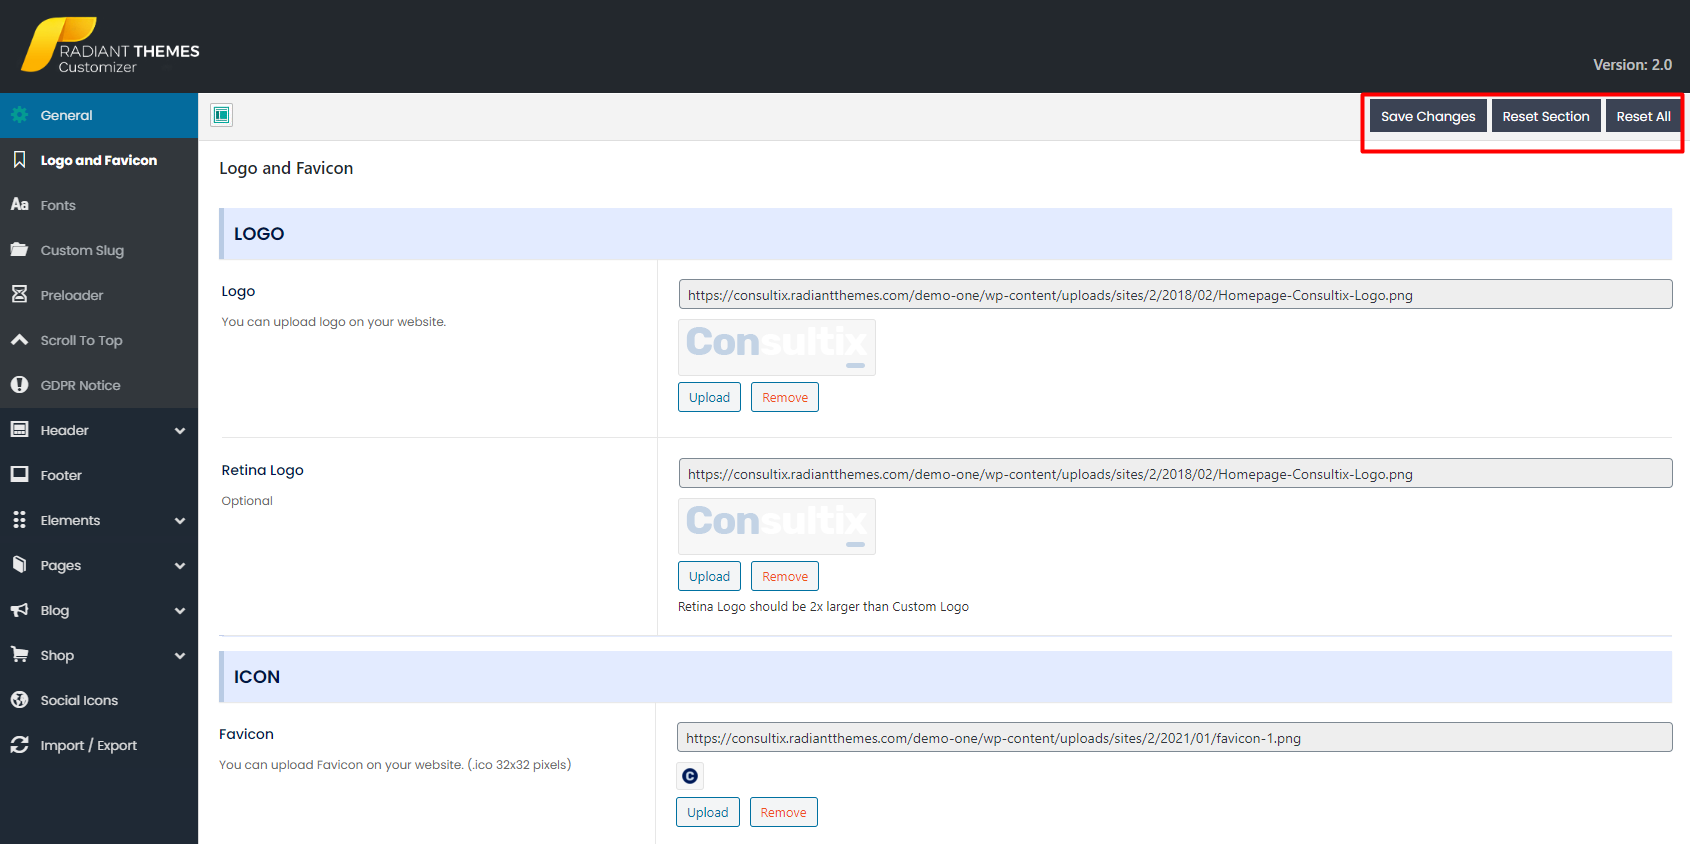
Logo & Favicon
![]()
This section contains the following options:
Logo: Here, you can upload your Logo and Retina Logo (this field is optional). Retina Logo should be 2x larger than Custom Logo.
Icon: Here, you can upload your Favicon and Apple Touch Icon.
Font Style
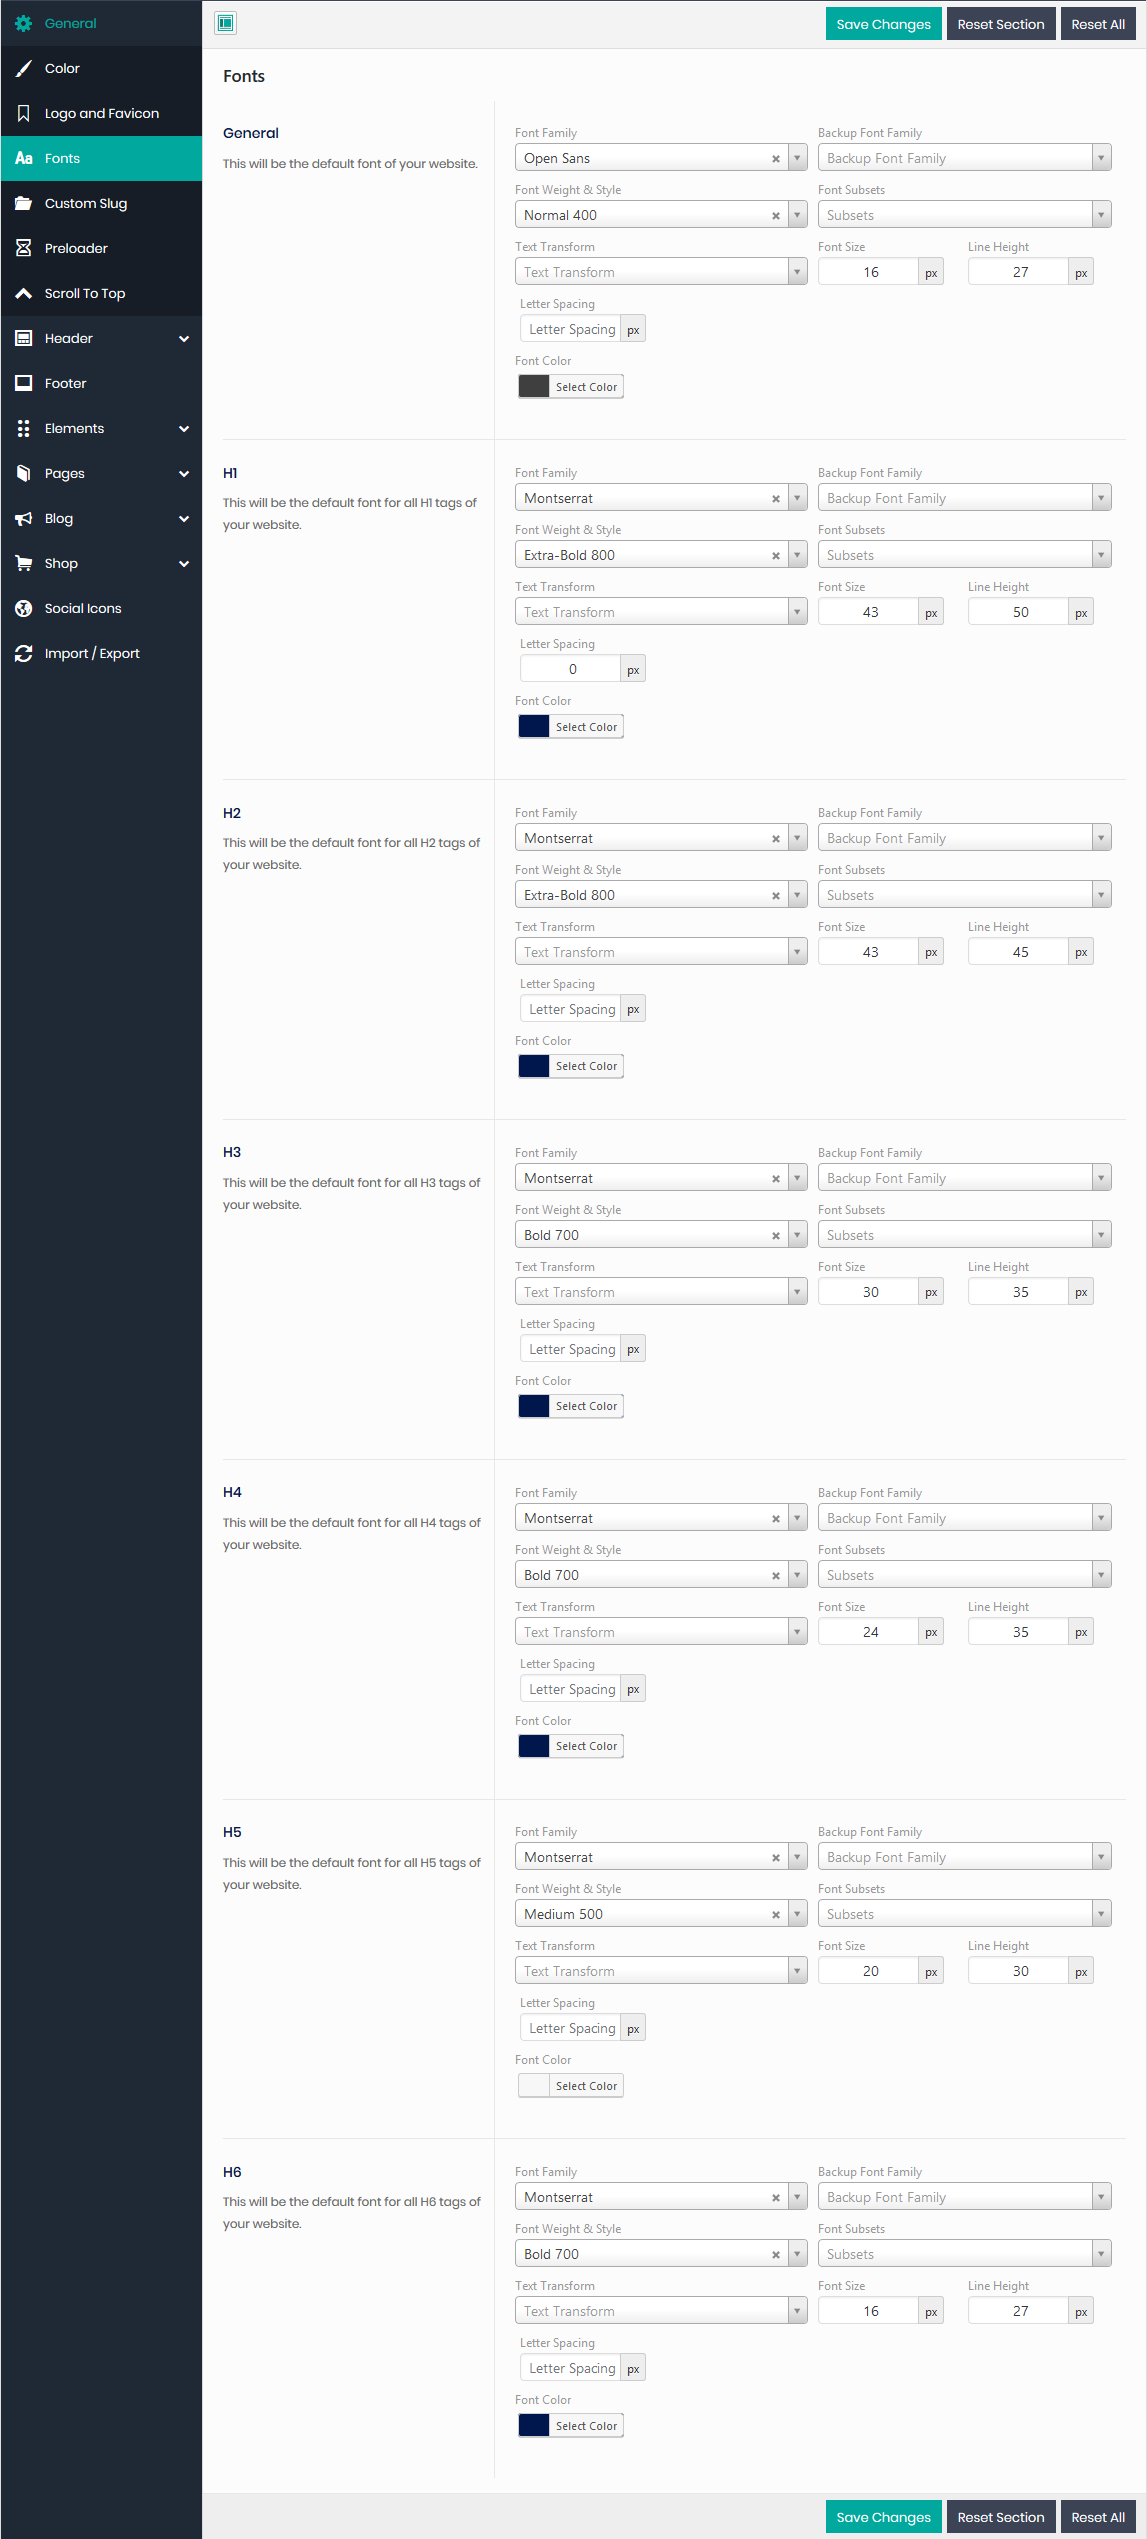
You can change style of the Body text on ‘General’ field. Also, you can change style for all of the Heading tags (H1, H2, H3, H4, H5 and H6) from their respective fields. For example, if you change style of H1, then H1 attributes will be changed throughout the site.
Custom Slug
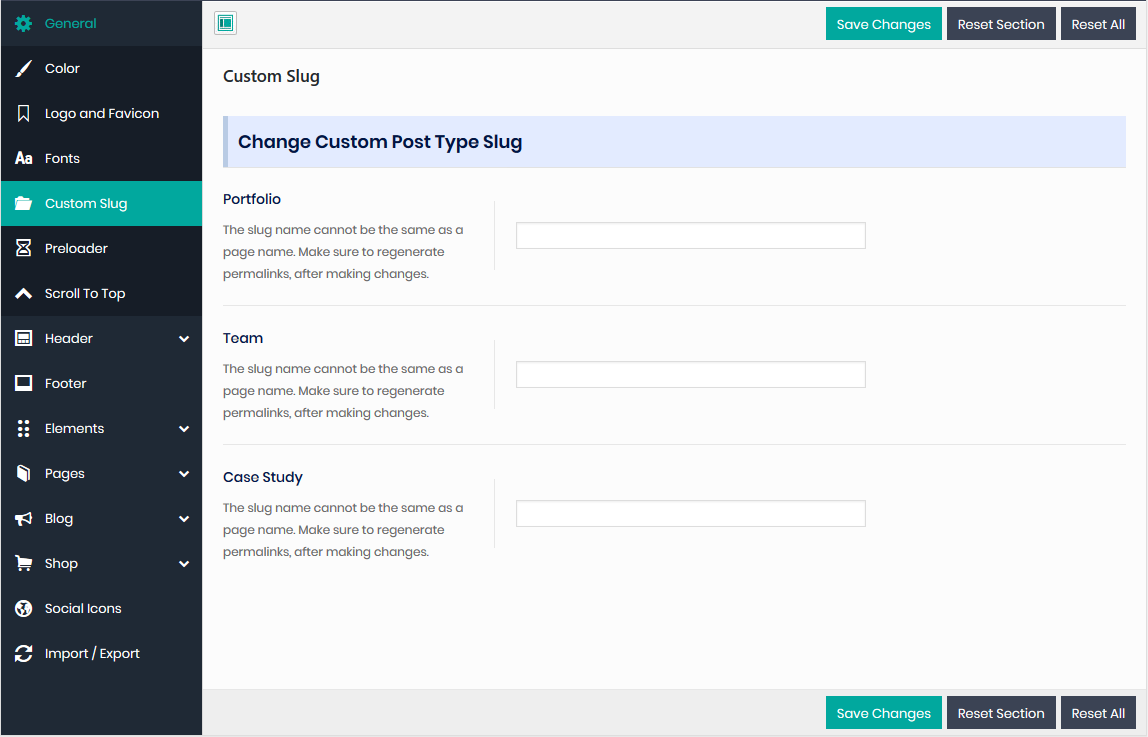
This section contains the following options:
Portfolio: Here, you can rename the slug of the Portfolio.
Team: Here, you can rename the slug of the Team.
Case Study: Here, you can rename the slug of the Case Study.
Preloader
This section contain the following options:
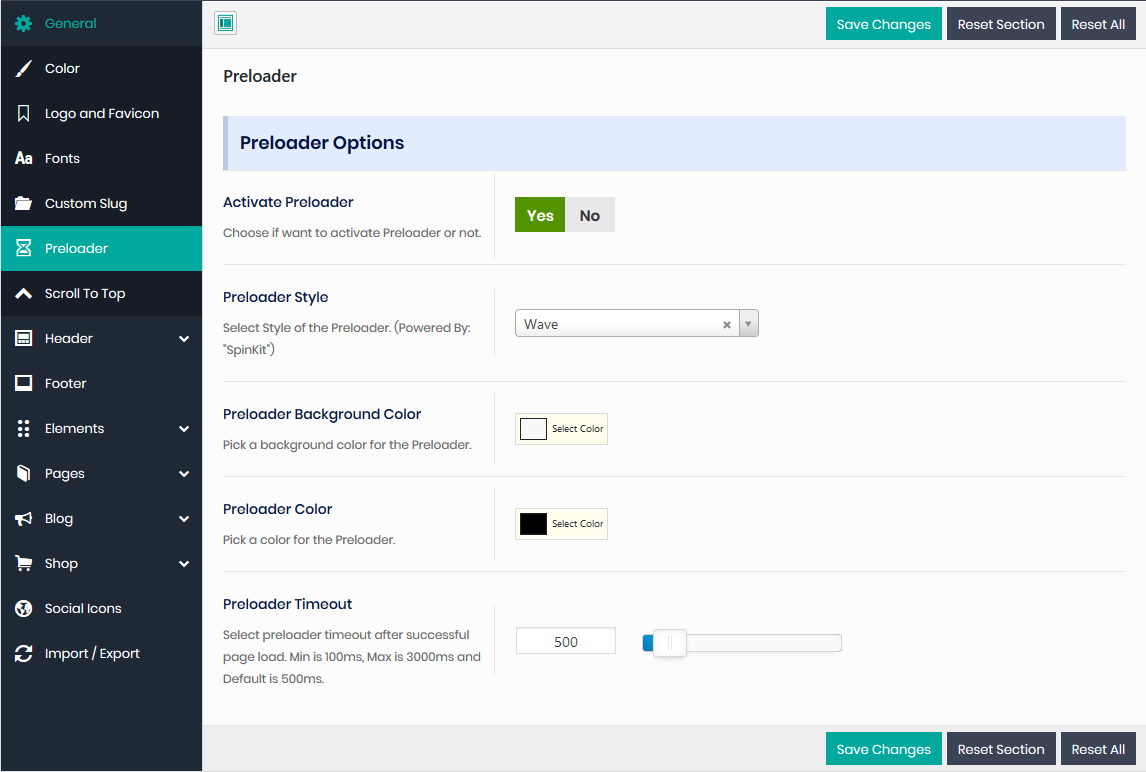
Activate Preloader: Choose if you want to activate Preloader for your site or not. If you have chosen ‘Yes’, then you will get these options--
- Preloader Style: Select Style of the Preloader.
- Preloader Background Color: Pick a background color for the Preloader.
- Preloader Color: Pick a color for the Preloader.
- Preloader Timeout: Select Preloader Timeout.
Scroll To Top
This section contain the following options:
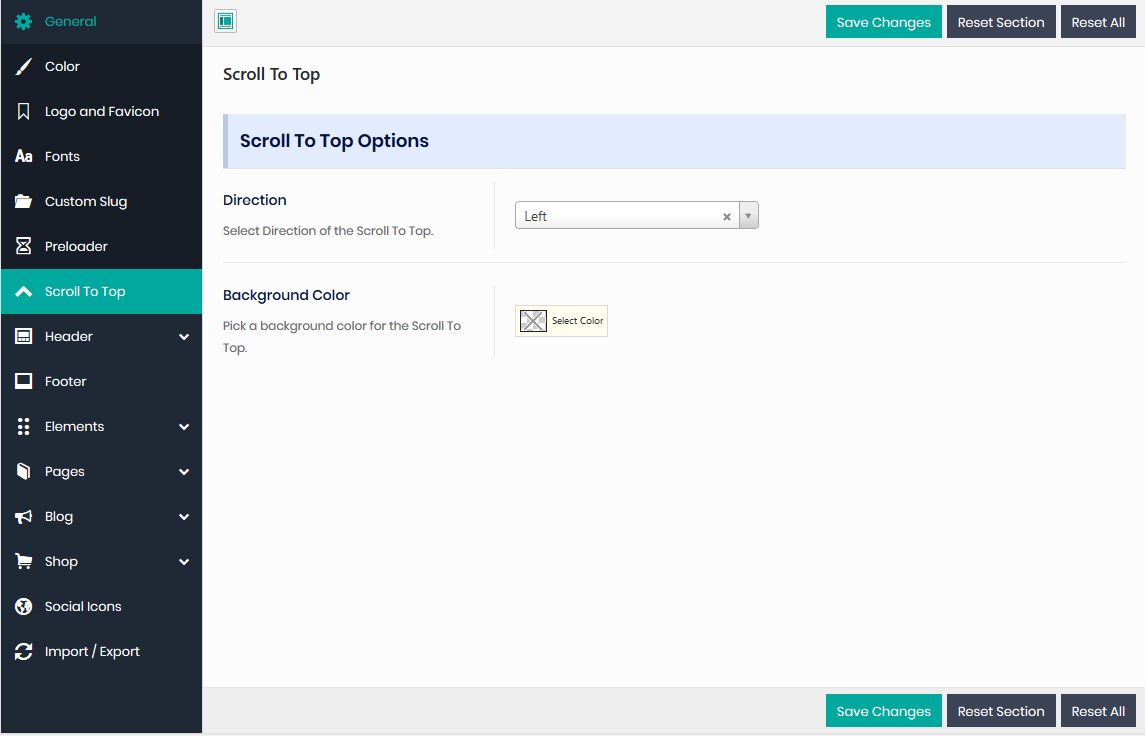
you will get these options:
- Direction: Select Direction of the Scroll to Top.
- Background Color: Pick a background color for the Scroll to Top.
GDPR Notice
This section contain the following options:
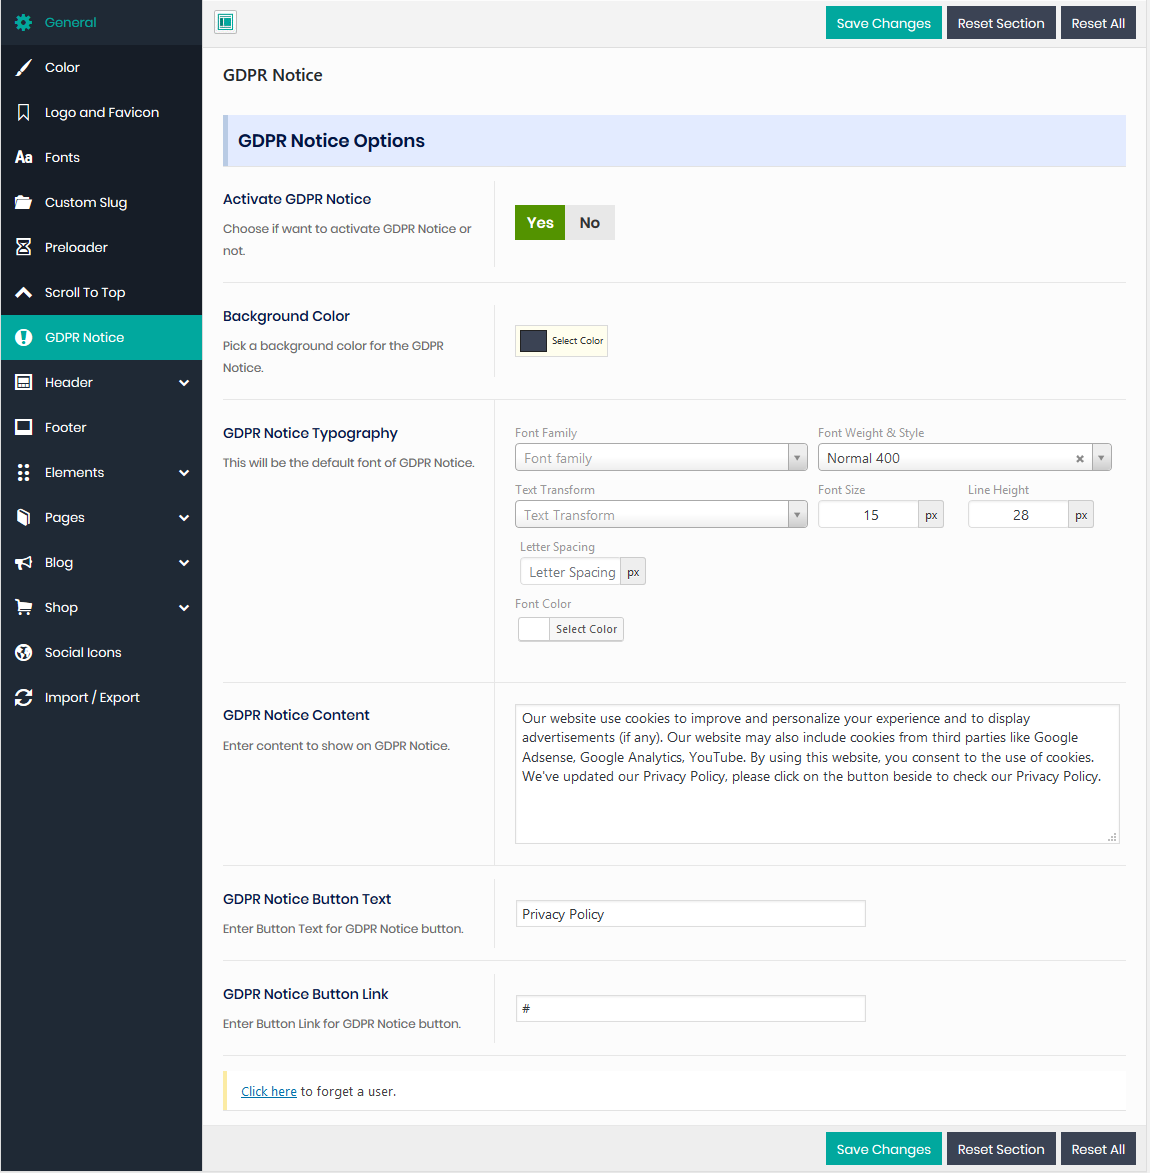
You will get these options:
- Activate GDPR Notice: Choose if want to activate GDPR Notice or not.
- Background Color: Pick a background color for the GDPR Notice.
- GDPR Notice Typography: Provide Typography for GDPR Notice.
- GDPR Notice Content: Enter content to show on GDPR Notice.
- GDPR Notice Button Text: Enter Button Text for GDPR Notice button.
- GDPR Notice Button Link: Enter Button Link for GDPR Notice button.
Header
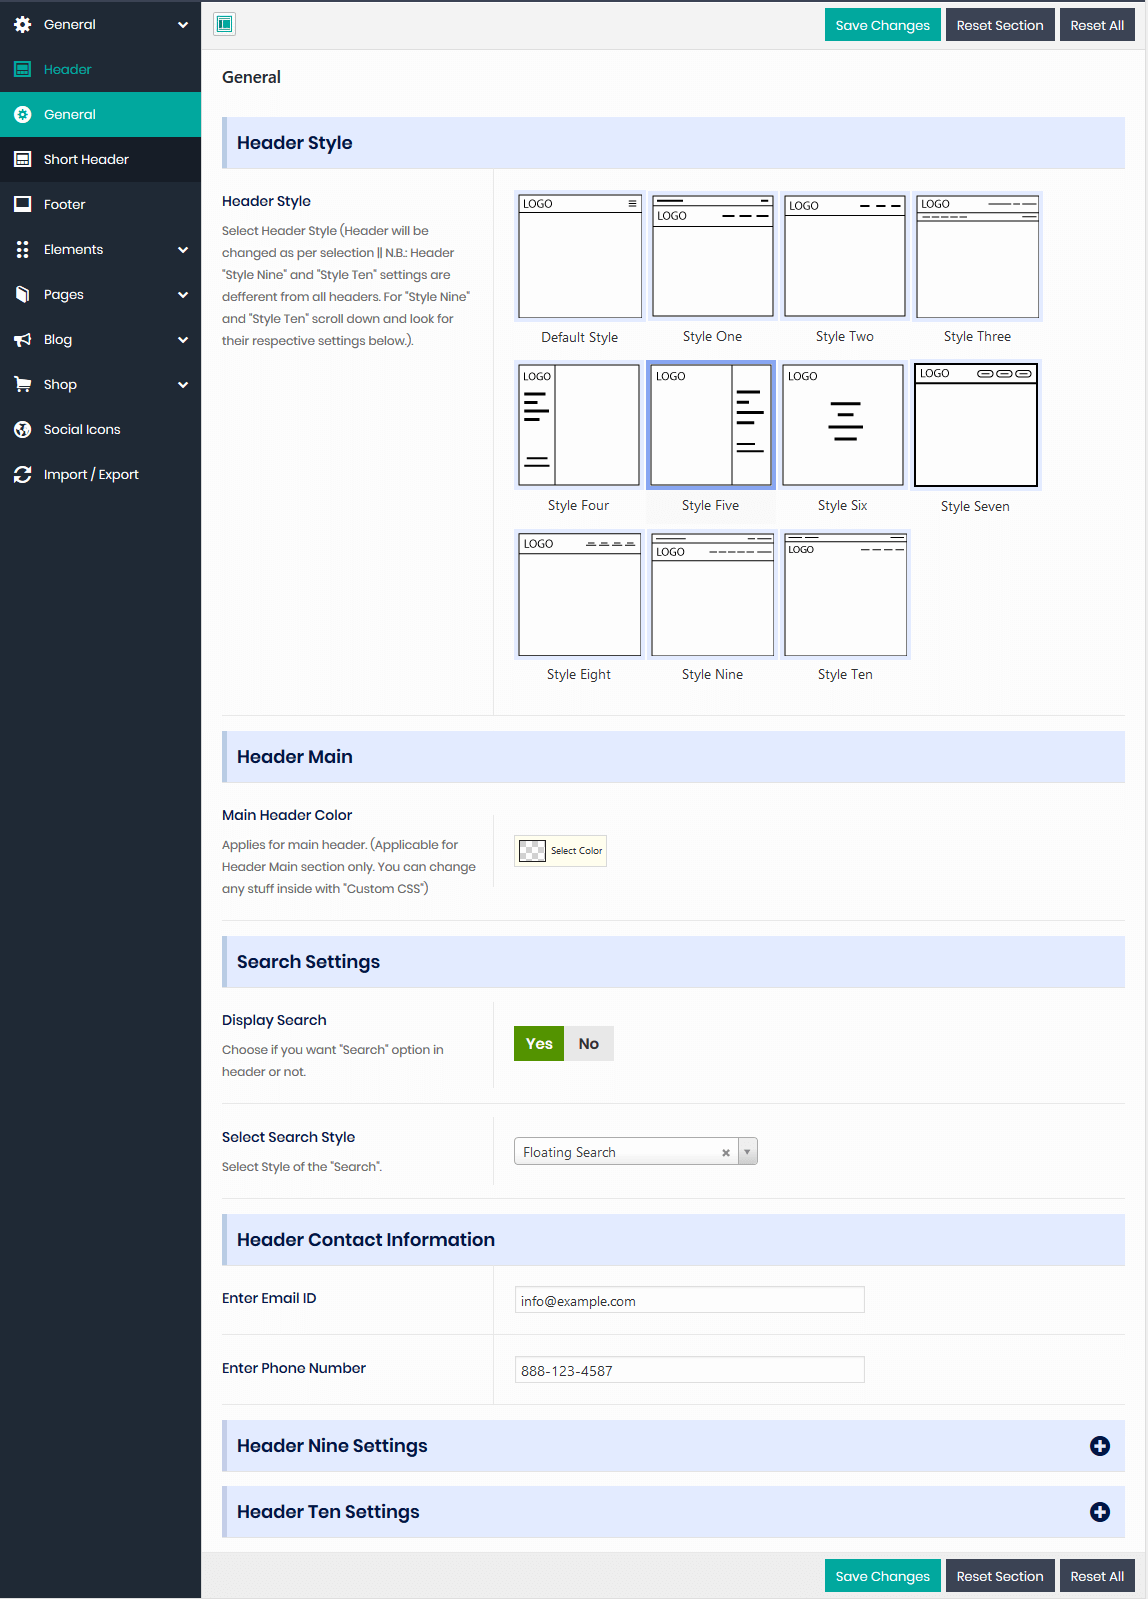
General
Header Style: We’ve mainly 9 different types of headers. But, we’ve lots of sub options within every header style. You can create every possible header by managing those options.
1) Options for Style Default:
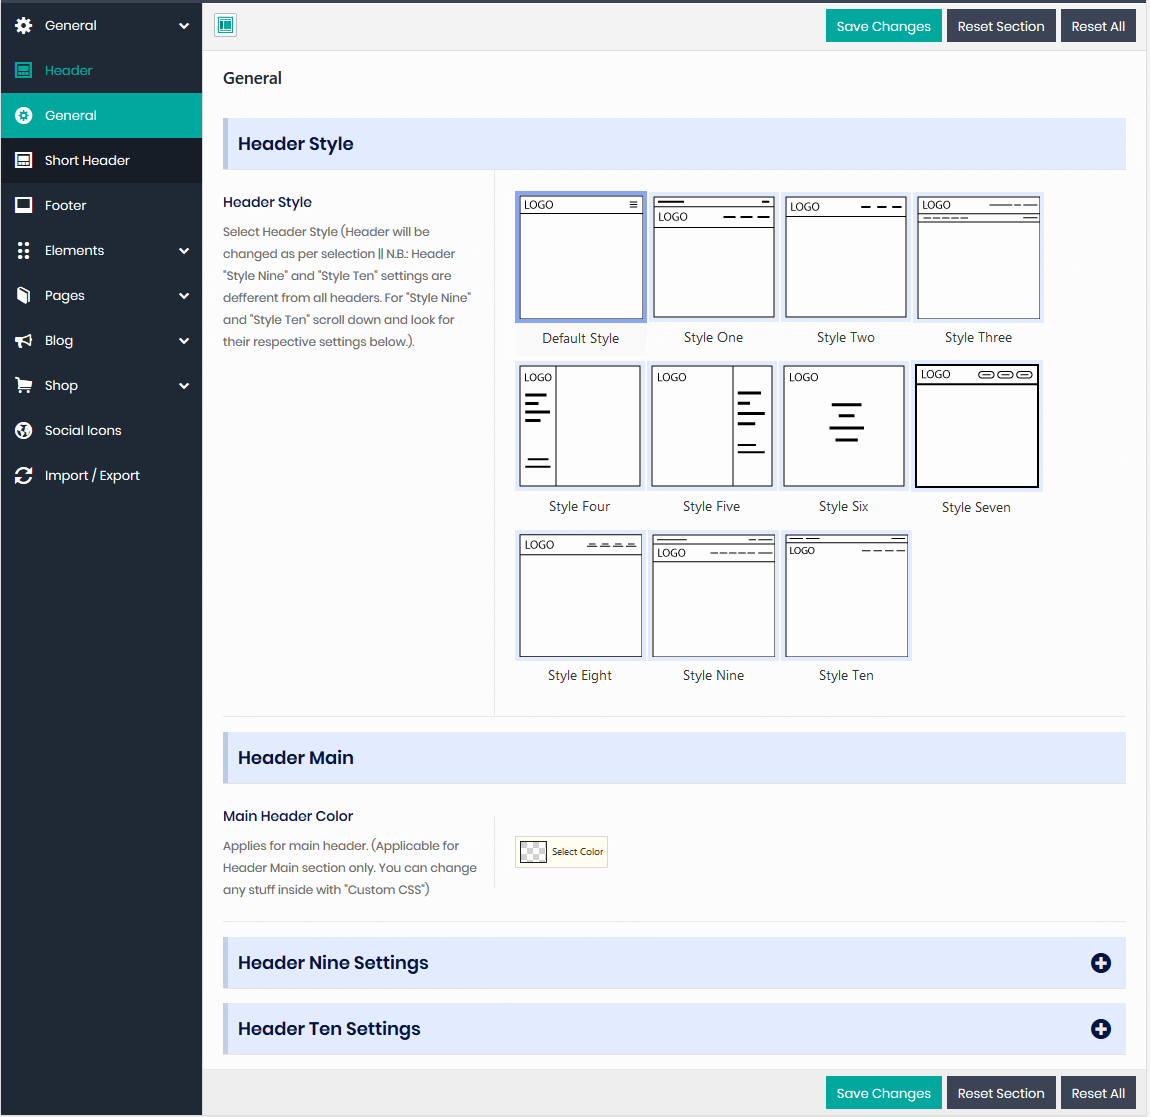
a) Header Main: This section contains the following option:
Main Header Color: Specify color for the main Header.
2) Options for Style One:
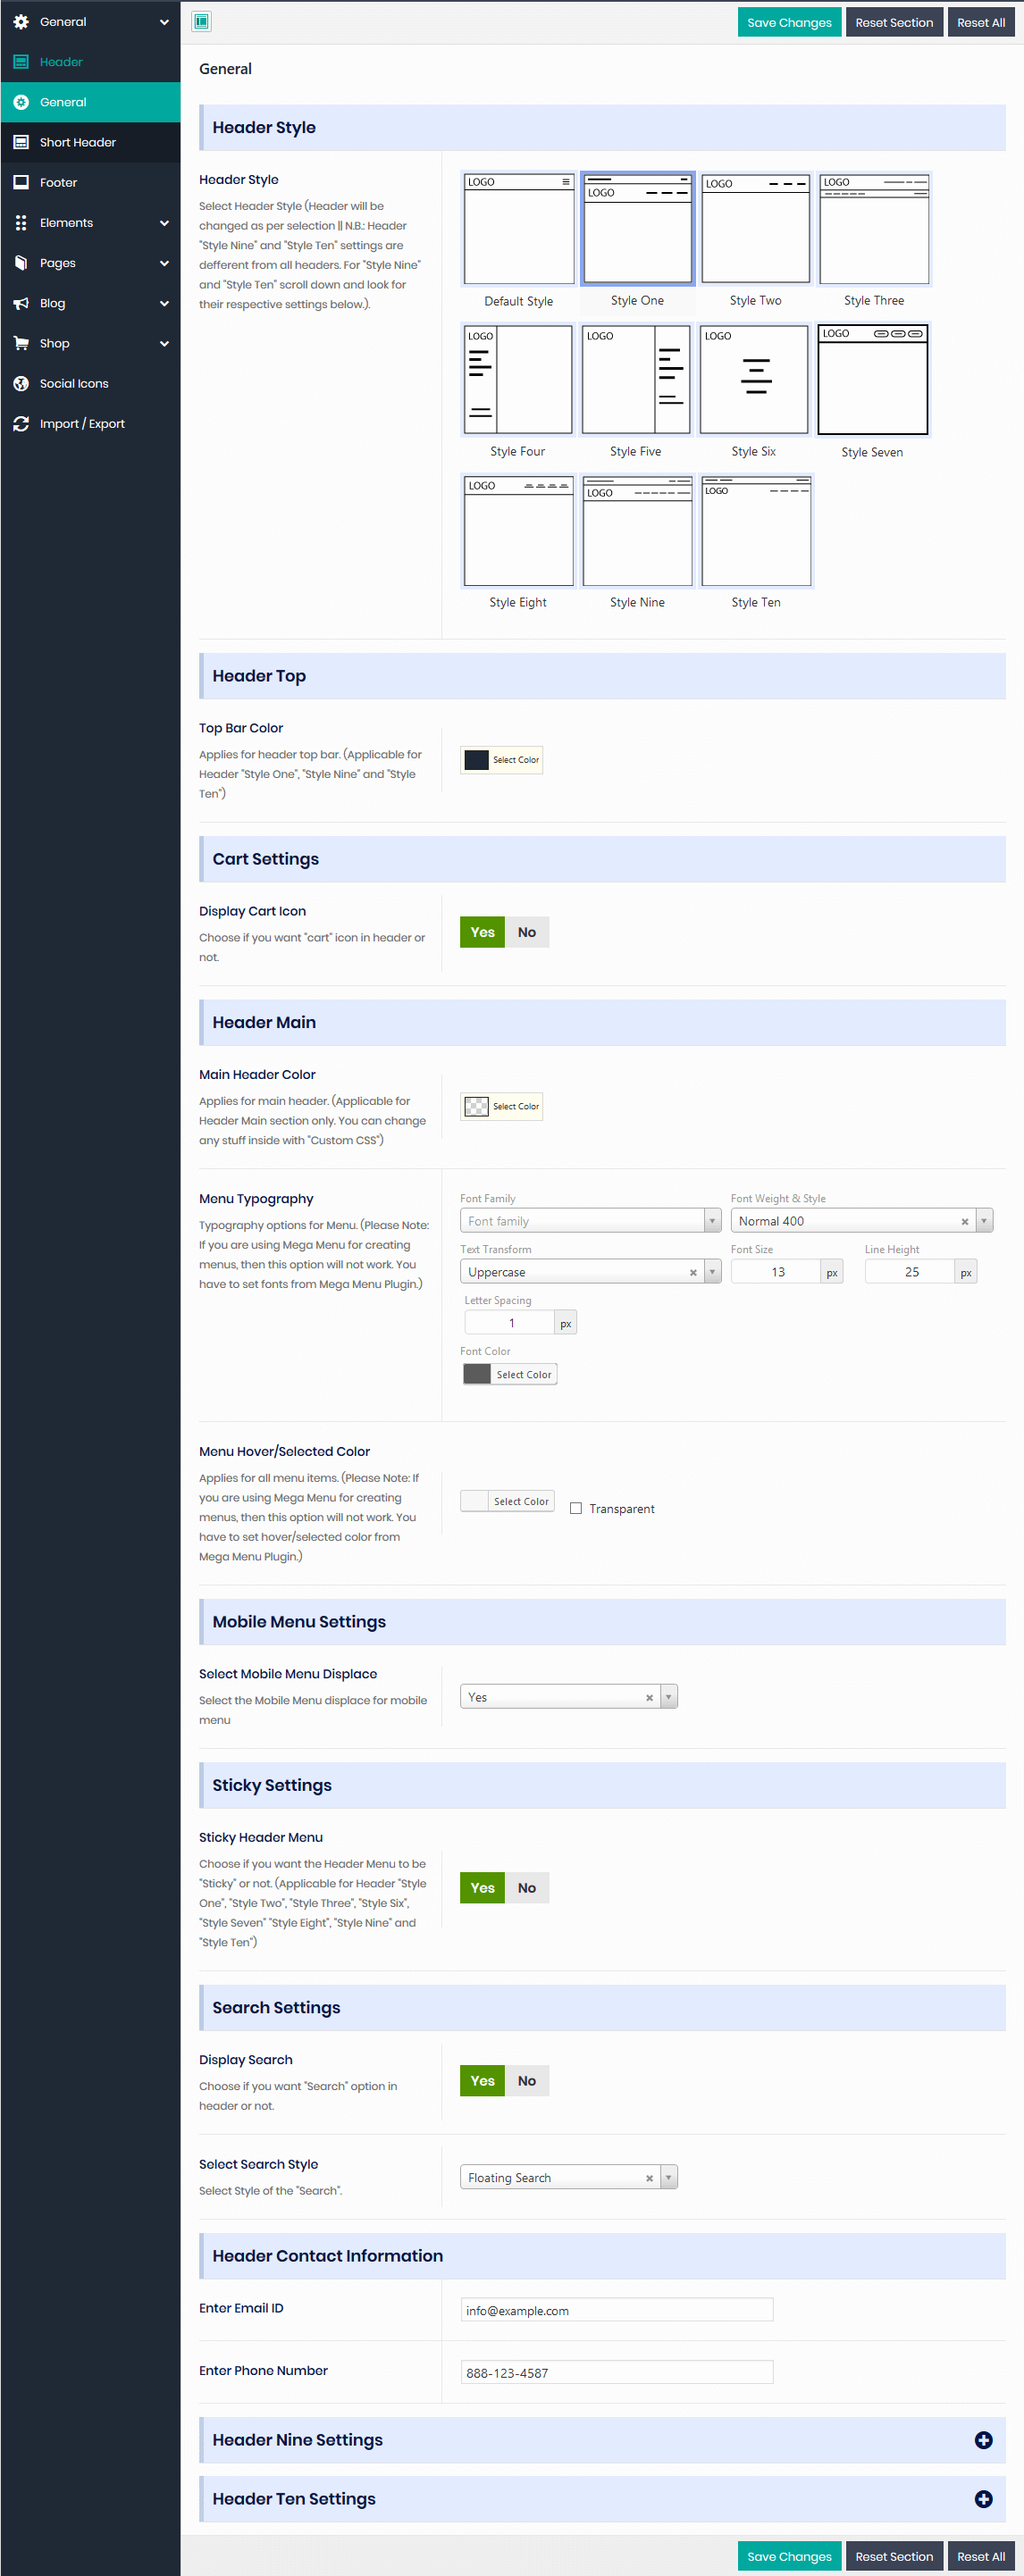
This section contains the following options:
a) Header Top : This section contains the following option:
Top Bar Color: Provide color of top bar here.
b) Cart Settings: This section contains the following option:
Display Cart Icon: Choose if you want to display Cart basket in your header or not.
c) Header Main: This section contains the following options:
Main Header Color: Specify color for the main Header.
Menu Typography: Choose everything related to Fonts of the Menu. If you are using ‘RadiantThemes Mega Menu’ for creating menus, then this option will not work. You have to set fonts from ‘RadiantThemes Mega Menu’ Plugin.
Menu Hover/Selected Color: Specify Hover color of the menu. If you are using ‘RadiantThemes Mega Menu’ for creating menus, then this option will not work. You have to set hover/selected color from ‘RadiantThemes Mega Menu’ Plugin.
d) Mobile Settings: This setting is precisely for mobile version of the menu. This section contains the following option:
Select Mobile Menu Displace: Select displace of the Menu.
e) Sticky Settings: This section contains the following option:
Sticky Header Menu: Choose if you want your Header Menu to be ‘Sticky’ or not.
f) Search Settings: This section contains the following option:
Display Search: Choose, if you want to display 'Search' or not. If you have chosen ‘Yes’, then you can specify Search Style on ‘Select Search Style’ field. If you choose 'Flyout Search' on 'Select Search Style' field, then you can specify the background color of the search on Choose Search Background Color field.
g) Header Contact Information: This section contains the following options:
Enter Email ID: Provide Email ID, right here.
Enter Phone Number: Provide Phone Number, right here.
3) Options for Style Two:
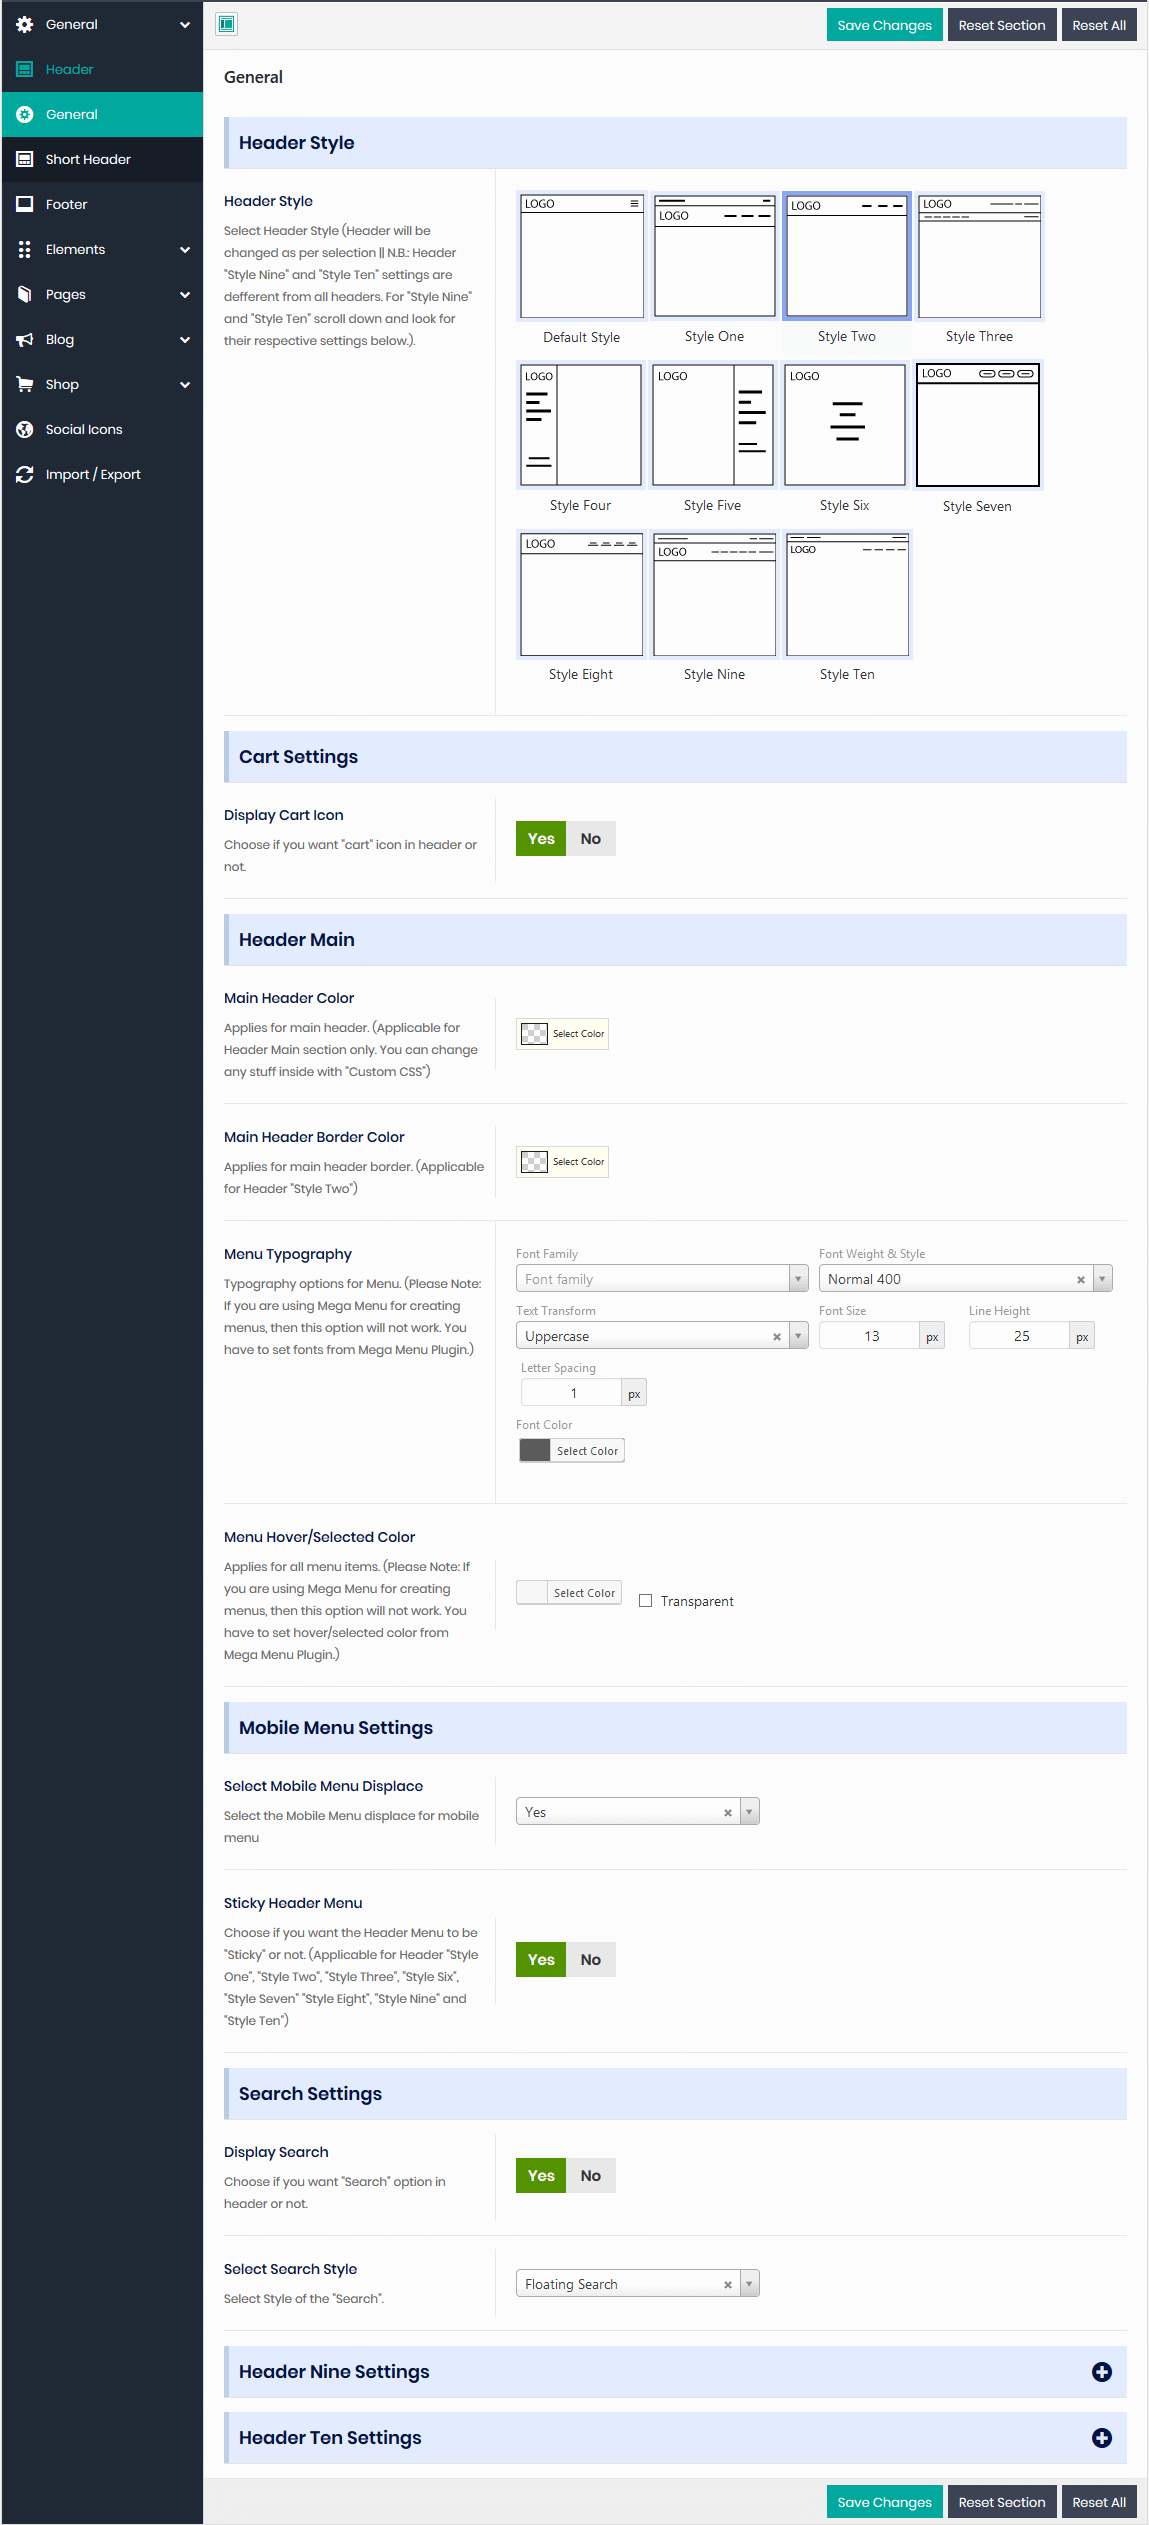
This section contains the following options:
a) Cart Settings: This section contains the following option:
Display Cart Icon: Choose if you want to display Cart basket in your header or not.
b) Header Main: This section contains the following options:
Main Header Color: Specify color for the main Header.
Main Header Border Color: Specify Border color for the Main Header.
Menu Typography: Choose everything related to Fonts of the Menu. If you are using ‘RadiantThemes Mega Menu’ for creating menus, then this option will not work. You have to set fonts from ‘RadiantThemes Mega Menu’ Plugin.
Menu Hover/Selected Color: Specify Hover color of the menu. If you are using ‘RadiantThemes Mega Menu’ for creating menus, then this option will not work. You have to set hover/selected color from ‘RadiantThemes Mega Menu’ Plugin.
c) Mobile Settings: This setting is precisely for mobile version of the menu. This section contains the following option:
Select Mobile Menu Displace: Select displace of the Menu.
Sticky Header Menu: Choose if you want your Header Menu to be ‘Sticky’ or not.
d) Search Settings: This section contains the following option:
Display Search: Choose, if you want to display 'Search' or not. If you have chosen ‘Yes’, then you can specify Search Style on ‘Select Search Style’ field. If you choose 'Flyout Search' on 'Select Search Style' field, then you can specify the background color of the search on Choose Search Background Color field.
4) Options for Style Three:
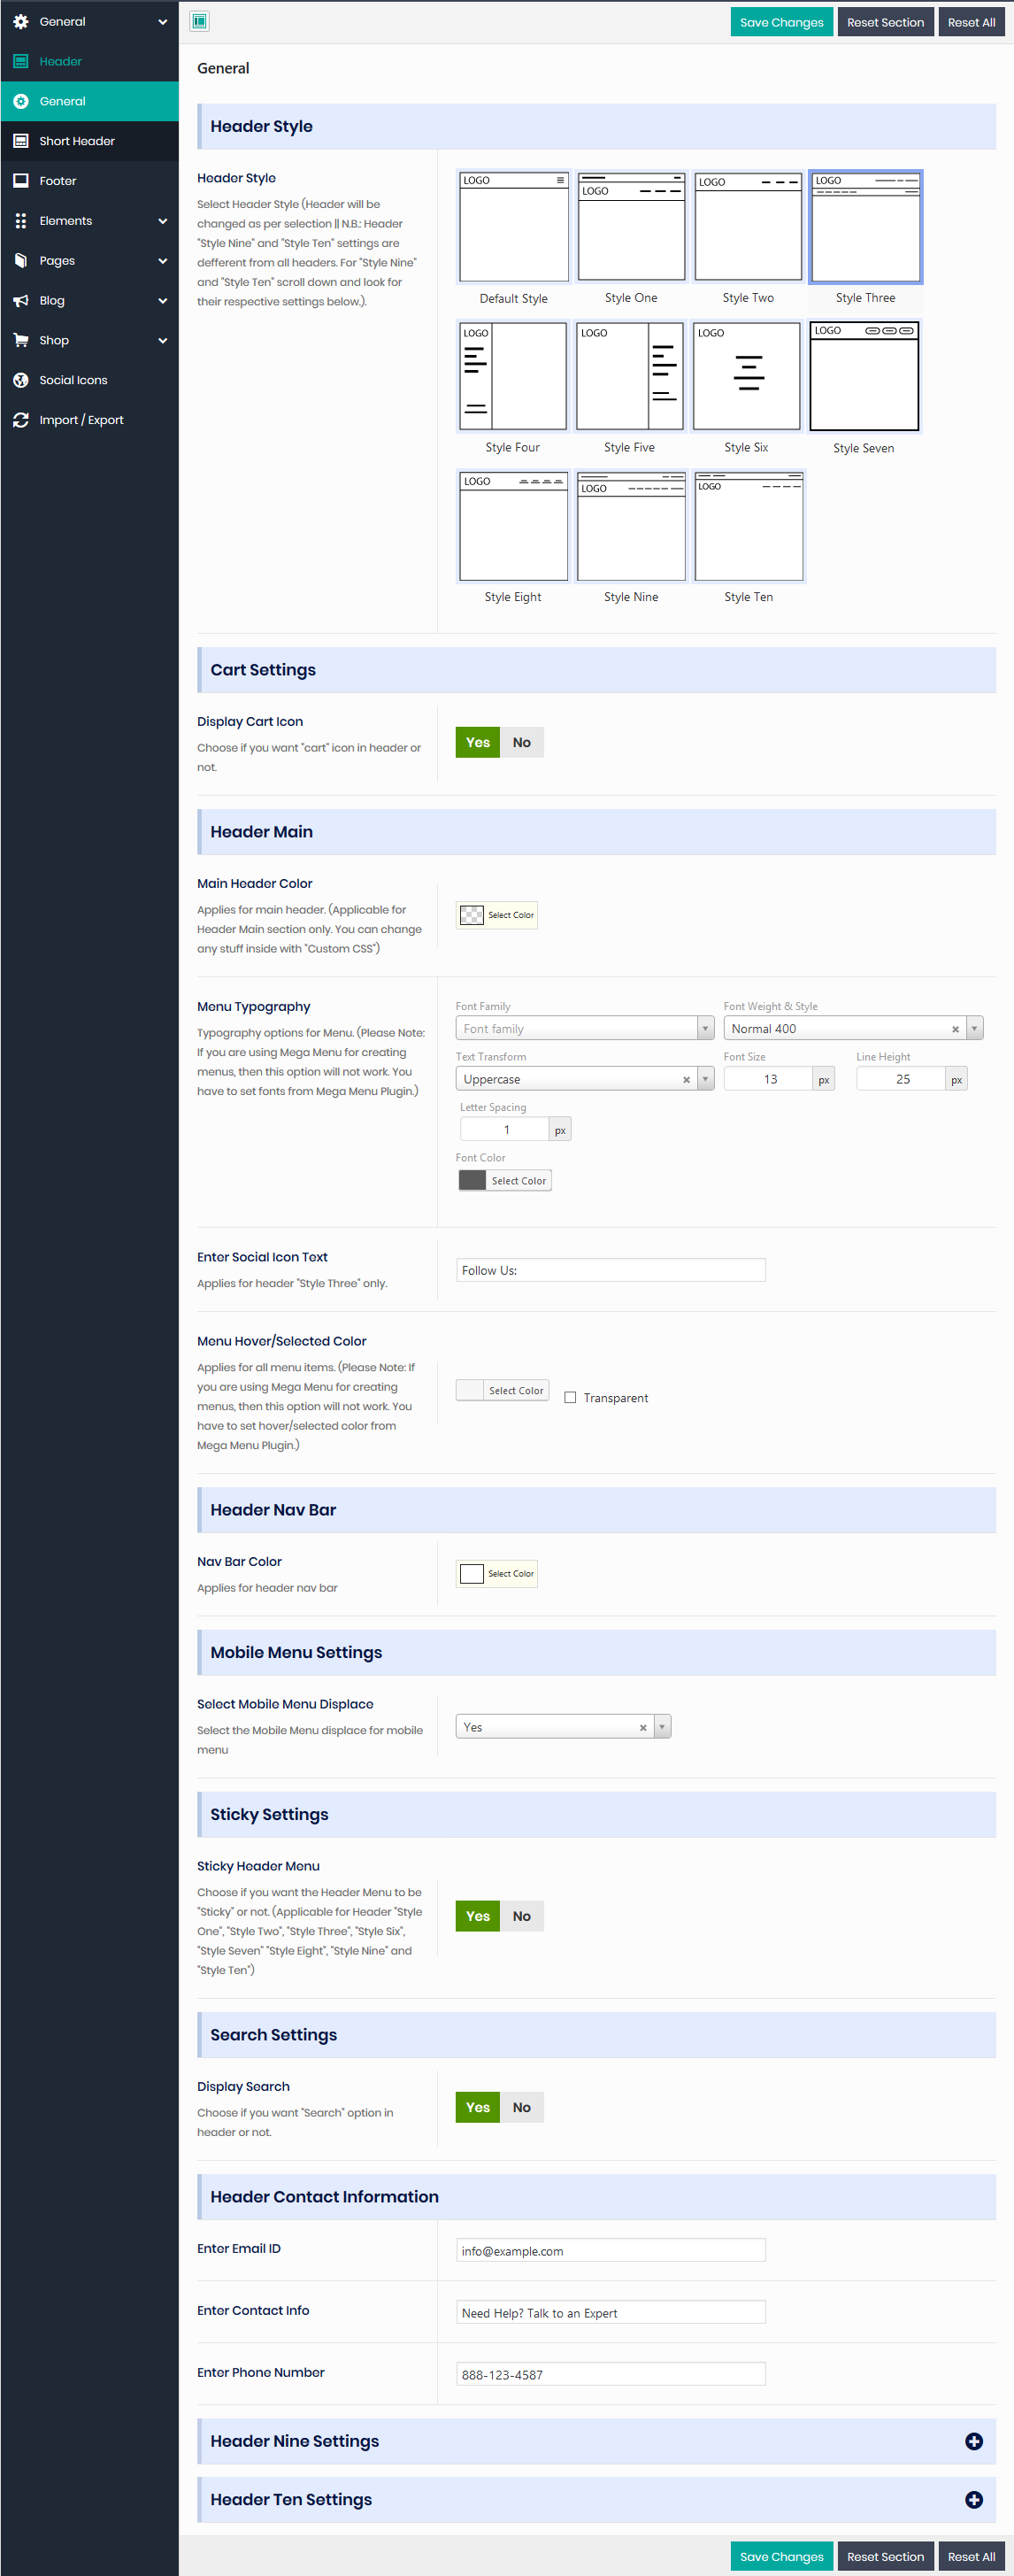
This section contains the following options:
a) Cart Settings: This section contains the following option:
Display Cart Icon: Choose if you want to display Cart basket in your header or not.
b) Header Main: This section contains the following options:
Main Header Color: Specify color for the main Header.
Menu Typography: Choose everything related to Fonts of the Menu. If you are using ‘RadiantThemes Mega Menu’ for creating menus, then this option will not work. You have to set fonts from ‘RadiantThemes Mega Menu’ Plugin.
Enter Social Icon Text: provide text of social icon section.
Menu Hover/Selected Color: Specify Hover color of the menu. If you are using ‘RadiantThemes Mega Menu’ for creating menus, then this option will not work. You have to set hover/selected color from ‘RadiantThemes Mega Menu’ Plugin.
c) Header Nav Bar: This section contains the following options:
Nav Bar Color: Specify color of the Navigation Bar.
d) Mobile Menu Settings: This setting is precisely for mobile version of the menu. This section contains the following option:
Select Mobile Menu Displace: Select displace of the Menu.
g) Sticky Settings: This section contains the following option:
Sticky Header Menu: Choose if you want your Header Menu to be ‘Sticky’ or not.
h) Search Settings: This section contains the following option:
Display Search: Choose, if you want to display 'Search' or not.
i) Header Contact Information: This section contains the following options:
Enter Email ID: Provide Email ID, right here.
Enter Contact Info: Provide contact information text.
Enter Phone Number: Provide Phone Number, right here.
5) Options for Style Four:
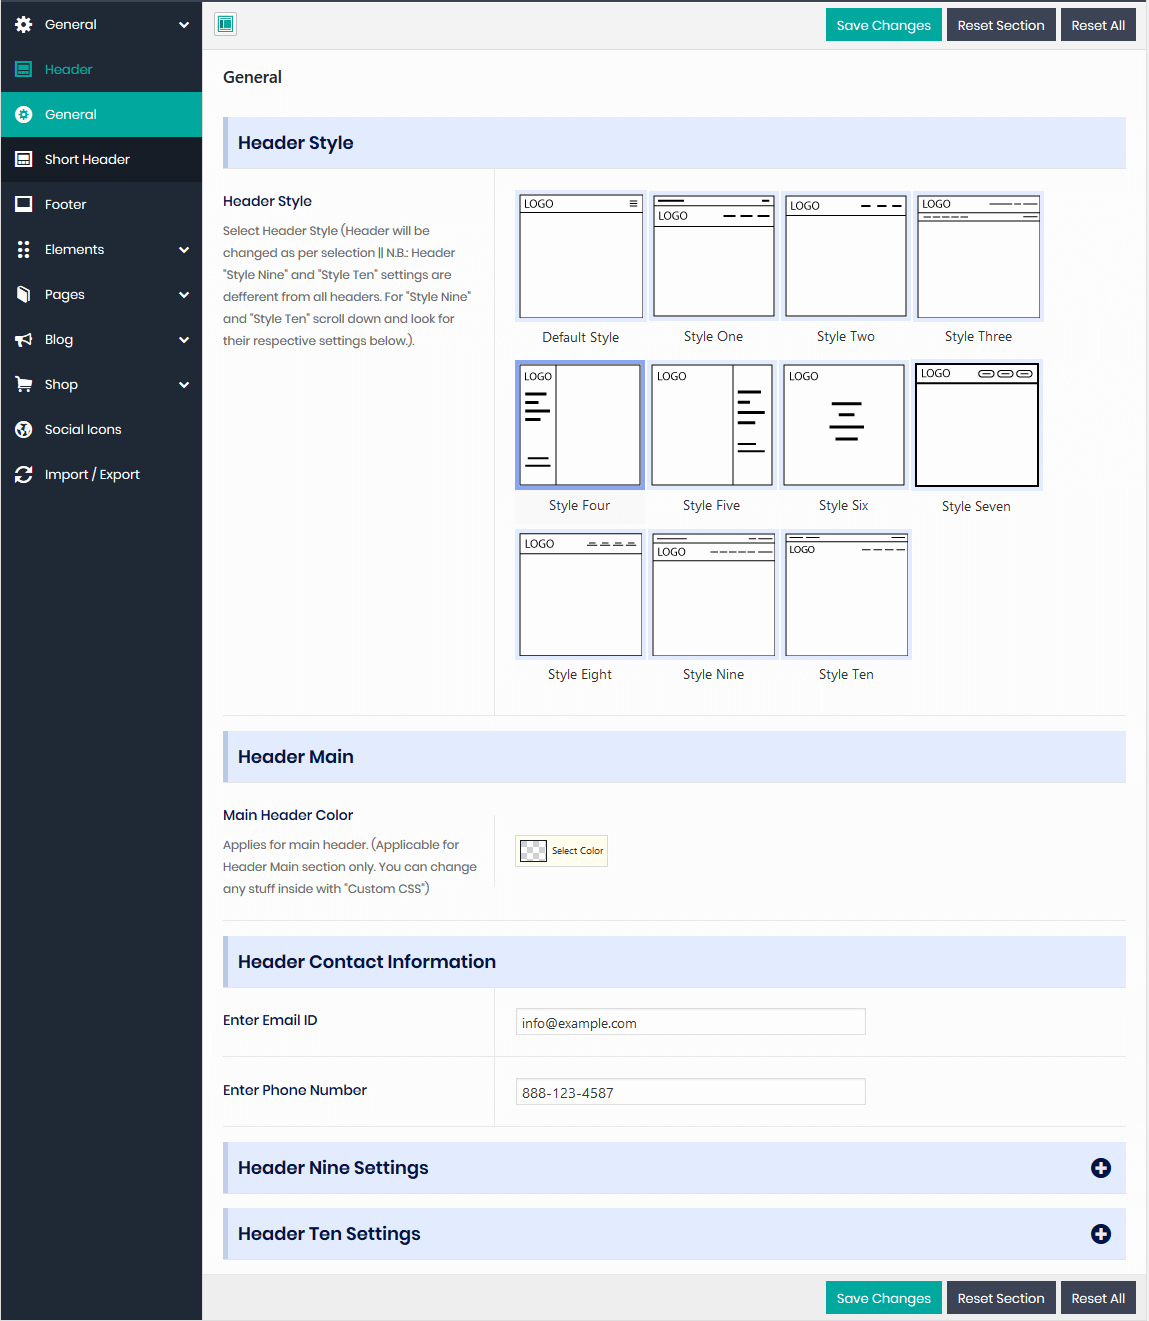
This section contains the following options:
a) Header Main: This section contains the following option:
Main Header Color: Specify color for the main Header.
b) Header Contact Information: This section contains the following options:
i)Enter Email ID: Provide Email ID, right here.
ii)Enter Phone Number: Provide Phone Number, right here.
6) Options for Style Five:
This section contains the following options:
a) Header Main: This section contains the following option:
Main Header Color: Specify color for the main Header.
b) Search Settings: This section contains the following option:
Display Search: Choose, if you want to display 'Search' or not. If you have chosen ‘Yes’, then you can specify Search Style on ‘Select Search Style’ field. If you choose 'Flyout Search' on 'Select Search Style' field, then you can specify the background color of the search on Choose Search Background Color field.
c) Header Contact Information: This section contains the following options:
Enter Email ID: Provide Email ID, right here.
Enter Phone Number: Provide Phone Number, right here.
7) Options for Style Six:
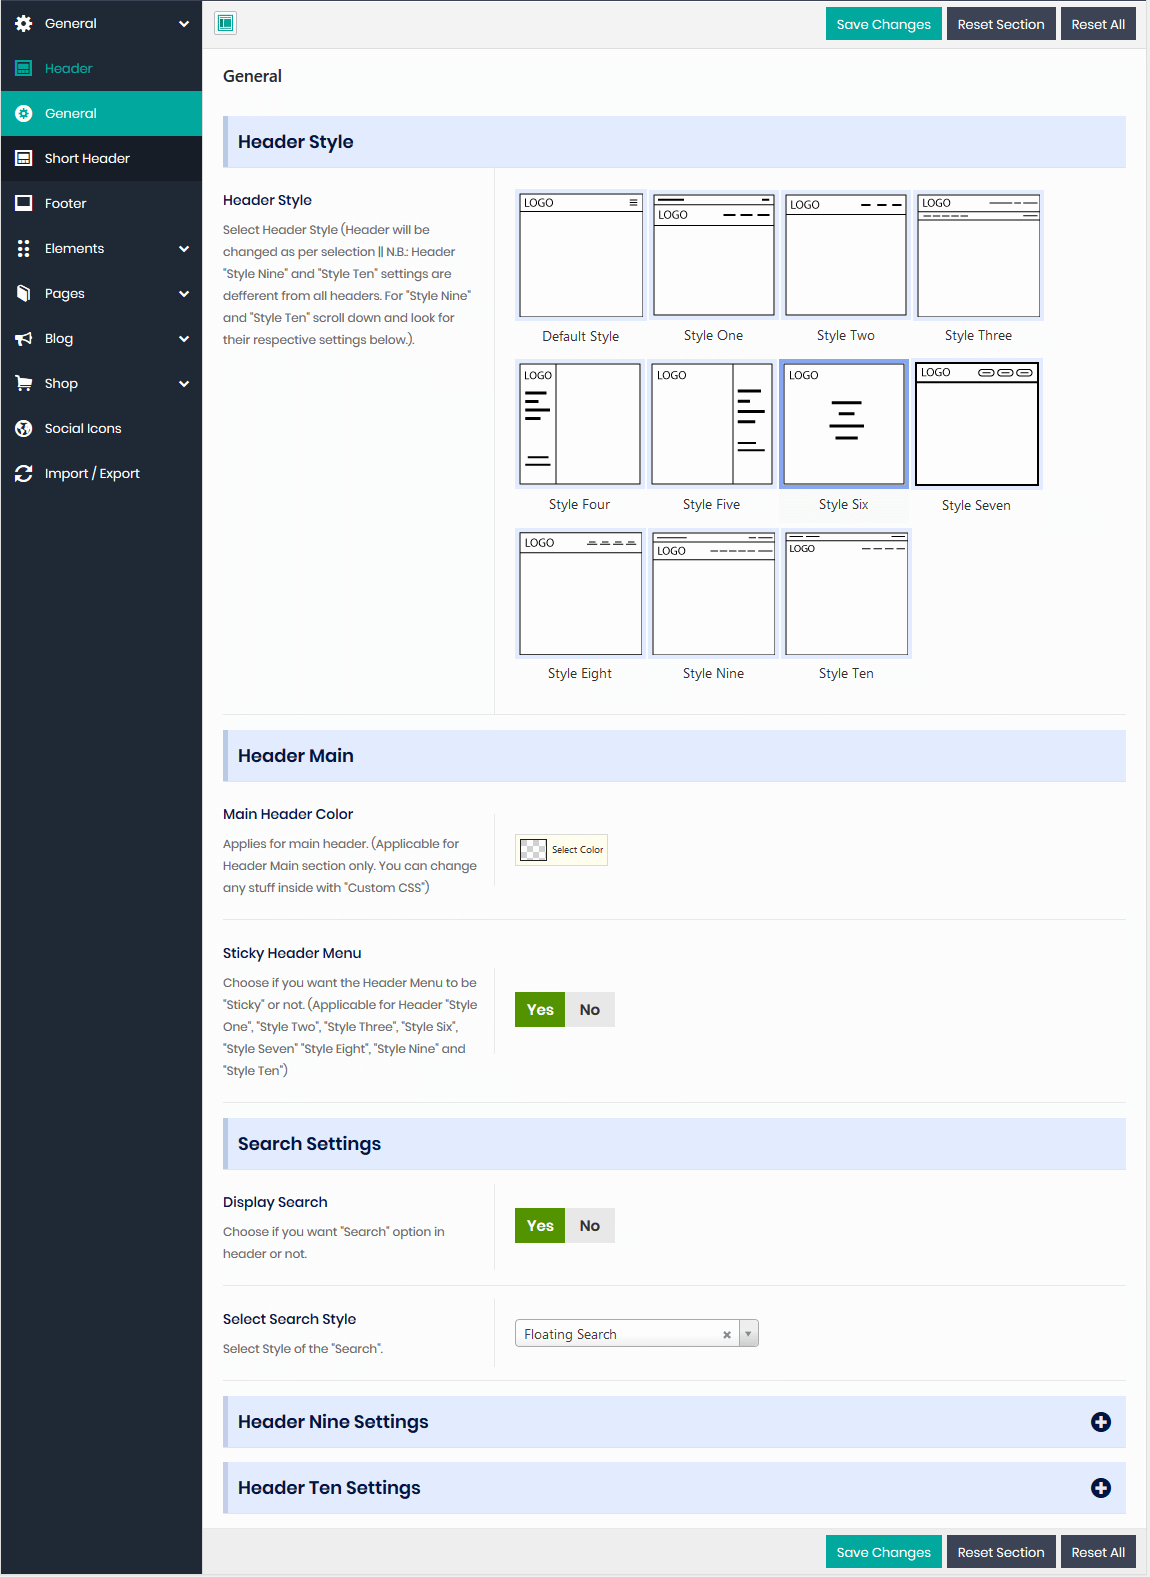
This section contains the following options:
a) Header Main: This section contains the following options:
Main Header Color: Specify color for the main Header.
Sticky Header Menu: Choose if you want the Header Menu to be "Sticky" or not.
b) Search Settings: This section contains the following option:
Display Search: Choose, if you want to display 'Search' or not. If you have chosen ‘Yes’, then you can specify Search Style on ‘Select Search Style’ field. If you choose 'Flyout Search' on 'Select Search Style' field, then you can specify the background color of the search on Choose Search Background Color field.
8) Options for Style Seven:
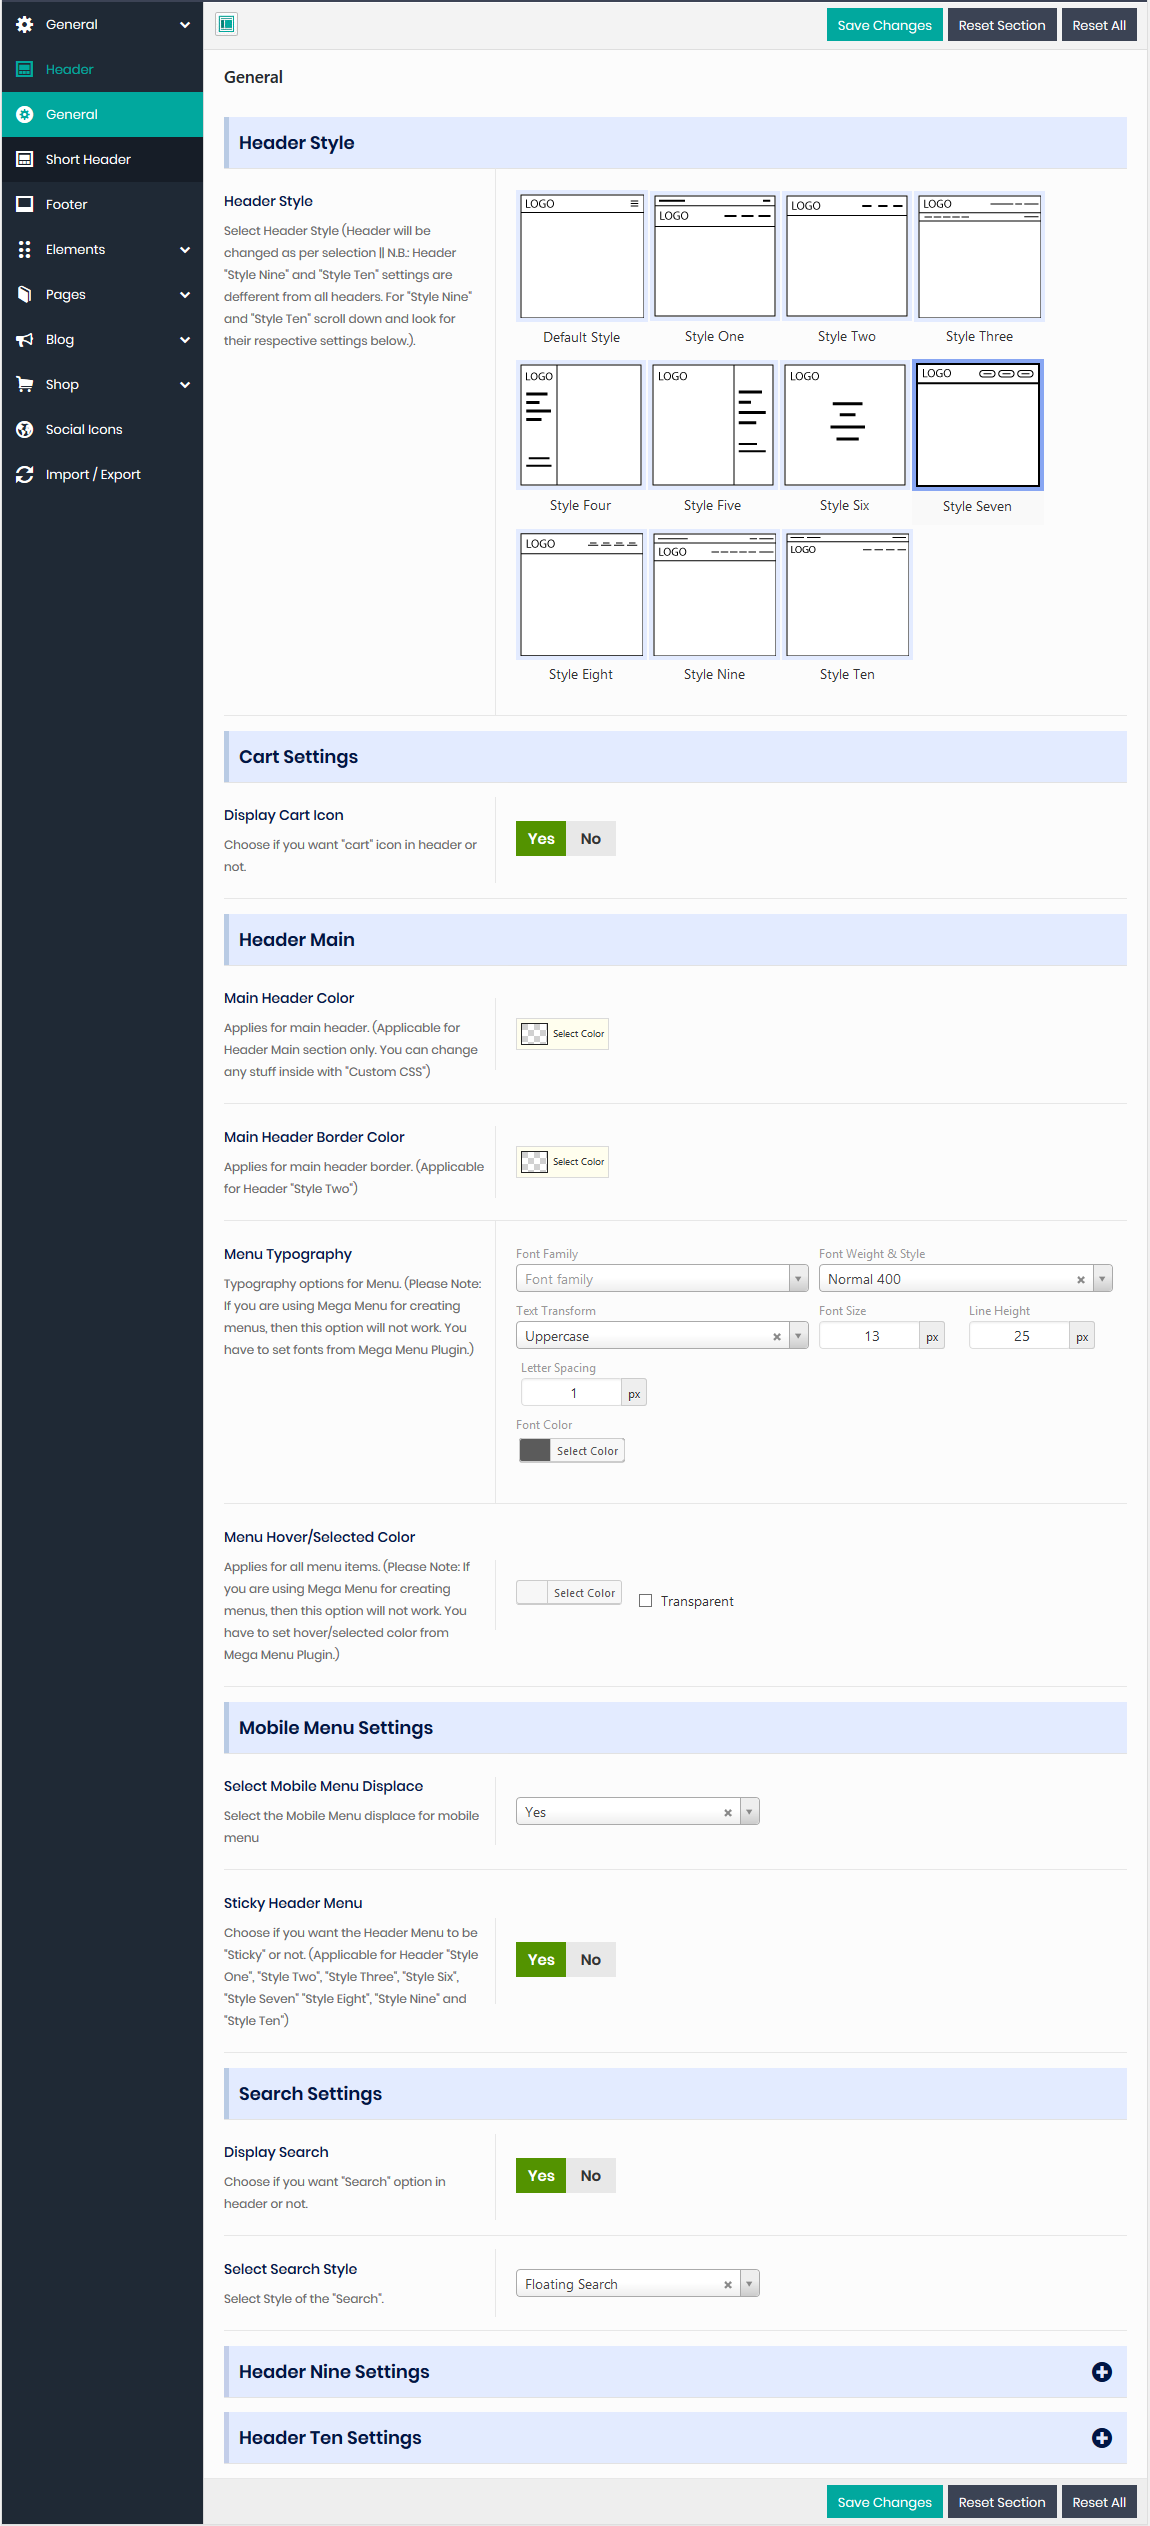
Follow 'Header Style Two'.
9) Options for Style Eight:
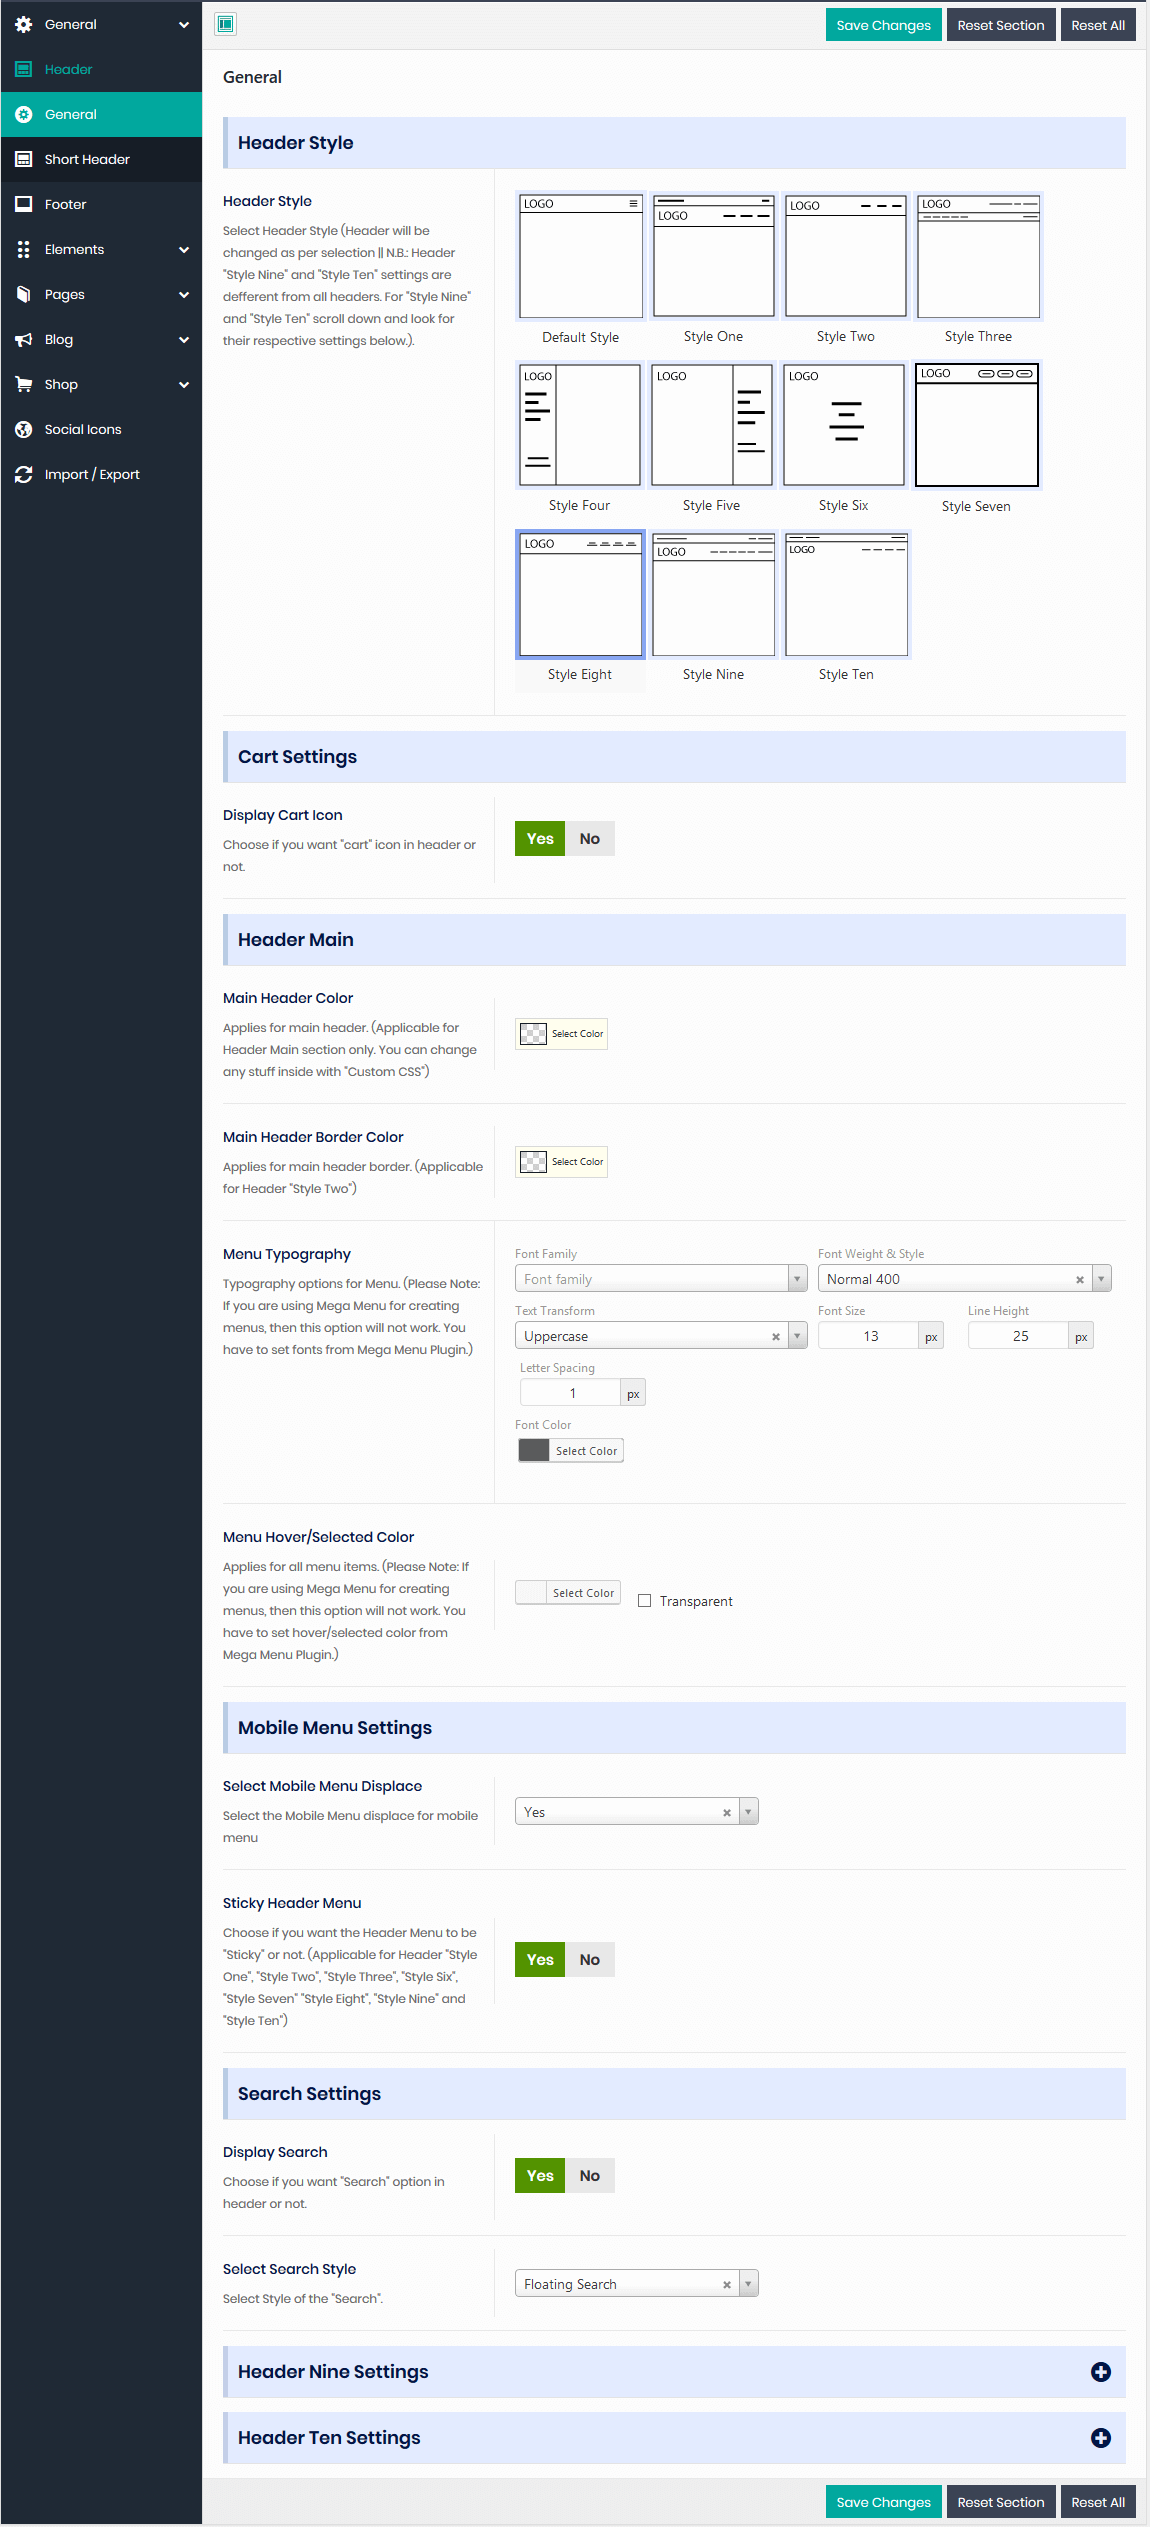
Follow 'Header Style Two'.
10) Options for Style Nine:
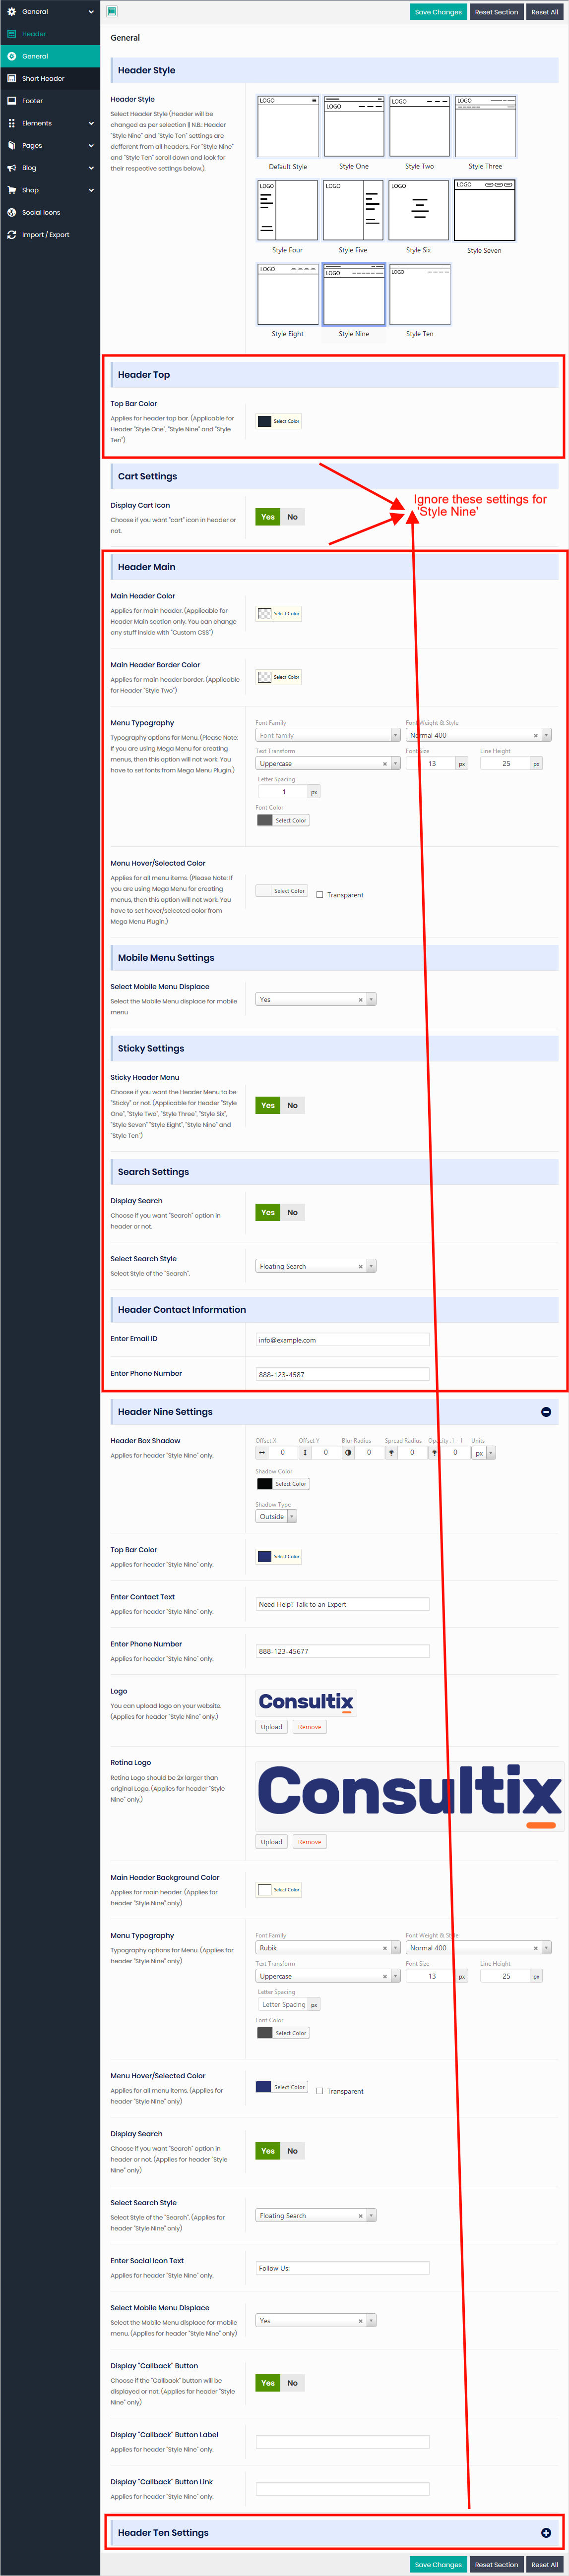
For 'Header Style Nine', only 'Cart Settings' and 'Header Nine Settings' sections are applicable(Follow the above screenshot for better understanding).
As, 'Logo' and 'Retina Logo' for 'Header Style Nine' are different from the other header logo, so you need to change 'Logo' and 'Retina Logo' for 'Header Style Nine' from 'Header Nine Settings'.
So, these are the options which are applicable for 'Header Style Nine':
a) Cart Settings: This section contains the following option:
Display Cart Icon: Choose if you want to display Cart basket in your header or not.
b) Header Nine Settings: This section contains the following options:
Header Box Shadow: Provide Box Shadow for Header, right here.
Top Bar Color: Provide color for top bar here.
Enter Contact Text: Provide Contact Text here.
Enter Phone Number: Provide Phone Number here.
Logo: Upload your Logo for 'Header Style Nine' here.
Retina Logo: Upload your Retina Logo which should be 2x larger than Custom Logo.
Main Header Background Color: Specify Background Color of Main Header here.
Menu Typography: Choose everything related to Fonts of the Menu.
Menu Hover/Selected Color: Specify Hover color of the menu.
Display Search: Choose, if you want to display 'Search' or not. If you have chosen ‘Yes’, then you can specify Search Style on ‘Select Search Style’ field. If you choose 'Flyout Search' on 'Select Search Style' field, then you can specify the background color of the search on Choose Search Background Color field.
Enter Social Icon Text: Provide text social icon section.
Select Mobile Menu Displace: Select displace of the Menu.
Display "Callback" Button: Choose, if you want to display 'Callback' button or not. If you have chosen ‘Yes’, then you can provide button label on ‘Display "Callback" Button Label’ field and button link on ‘Display "Callback" Button Link’ field.
11) Options for Style Ten:
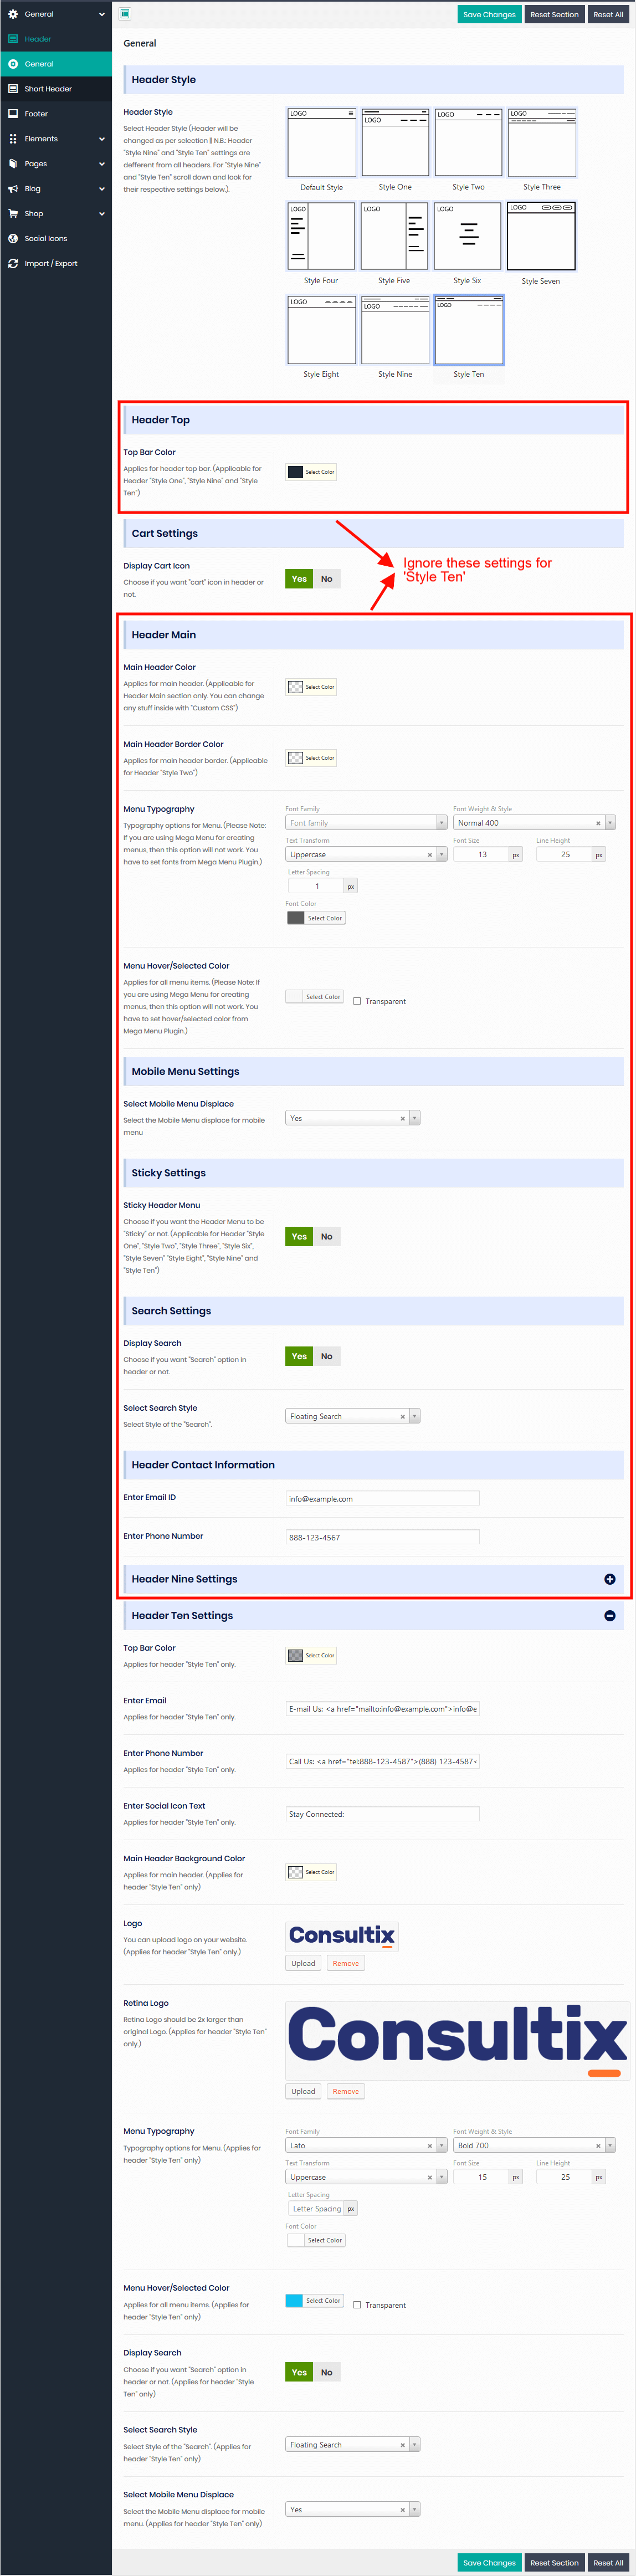
For 'Header Style Ten', only 'Cart Settings' and 'Header Ten Settings' sections are applicable(Follow the above screenshot for better understanding).
As, 'Logo' and 'Retina Logo' for 'Header Style Ten' are different from the other header logo, so you need to change 'Logo' and 'Retina Logo' for 'Header Style Ten' from 'Header Ten Settings'.
So, these are the options which are applicable for 'Header Style Ten':
a) Cart Settings: This section contains the following option:
Display Cart Icon: Choose if you want to display Cart basket in your header or not.
b) Header Ten Settings: This section contains the following options:
Top Bar Color: Provide color for top bar here.
Enter Email: Provide Contact email here.
Enter Phone Number: Provide Phone Number here.
Enter Social Icon Text: Provide text social icon section.
Main Header Background Color: Specify Background Color of Main Header here.
Logo: Upload your Logo for 'Header Style Ten' here.
Retina Logo: Upload your Retina Logo which should be 2x larger than Custom Logo.
Menu Typography: Choose everything related to Fonts of the Menu.
Menu Hover/Selected Color: Specify Hover color of the menu.
Display Search: Choose, if you want to display 'Search' or not. If you have chosen ‘Yes’, then you can specify Search Style on ‘Select Search Style’ field. If you choose 'Flyout Search' on 'Select Search Style' field, then you can specify the background color of the search on Choose Search Background Color field.
Select Mobile Menu Displace: Select displace of the Menu.
Short Header
Inner Page Banner
Here, you can change manage short header for all the inner pages. This section contains the following options:
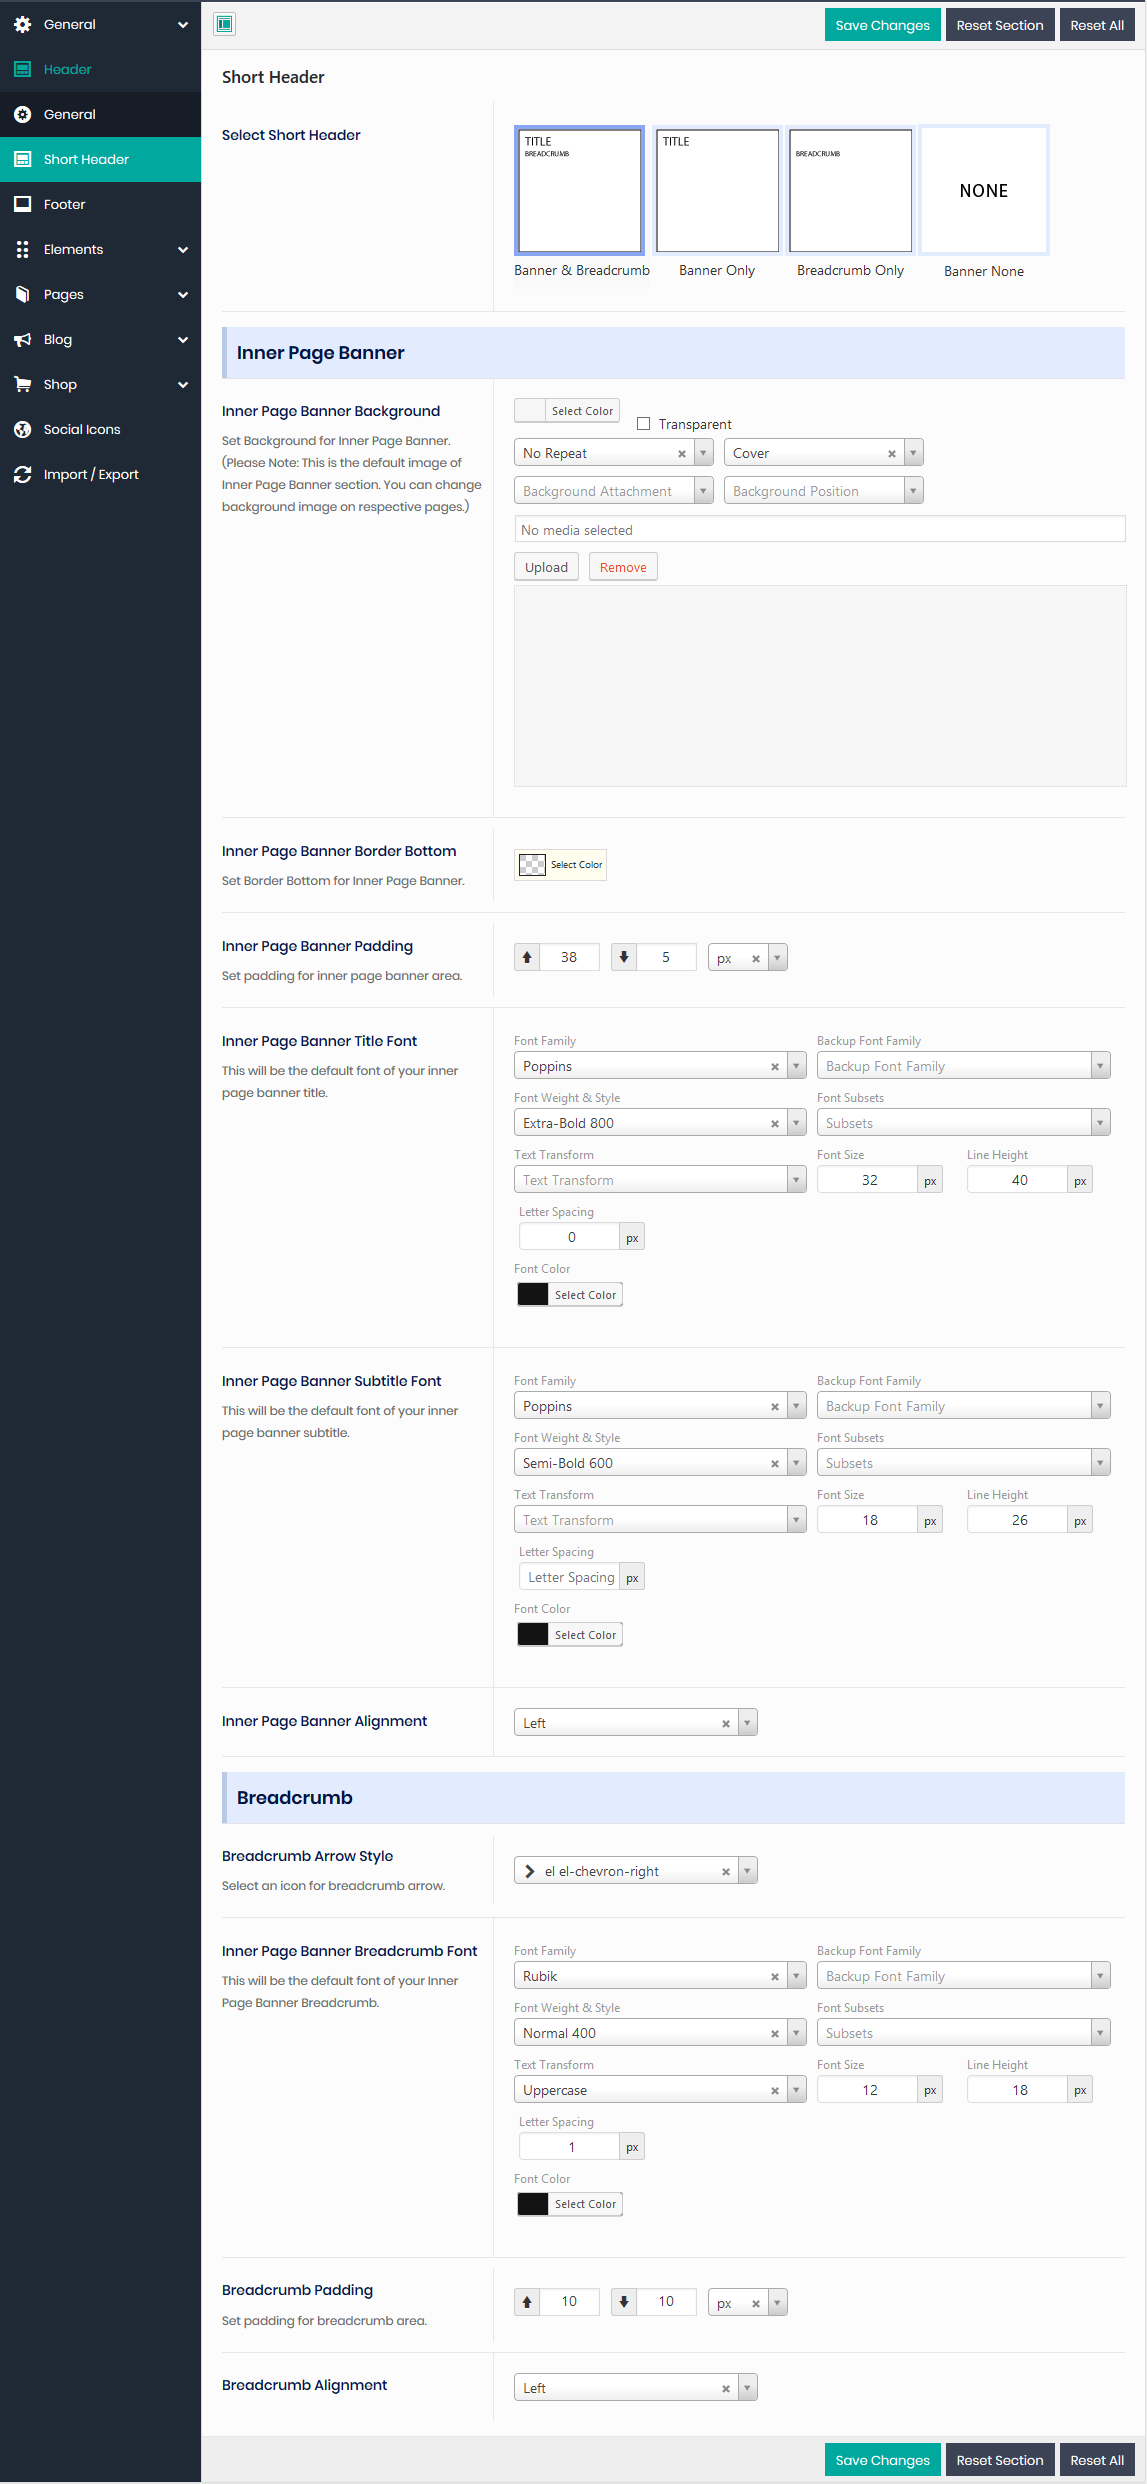
Inner Page Banner Background: If you want a common banner for all inner pages, then you need to add banner image, right here.
Inner Banner Border Bottom: Set Border Bottom color for Inner Banner.
Inner Banner Padding: Set Padding for Inner Banner.
Inner Page Banner Title Font: Choose everything related to the fonts of ‘Banner Title’.
Inner Page Banner Subtitle Font: If you have Banner Subtitle, then you can choose everything related to fonts of Banner Subtitle from here.
Inner Page Banner Alignment: Select Alignment for the Banner.
Breadcrumb
Here, you can manage Breadcrumb style. This section contains the following options:
Breadcrumb Arrow Style: Select icon for the arrow of the Breadcrumb.
Inner Page Banner Breadcrumb Font: Select all font details for Breadcrumb.
Breadcrumb Padding: Set padding for Breadcrumb.
Breadcrumb Alignment: Select Alignment of the Breadcrumb.
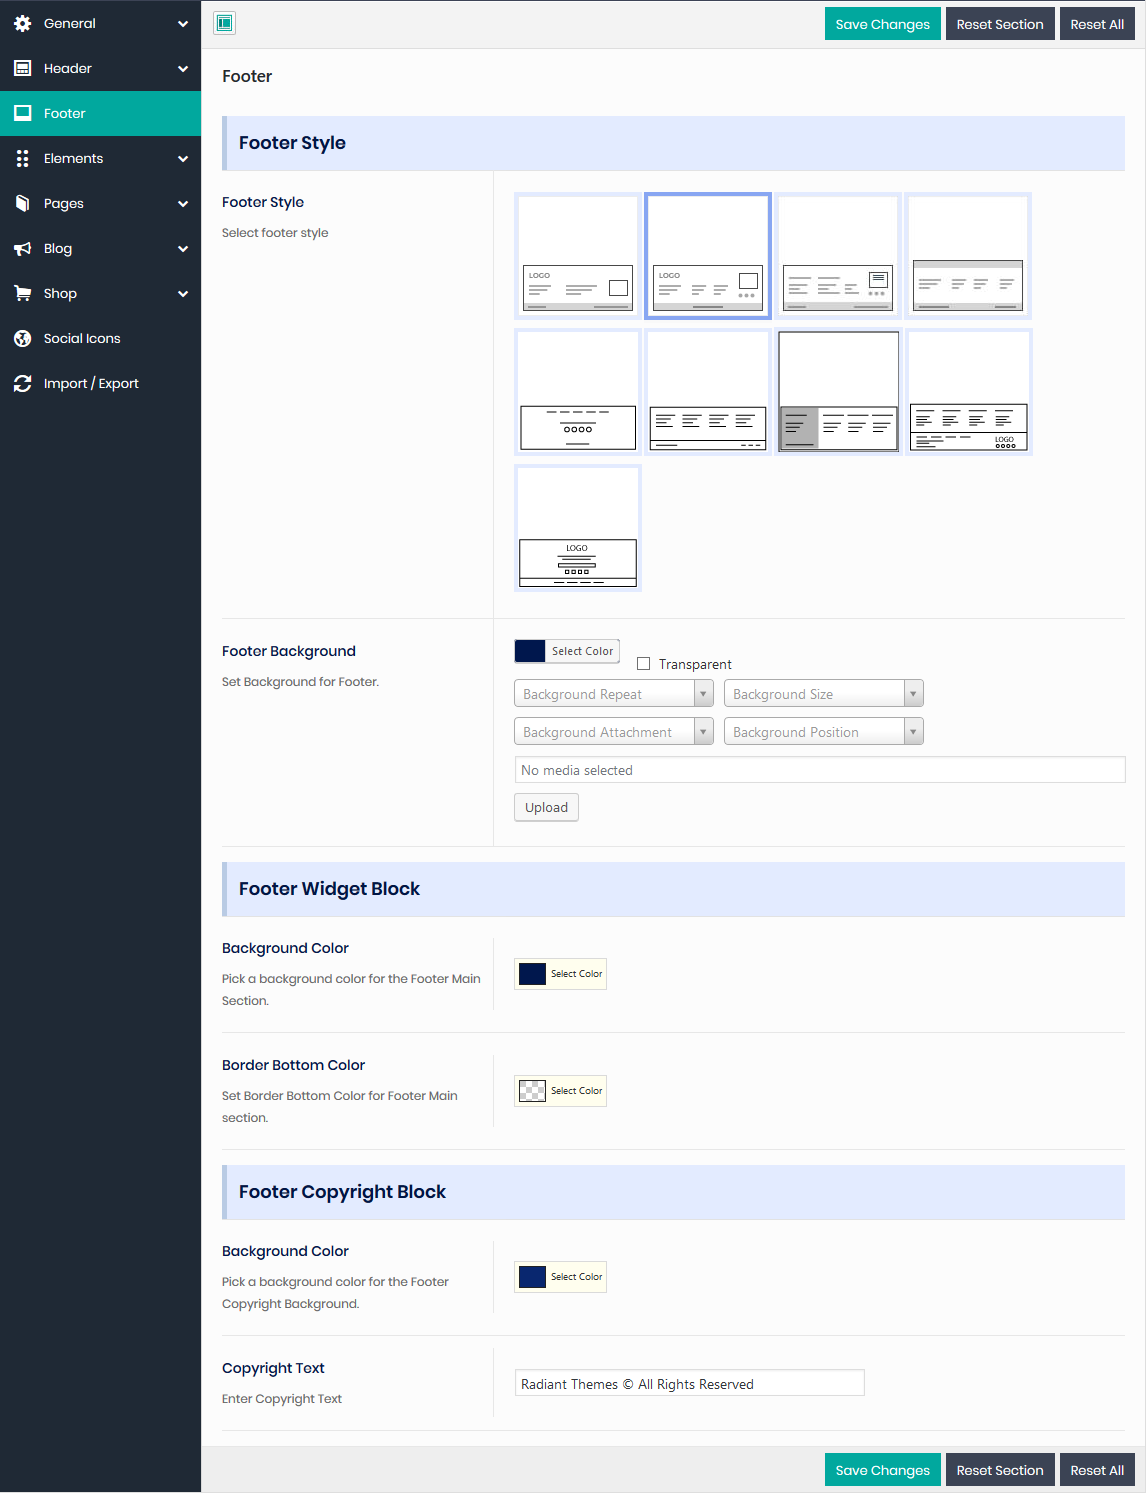
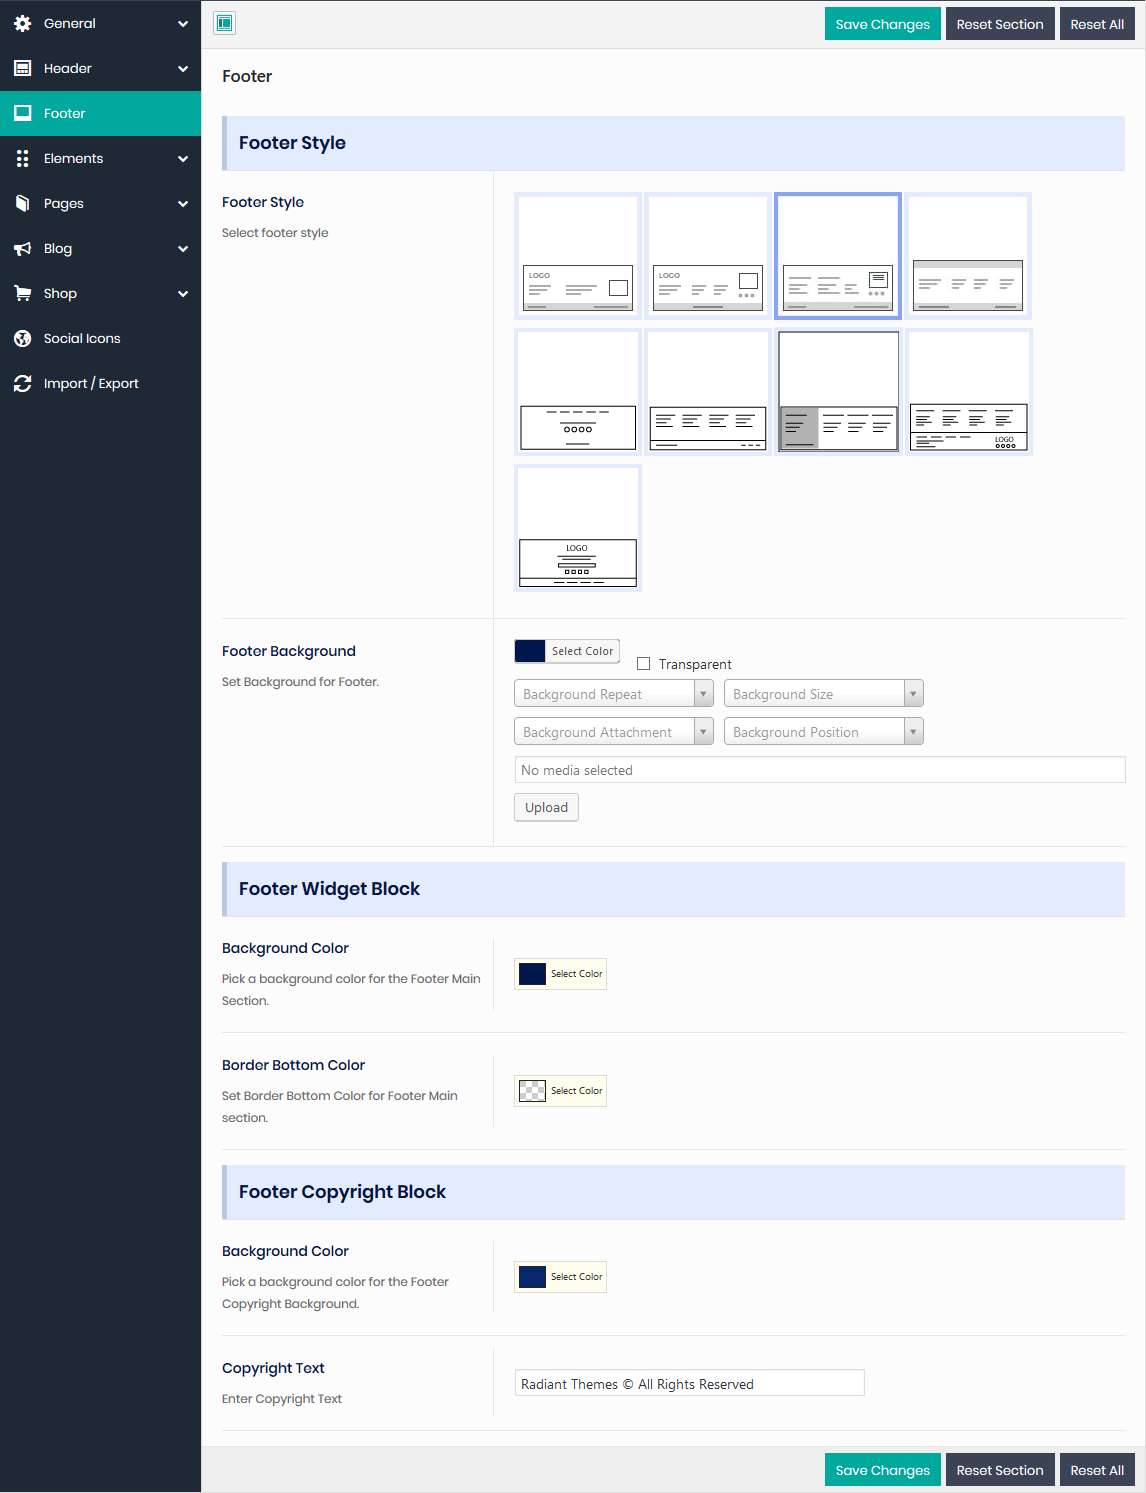
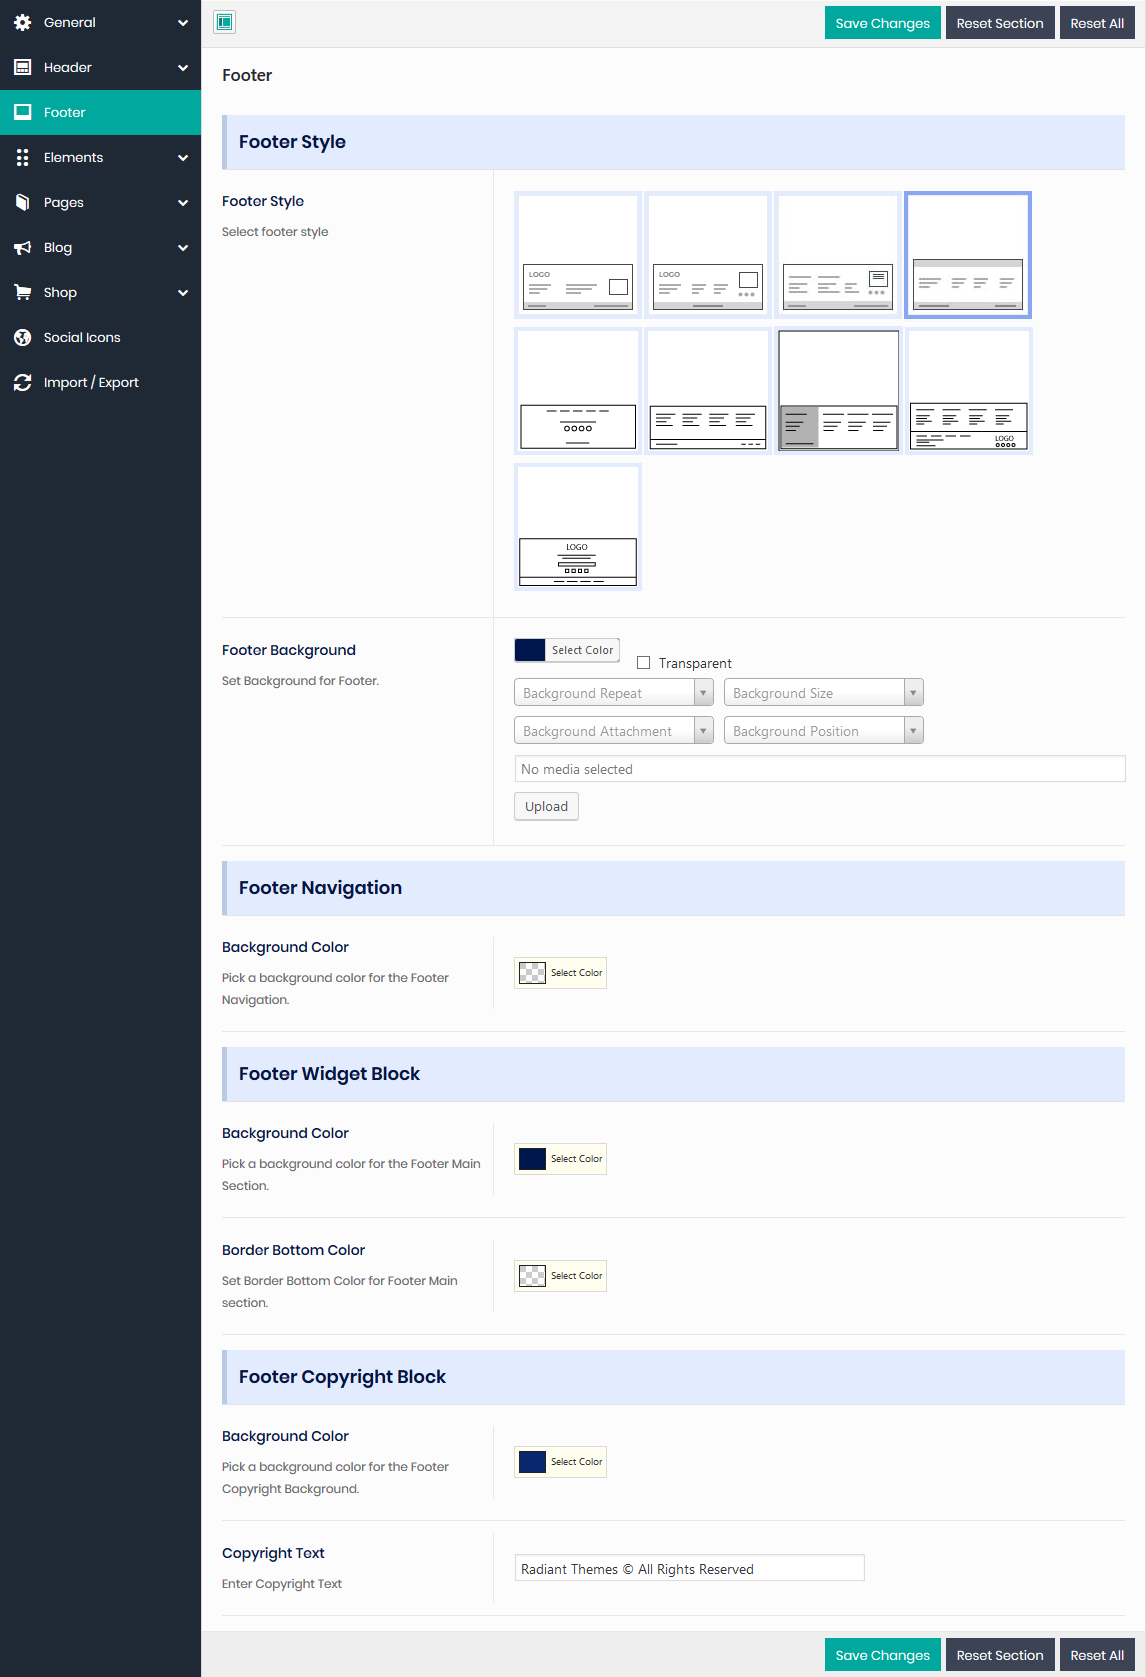
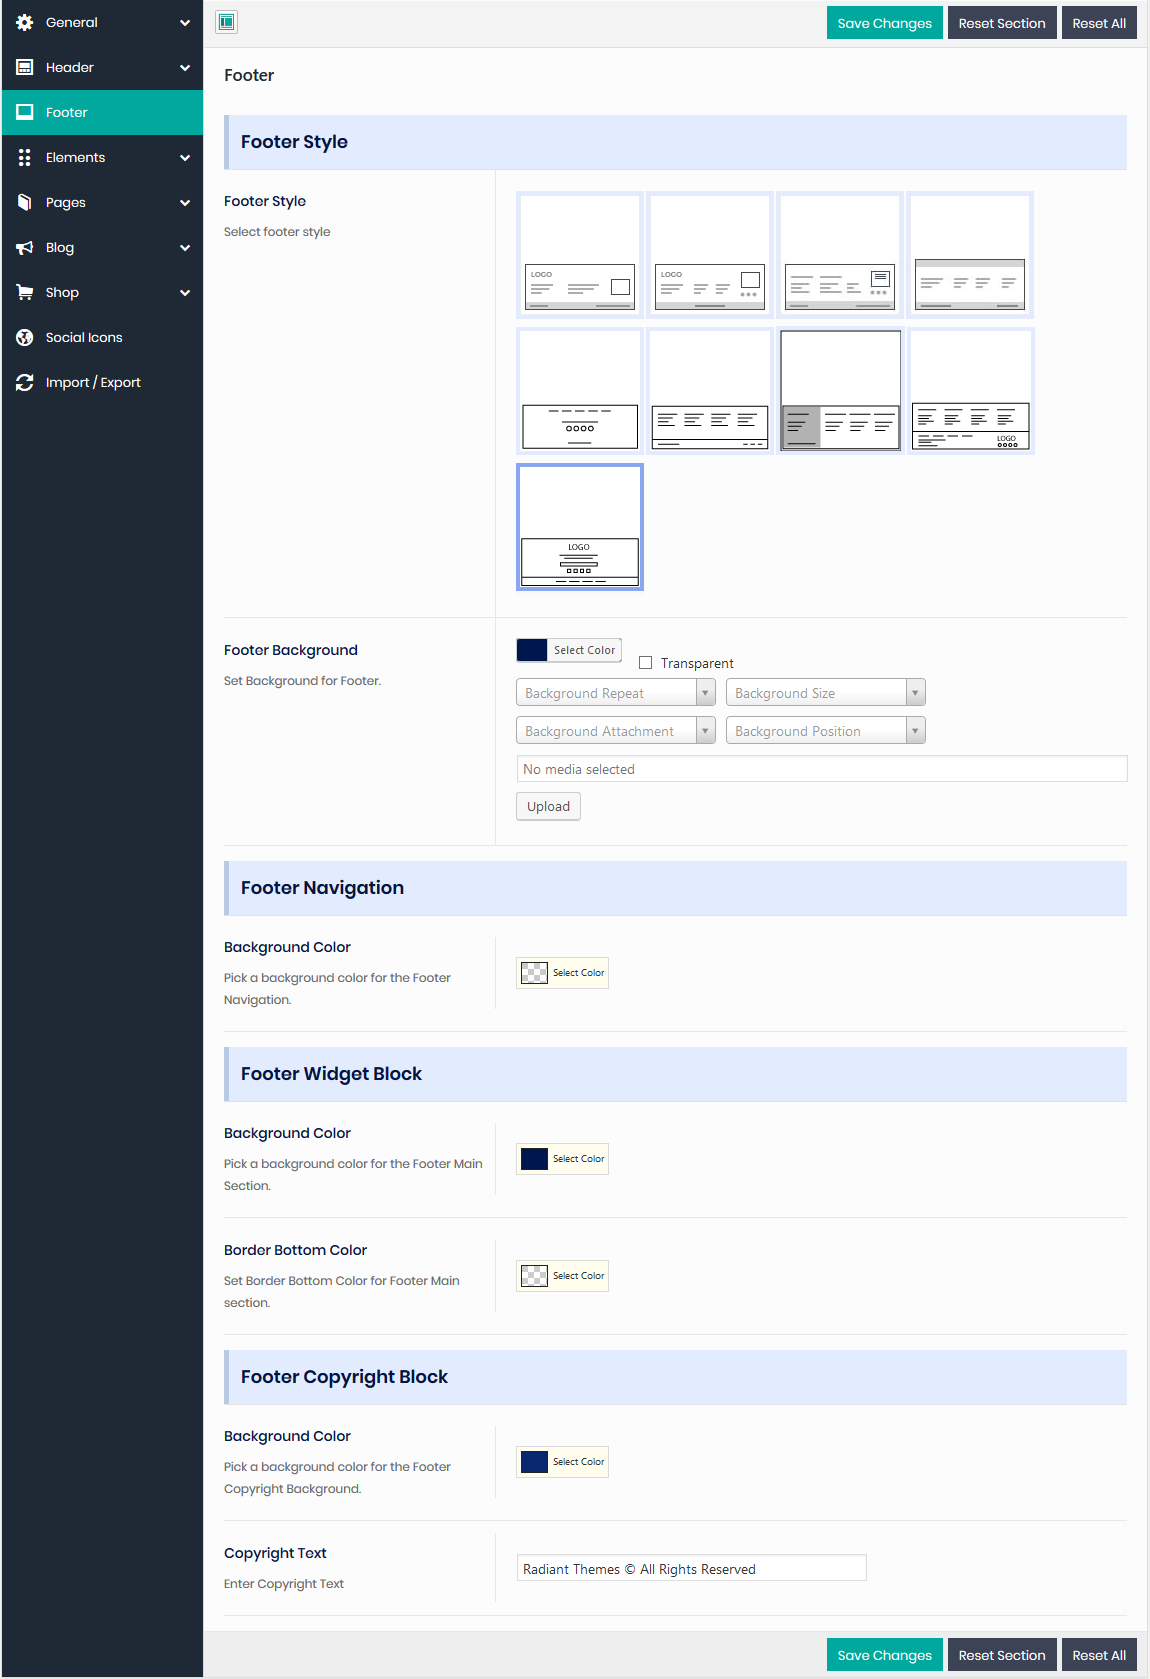
Footer
Footer Style: We’ve 9 different styles of footer.
1) Options for Style One:
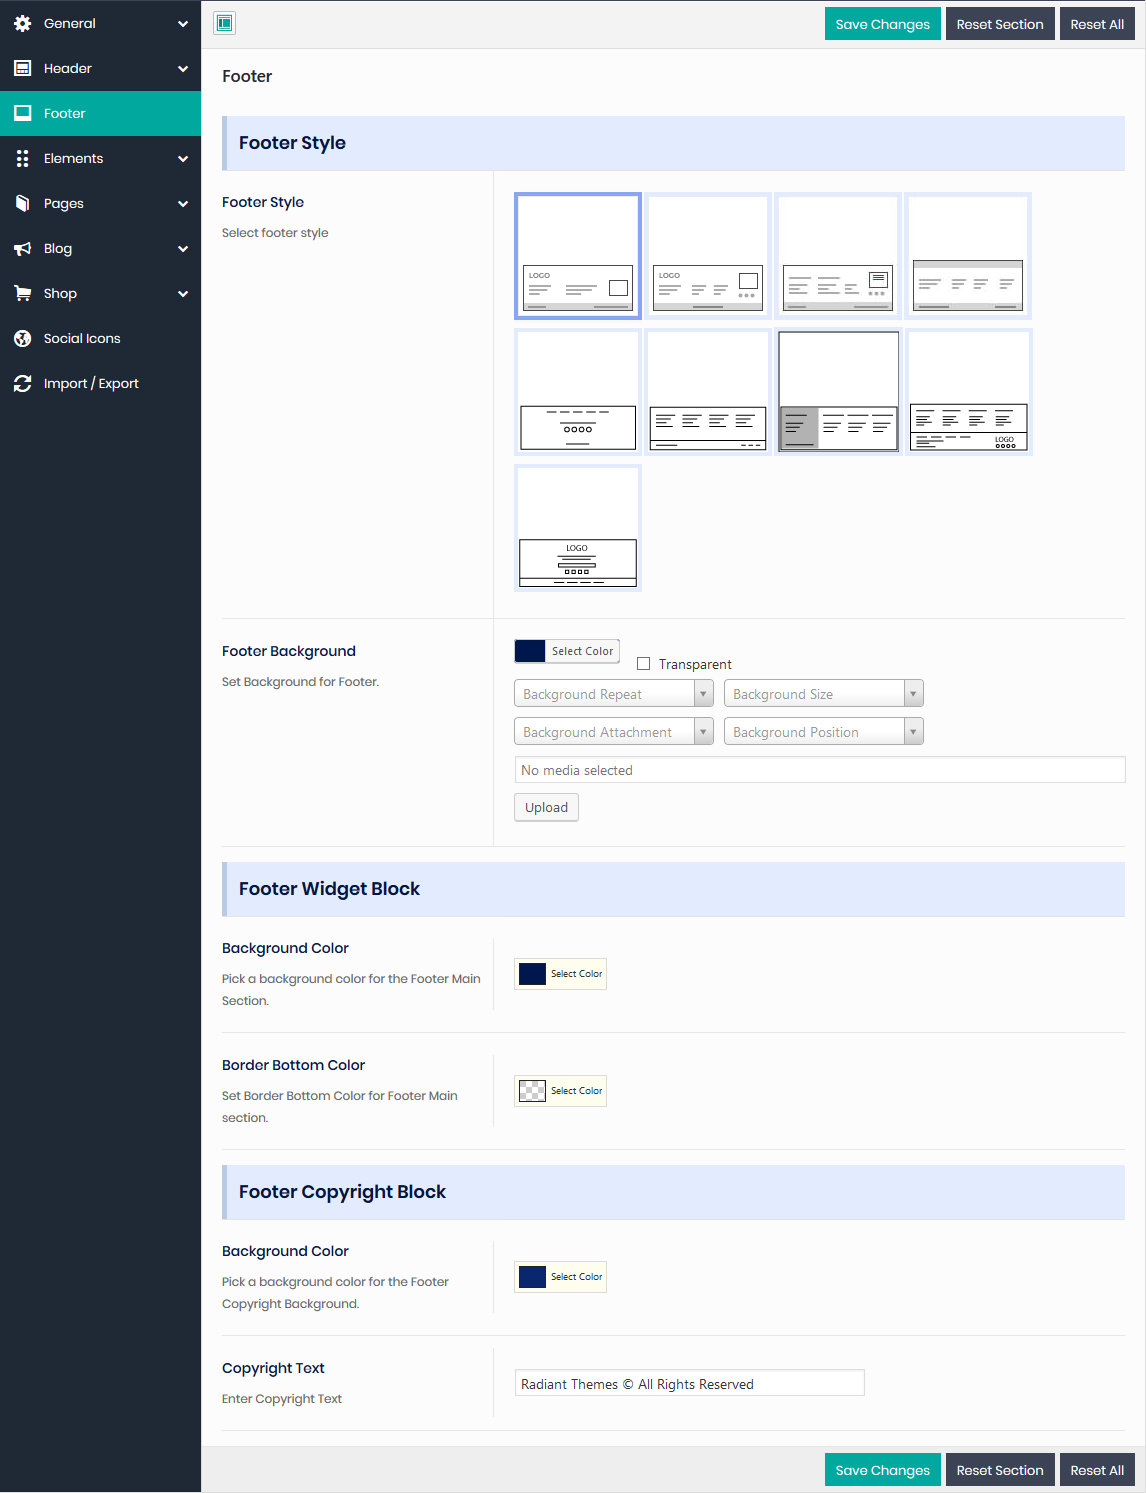
This section contains the following options:
Footer Background: Set Background Color or Image.
a) Footer Widget Block: This section contains the following option:
- Background Color: Set Background Color.
- Border Bottom Color: Set Border Bottom Color.
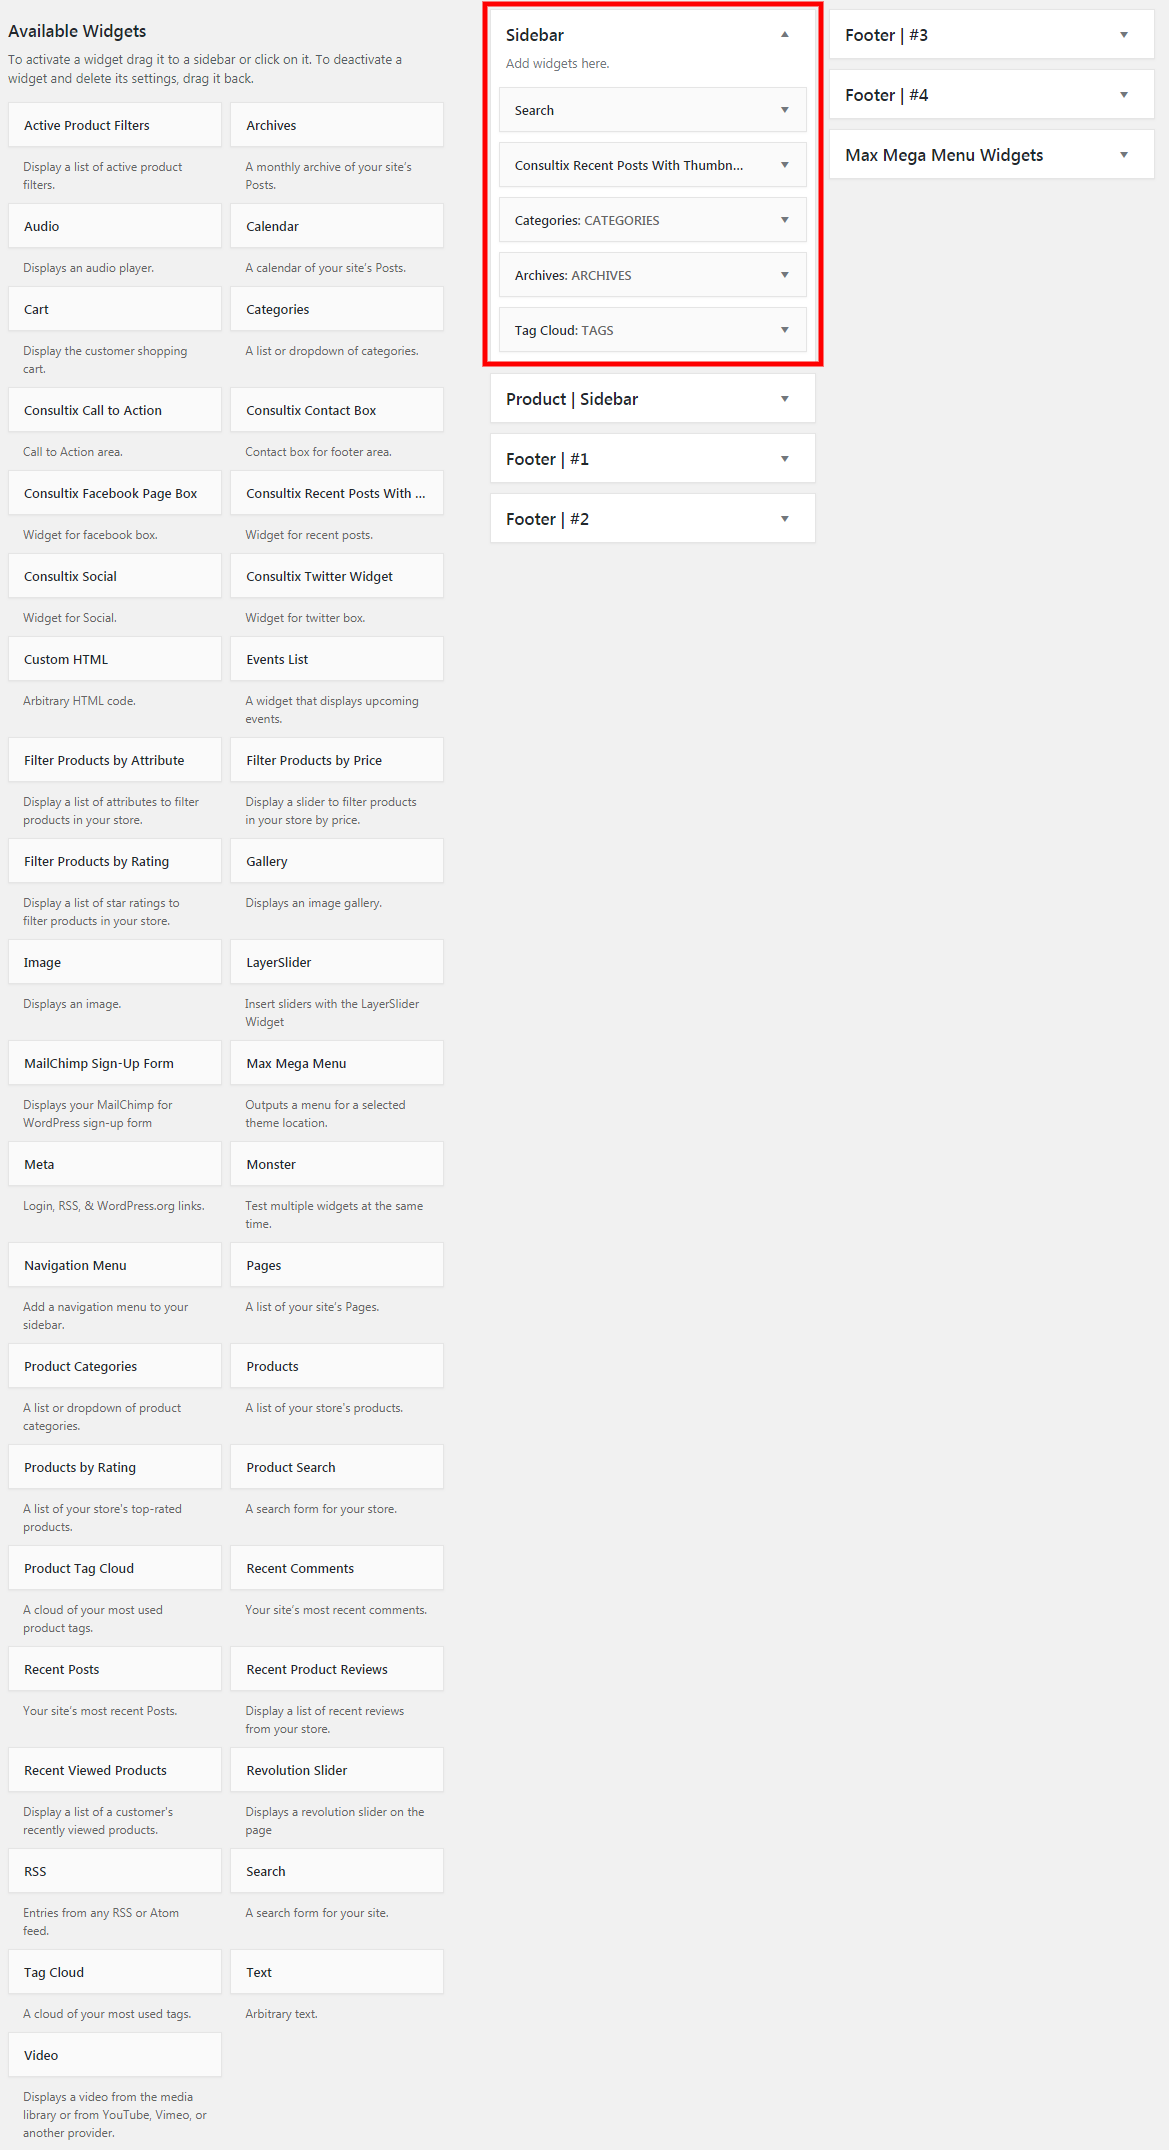
Widgets
To set up Widgets, navigate to Appearance > Widgets. Here, you will see that there are 6 available sidebars. Out of these sidebars, "Footer | #1", "Footer | #2", "Footer | #3", "Footer | #4" are used for the Footer Widget Block.
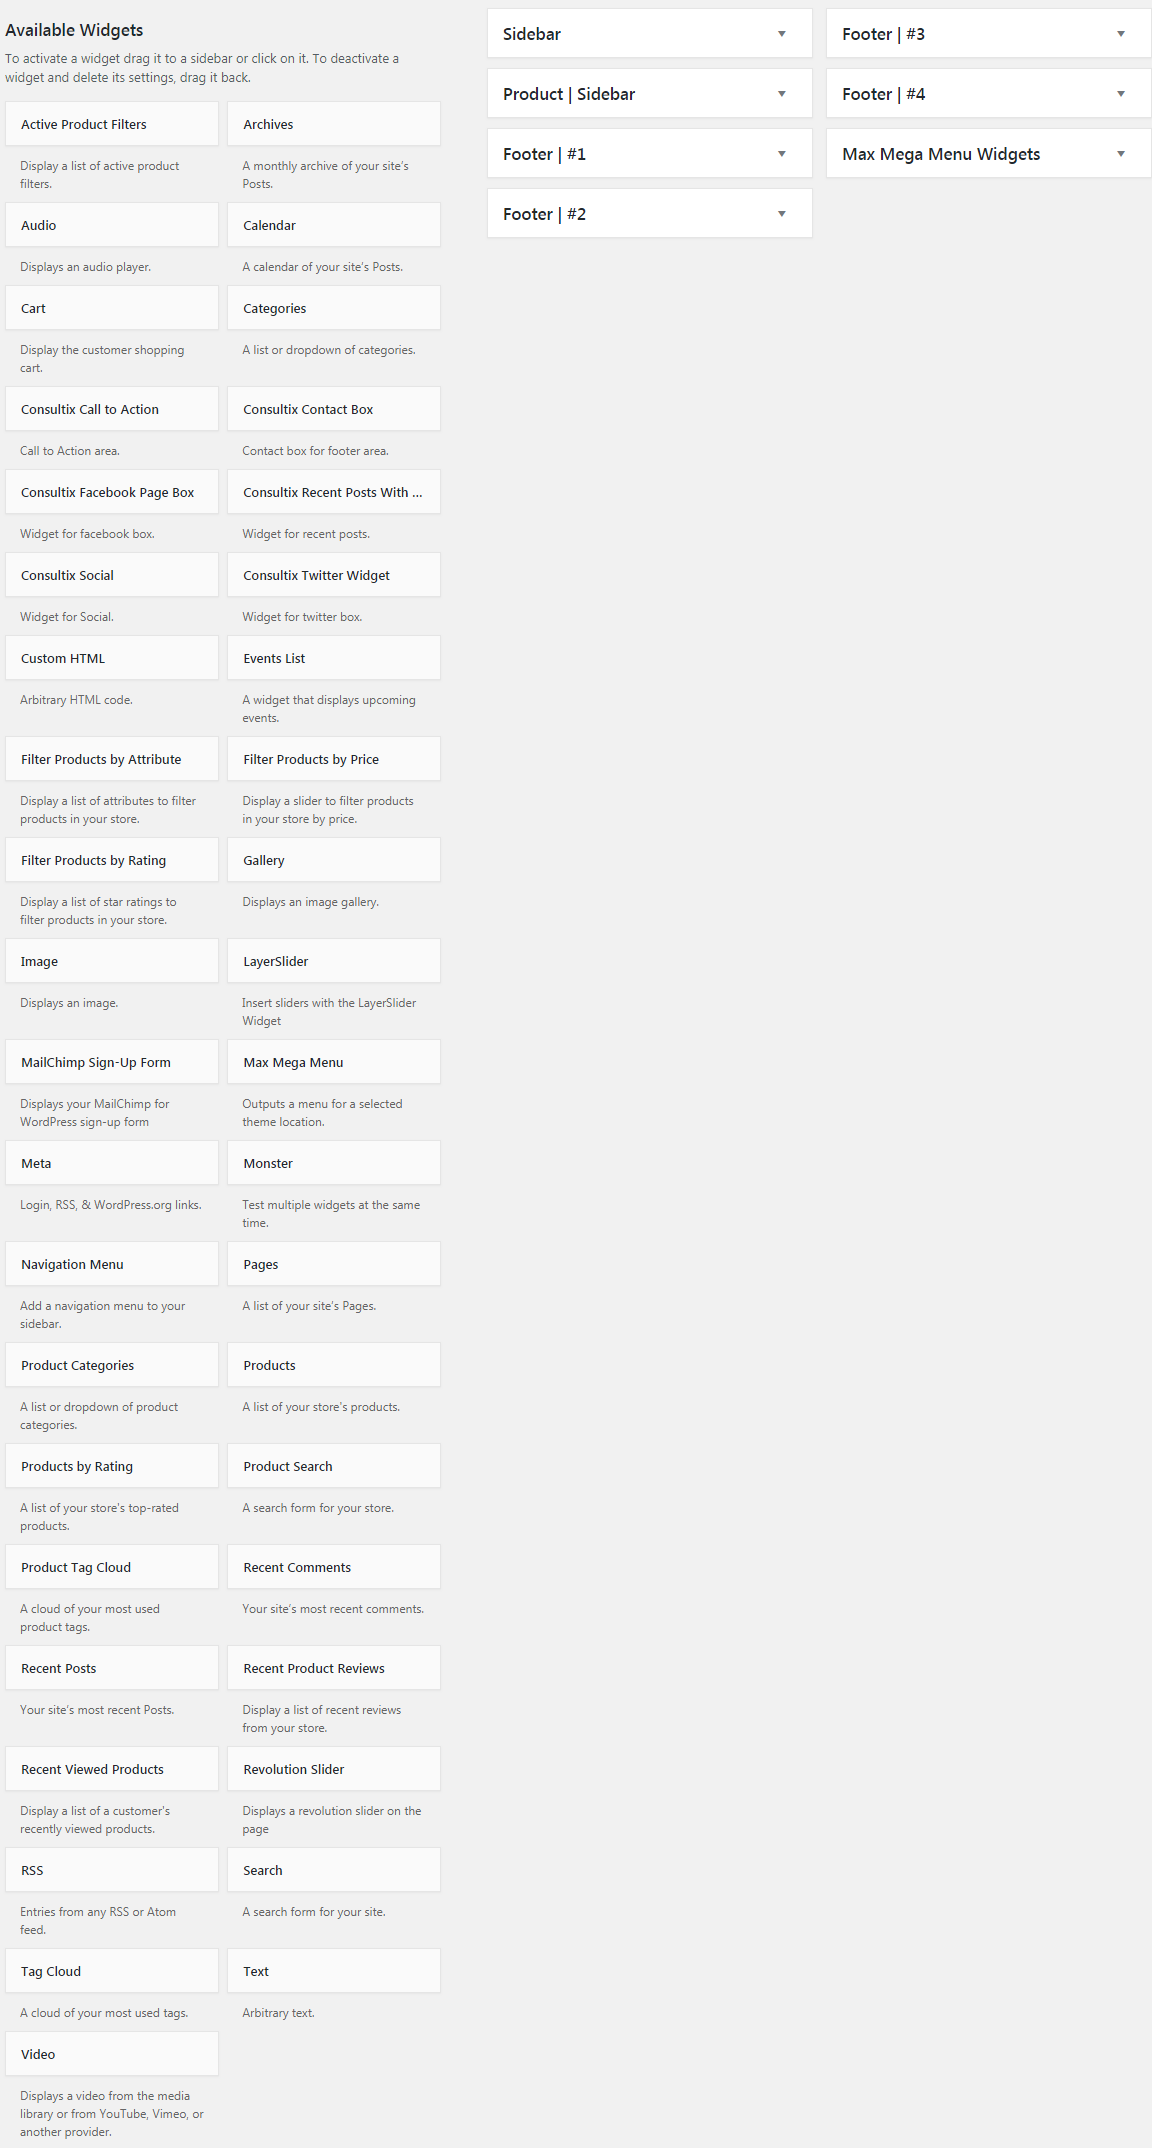
You can use any widget from the ‘Available Widgets’ section and drag those widgets to “Footer | #1” to “Footer | #4” or click on the widgets from the ‘Available Widgets’ section and then select the desired location.
If you want to change the footer section from four columns to three columns, use three sidebars from "Footer | #1" to "Footer | #4"; similarly if you want two columns, use two sidebars from "Footer | #1" to "Footer | #4" and if you want 1 column, use one sidebar from "Footer | #1" to "Footer | #4".
So, each sidebar from "Footer | #1" to "Footer | #4" represents a column.
6 Custom Widgets has been specially created us. You can add those widgets anywhere. Here are the details about those widgets--
1) Consultix Call to Action
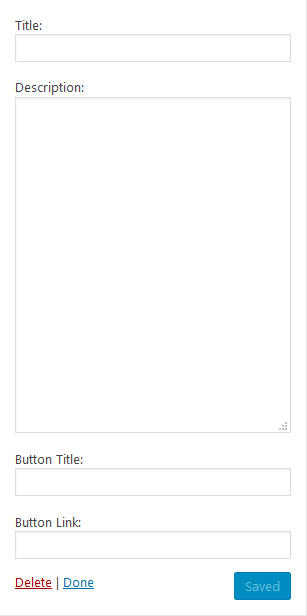
You can add a ‘Call to Action’ box from this widget. You can add widget title on ‘Title’ field and content on ‘Description’ field. If you want a button, then you can add button title on ‘Button Title’ field and link of the button on ‘Button Link’ field.
2) Consultix Contact Box--
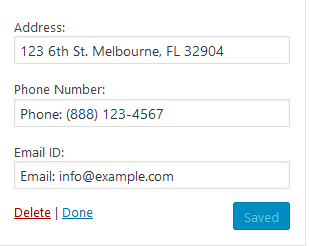
You can add a Contact box from this widget. You can add contact address on ‘Address’ field, Phone Number on ‘Phone Number’ field and email id on ‘Email ID’ field.
3) Consultix Facebook Page Box--
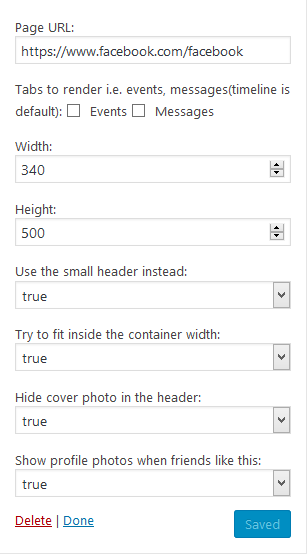
This widget contains the following options:
- Page URL: Provide your Facebook Page URL.
- Tabs: Specify what you want to show.
- Width: Provide Facebook box width.
- Height: Provide Facebook box Height.
- Use the small header instead: Choose if you want small header or not.
- Try to fit inside the container width: Choose if you want to fit Facebook posts within container width or not.
- Hide cover photo in the header: Chose if you want to hide cover photo from Facebook page header or not.
- Show profile photos when friends like this: Choose if you want to show profile photos (when friends like those photos) or not.
4) Consultix Recent Posts With Thumbnail Widget--
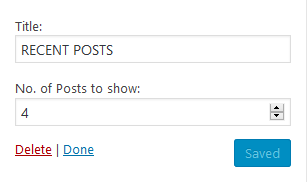
You can add a list(s) of ‘Recent Posts’ box from this widget. You can add title of the widget on the ‘Title’ field and can specify the number of Posts to show on ‘No. of Posts to show’ field.
5) Consultix Recent Social- Here, you can add all of your Social Icons with link.
6) Consultix Twitter Widget--
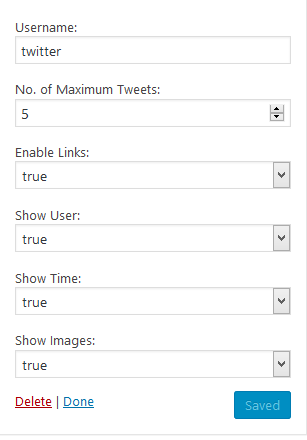
This widget contains the following options:
- Username: Provide your Twitter Username.
- No. of Maximum Tweets: Specify the number of maximum tweets you wish to show.
- Enable Links: Choose if you want to enable links or not.
- Show User: Choose if you want to show user or not.
- Show Time: Choose if you want to show time or not.
- Show Images: Choose if you want to show images or not.
b) Footer Copyright Block: This section contains the following option:
- Background Color: Set Background Color.
- Copyright Text: Provide Copyright Text.
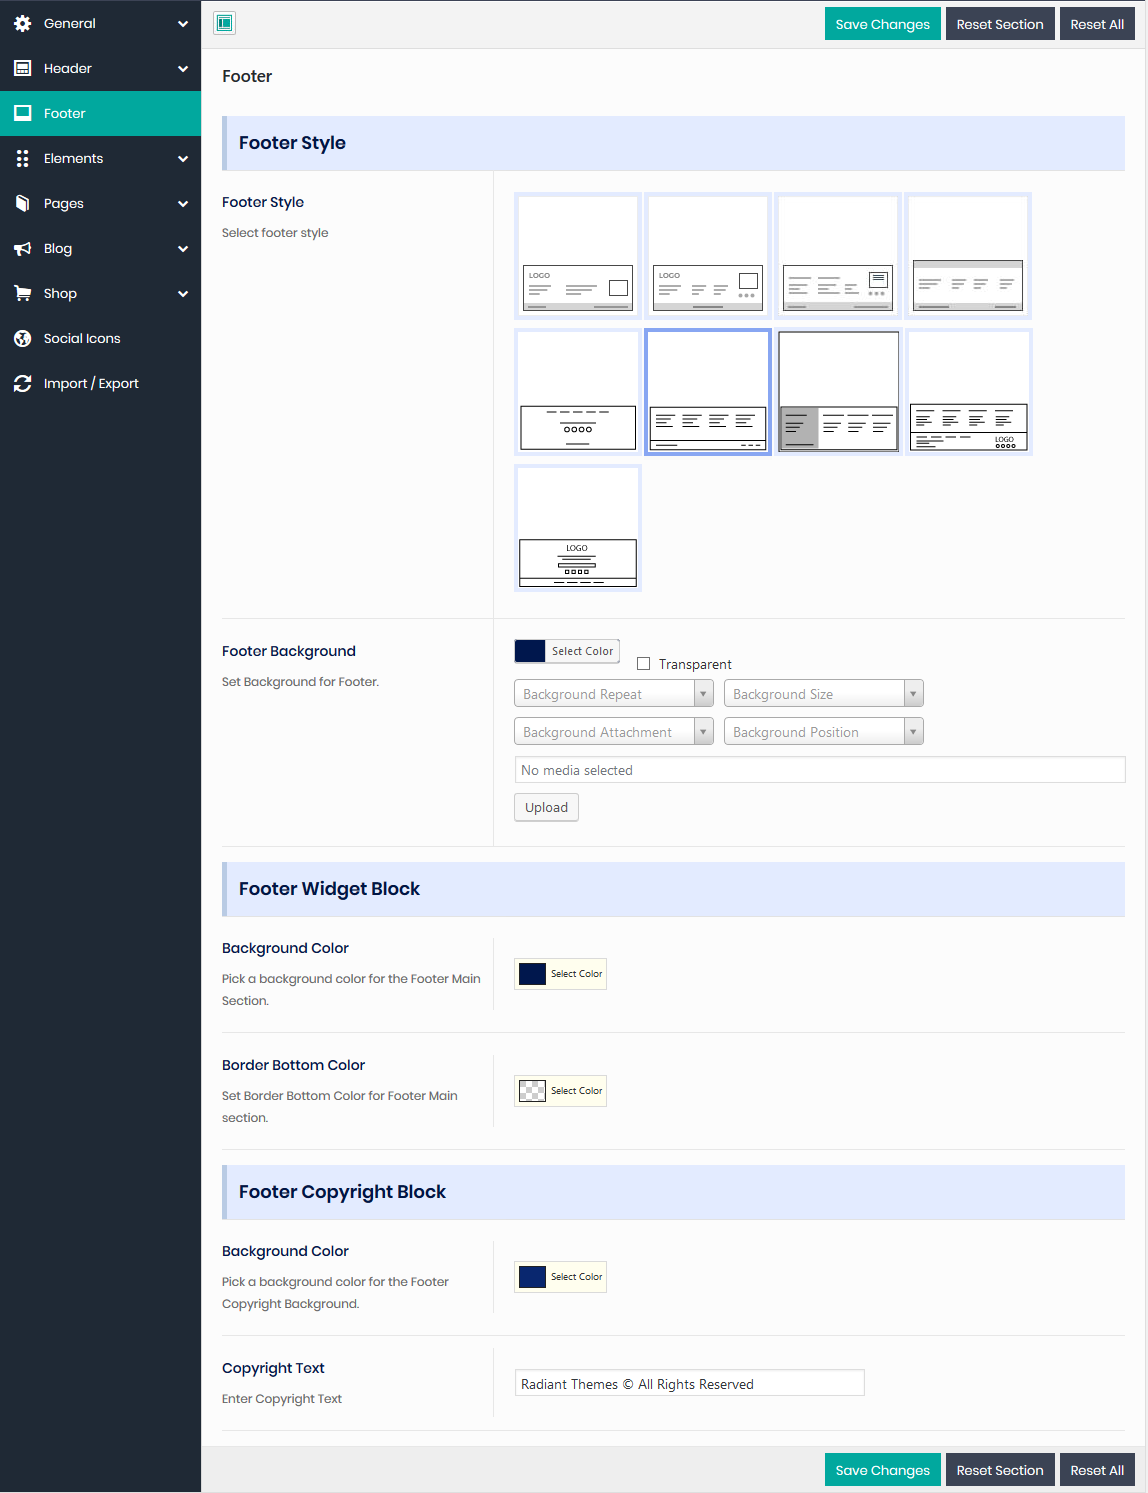
2) Options for Style Two:
As all options are same as ‘Footer Style One’, so you can change available options by following ‘Footer Style One’ tutorial.
3) Options for Style Three:
As all options are same as ‘Footer Style One’, so you can change available options by following ‘Footer Style One’ tutorial.
4) Options for Style Four:
Except 'Footer Navigation' section, all options are same as ‘Footer Style One’. For 'Footer Navigation' section, you will get this option--
Background Color: Set Background Color of Navigation menu.
As all other options are same as ‘Footer Style One’, so you can change available options by following ‘Footer Style One’ tutorial.
5) Options for Style Five:

As all options are same as ‘Footer Style Four’, so you can change available options by following ‘Footer Style Four’ tutorial.
6) Options for Style Six:
As all options are same as ‘Footer Style One’, so you can change available options by following ‘Footer Style One’ tutorial.
7) Options for Style Seven:
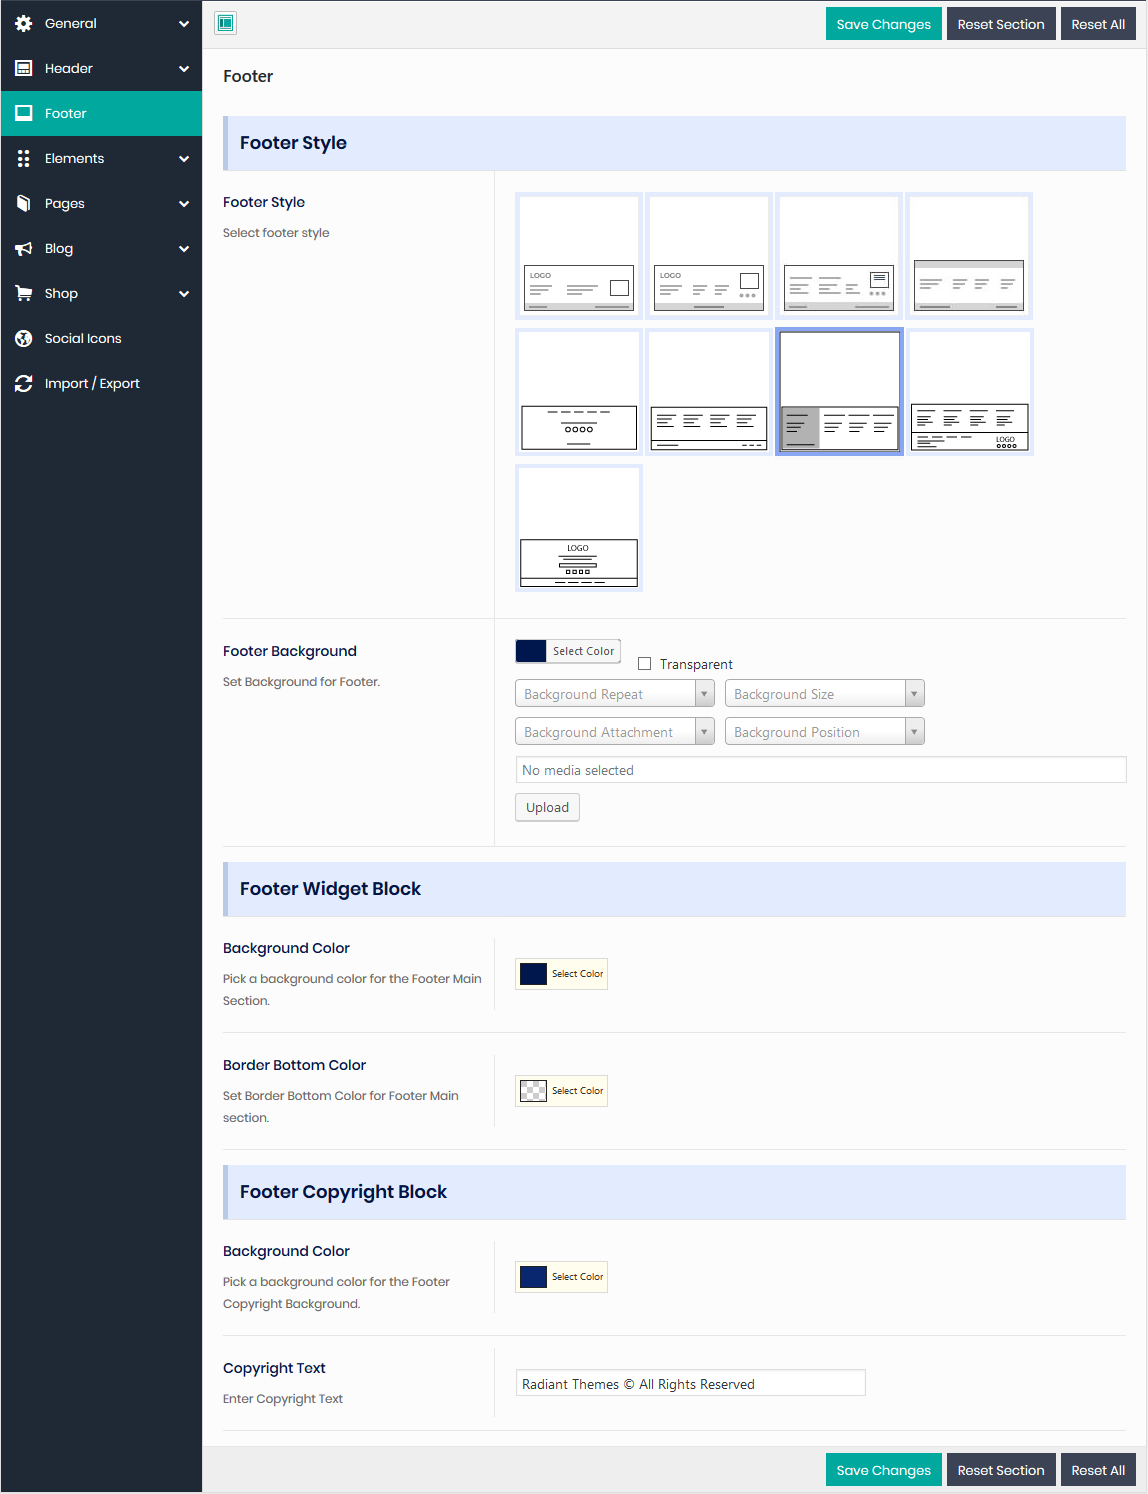
As all options are same as ‘Footer Style One’, so you can change available options by following ‘Footer Style One’ tutorial.
8) Options for Style Eight:
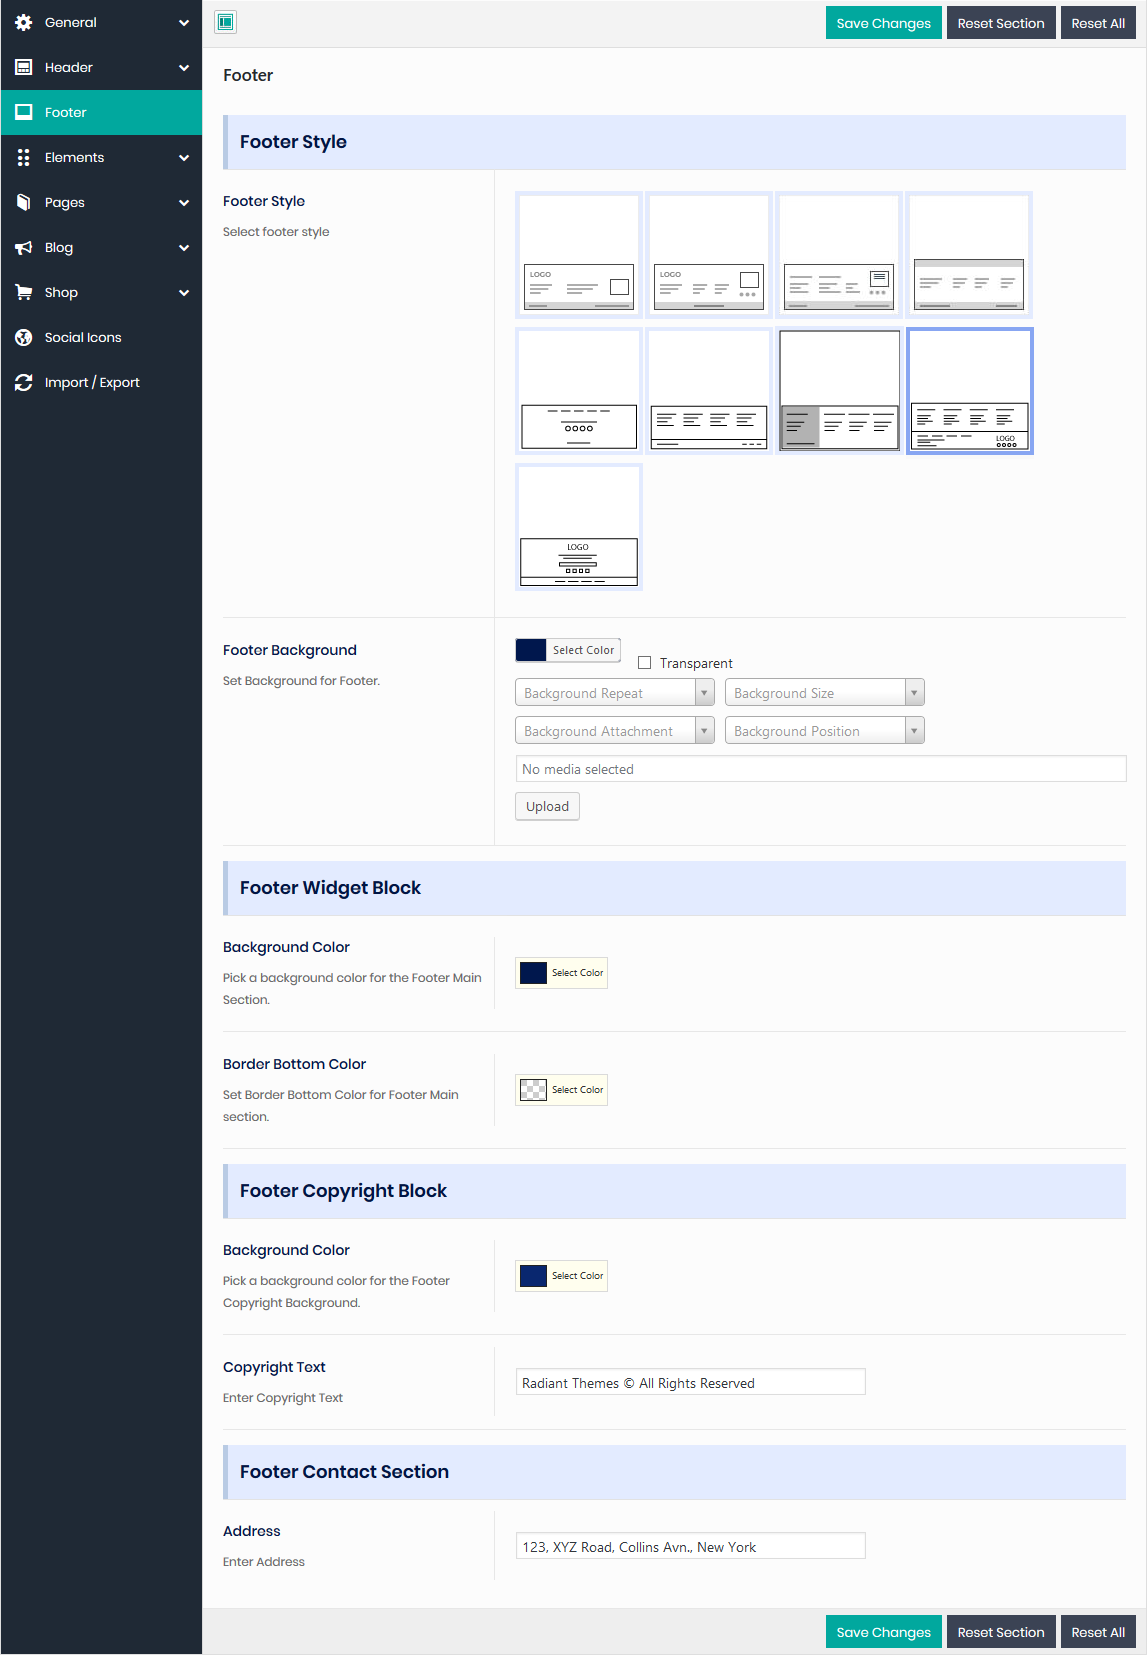
Except 'Footer Contact Section', all options are same as ‘Footer Style One’. For 'Footer Contact Section', you will get this option--
Address: Provide Contact Address.
As all other options are same as ‘Footer Style One’, so you can change available options by following ‘Footer Style One’ tutorial.
9) Options for Style Nine:
Except 'Footer Navigation' section, all options are same as ‘Footer Style One’. For 'Footer Navigation' section, you will get this option--
Background Color: Set Background Color of Navigation menu.
As all other options are same as ‘Footer Style One’, so you can change available options by following ‘Footer Style One’ tutorial.
Elements Style
Here, you can change every possible CSS style of almost all Elements.
Error 404
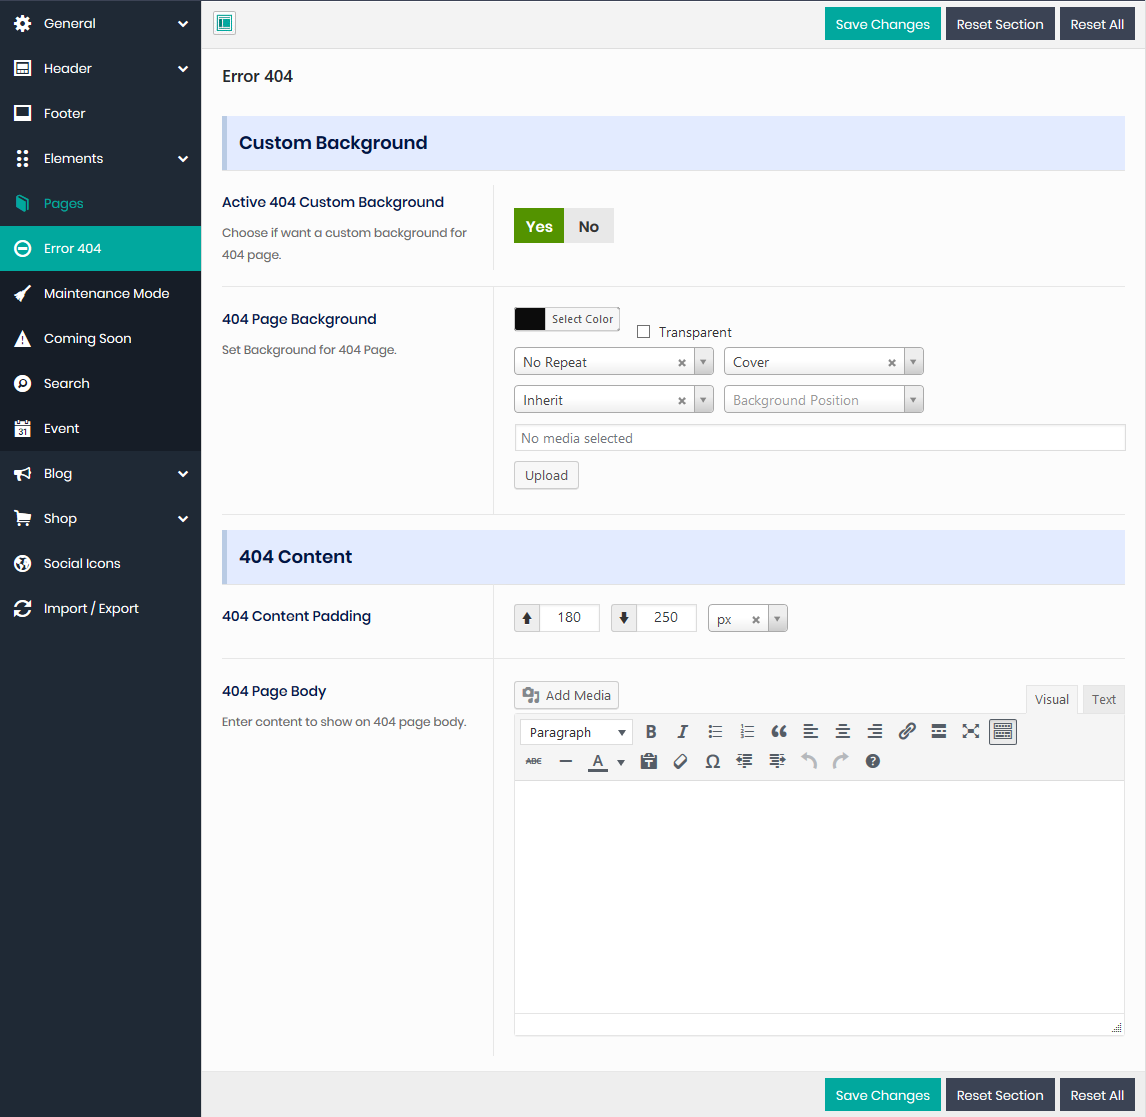
This section contains the following options:
a) Custom Background: This section contains the following option:
Active 404 Custom Background: Here, you can add custom background of ‘404 error’ page. If you choose ‘Yes’ on ‘Active 404 Custom Background’ field, then you can upload background of 404 page on ‘404 Page Background’. If you choose ‘No’, then you don’t need to upload background image. You can just choose 404 page style from ‘Select 404 Page Style’ field.
b) 404 Content : Here, you can also manage content for 404 error page. This section contains the following options:
404 Content Padding: Here, you can add padding for 404 error page content.
404 Page Body: Here, you can add the content for 404 error page.
Maintenance Mode
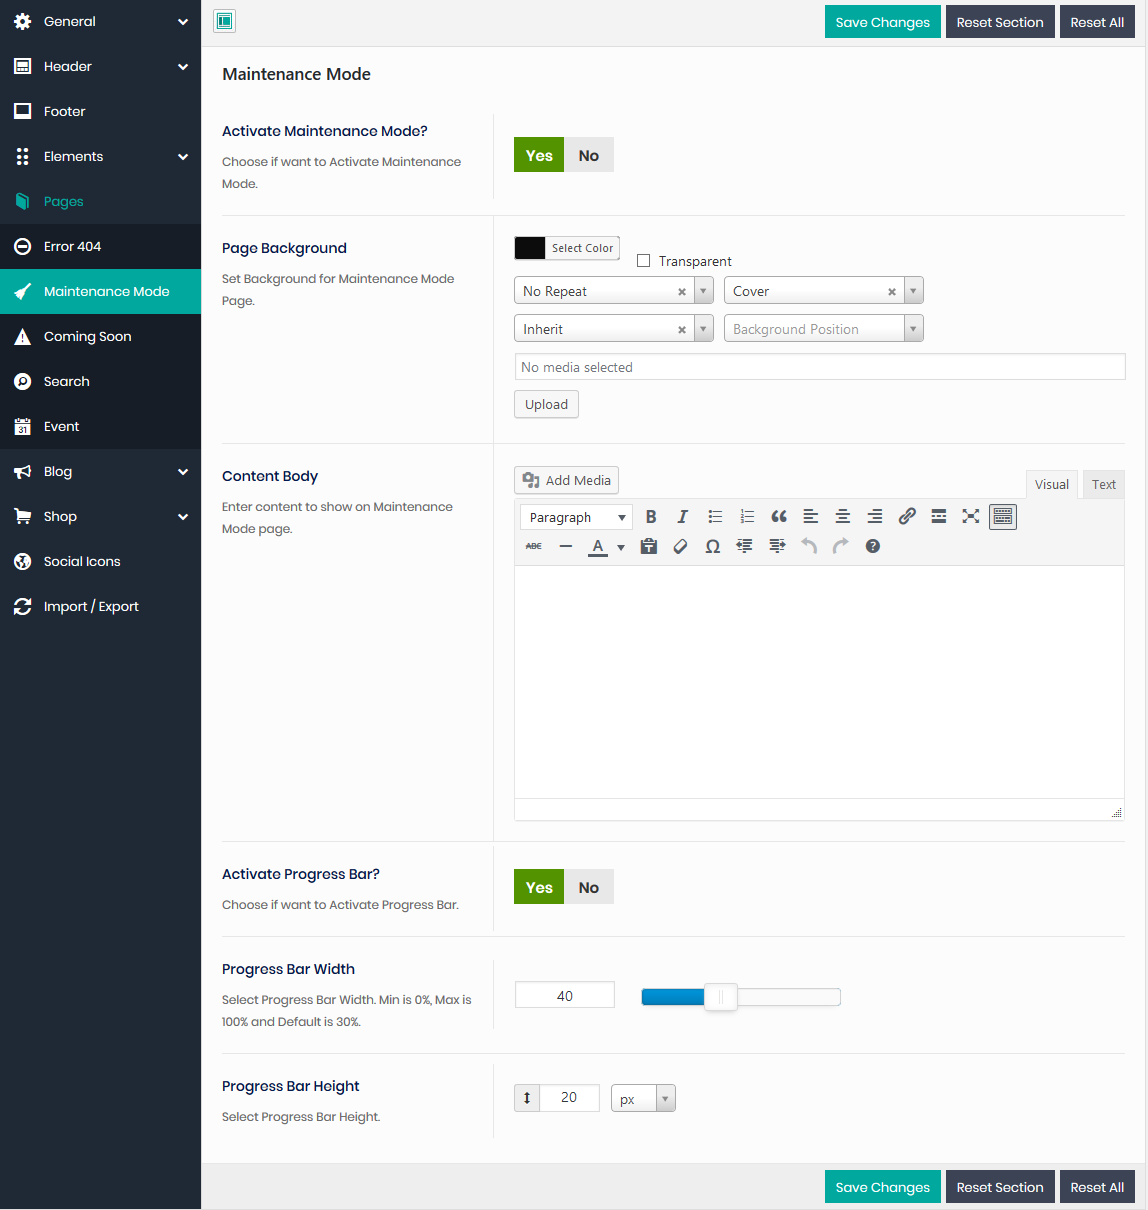
If you want to activate ‘Maintenance Mode’ on your site, then you can do the same by choosing ‘Yes’ on ‘Activate Maintenance Mode?’ field. After activating Maintenance Mode, you will get these options--
a) Custom Background: This section contains the following option:
Page Background: Here, you can upload background image for Maintenance Mode Page.
Content Body: Here, you can add content for Maintenance Mode Page.
Activate Progress Bar?: Choose if you want to activate ‘Progress Bar’ or not. If you have chosen ‘Yes’, then you can specify the width of the Progress Bar on ‘Progress Bar Width’ field and height of the Progress Bar on ‘Progress Bar Height’ field.
Coming soon
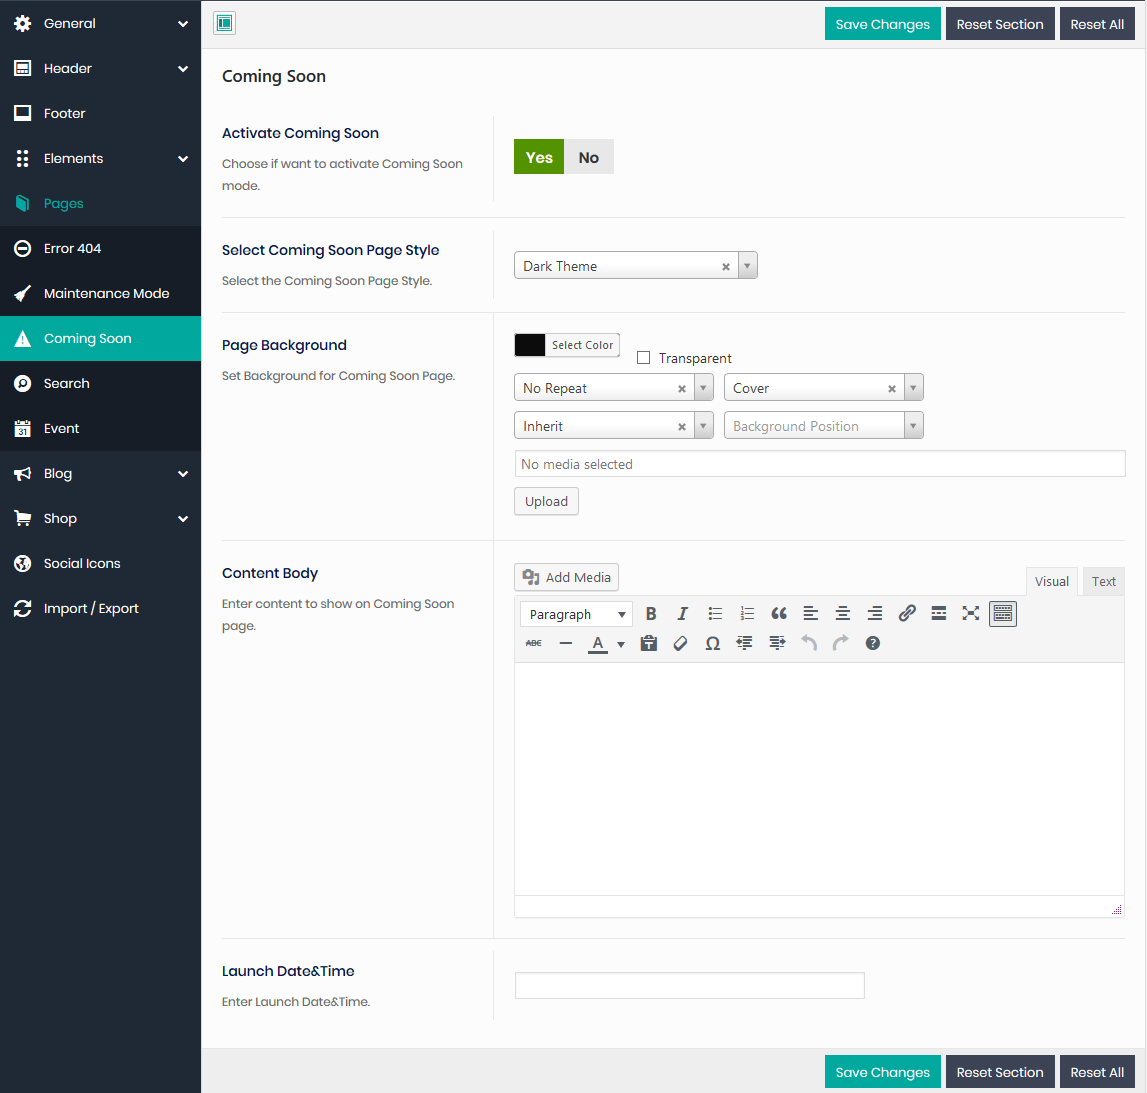
If you want to activate ‘Coming Soon Mode’ on your site, then you can do the same by choosing ‘Yes’ on ‘Activate Coming Soon’ field. After activating ‘Coming Soon Mode’, you will get these options--
Select Coming Soon Page Style: Choose page style of Coming Soon Page.
Page Background: Upload background image of Coming Soon Page.
Content Body: Provide content for Coming Soon Page.
Launch Date: Time: Specify the date and time for site launch.
Search
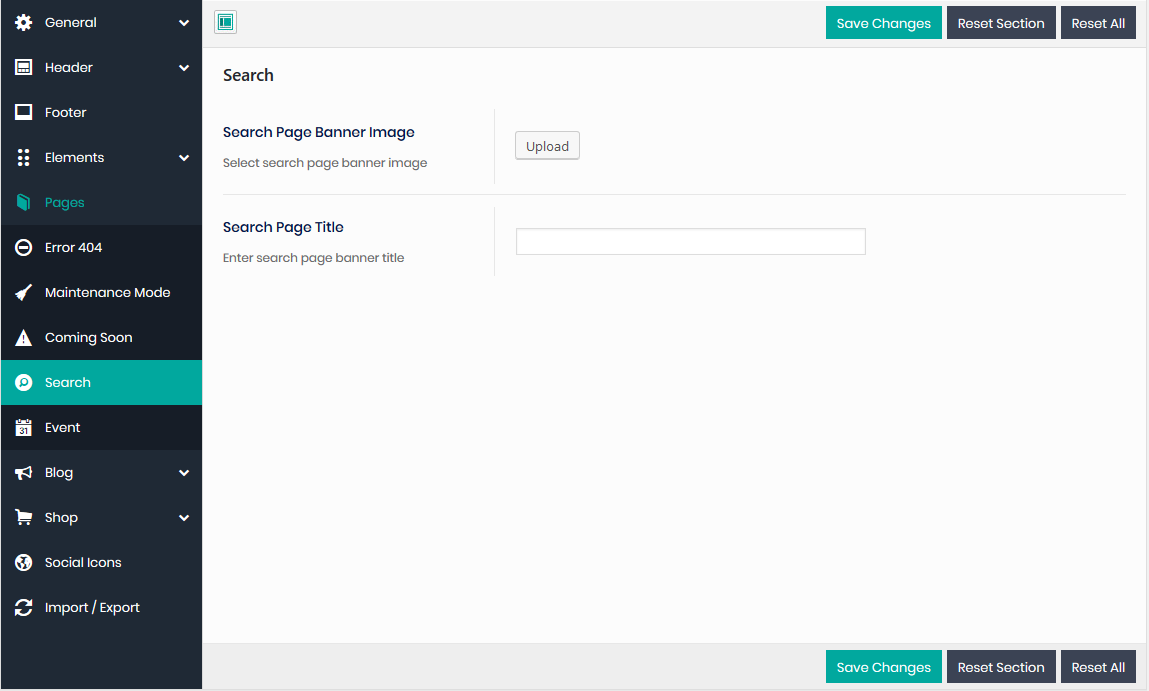
This section contains the following options:
Search Page Banner Image: Here, you can upload custom banner image for short header of search page.
Search Page Title: Here, you can provide custom title for short header.
Event
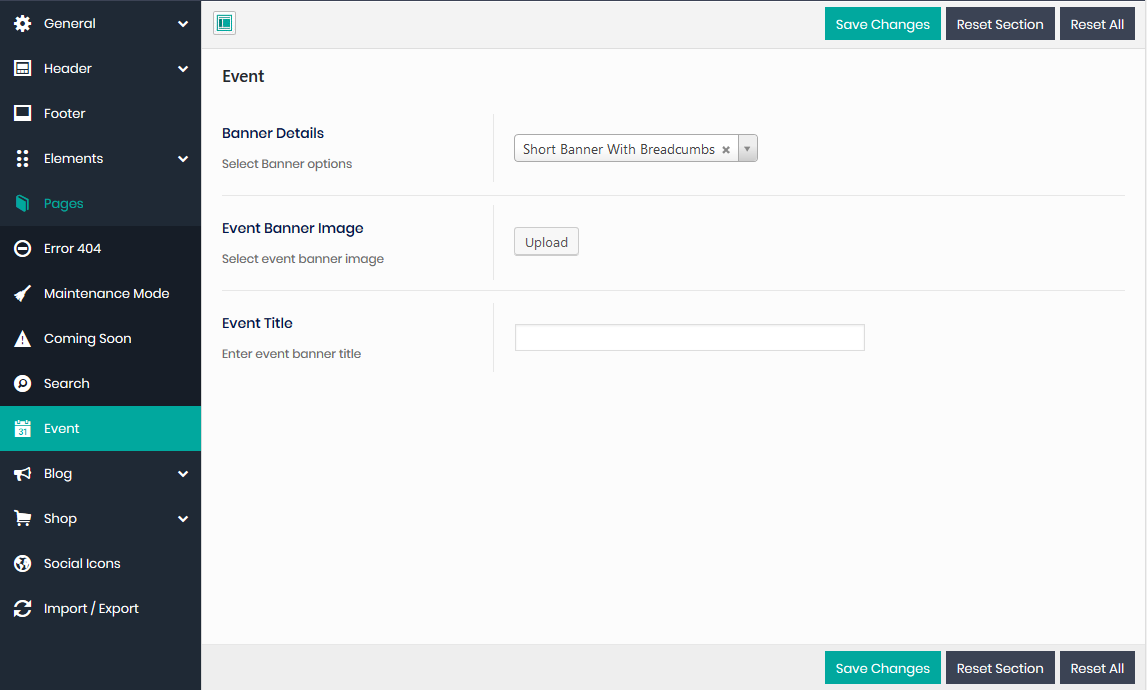
This section contains the following options:
Banner Details: Here, you can select style for the 'Short Header' of Event and Event Details page. 'Short Banner With Breadcumbs' is the default option
Event Banner Image: Here, you can upload custom banner image for short header of Event and Event Details page.
Event Title: Here, you can provide custom title for short header of Event and Event Details page.
Blog Layout
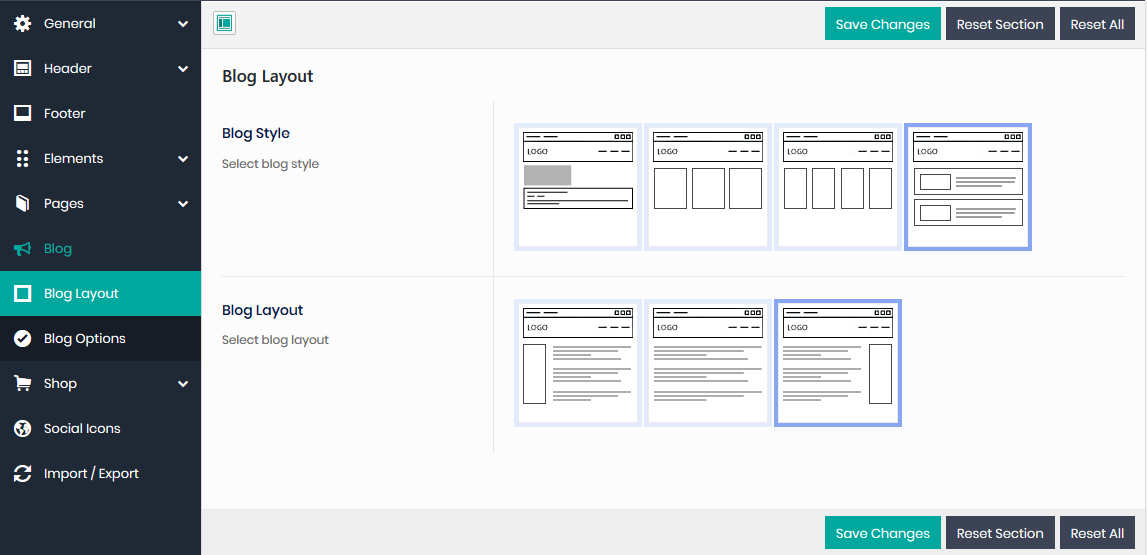
This section contains the following options:
Blog Style: You will get 4 different blog styles that will show on Blog page(First one is default). You can select any of them.
Blog Layout: You will get 3 different styles of ‘Blog Layout’ i.e; Sidebar (Left Sidebar, No Sidebar and Right Sidebar). You can select any of them.
You can manage your ‘Blog Sidebar’ by navigating to “Appearance > Widgets”.
Blog Options
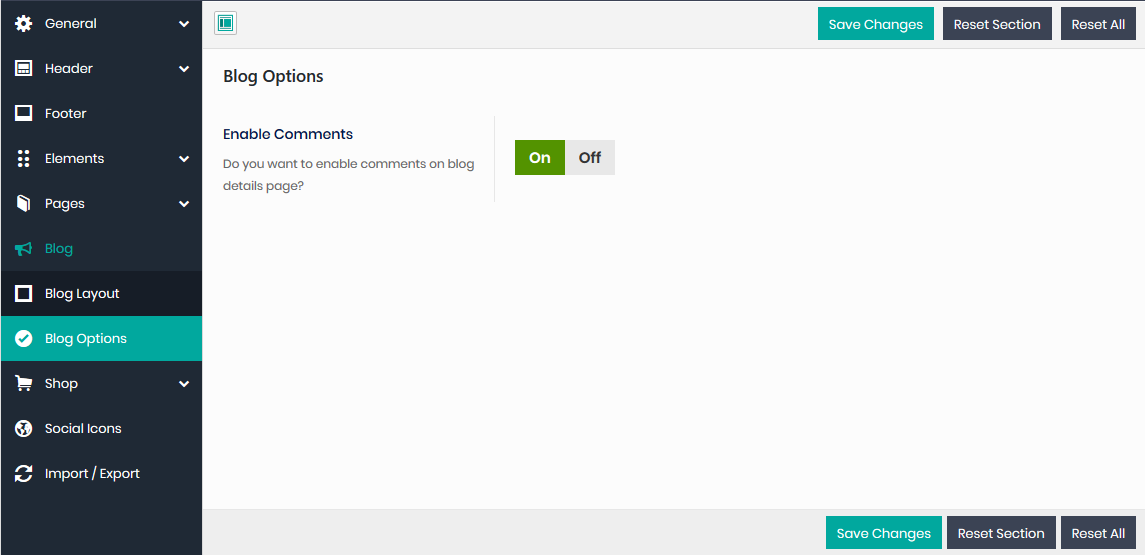
Here, you can choose if you want to enable ‘Comments’ or not in ‘blog details’ page.
Shop
Product Listing
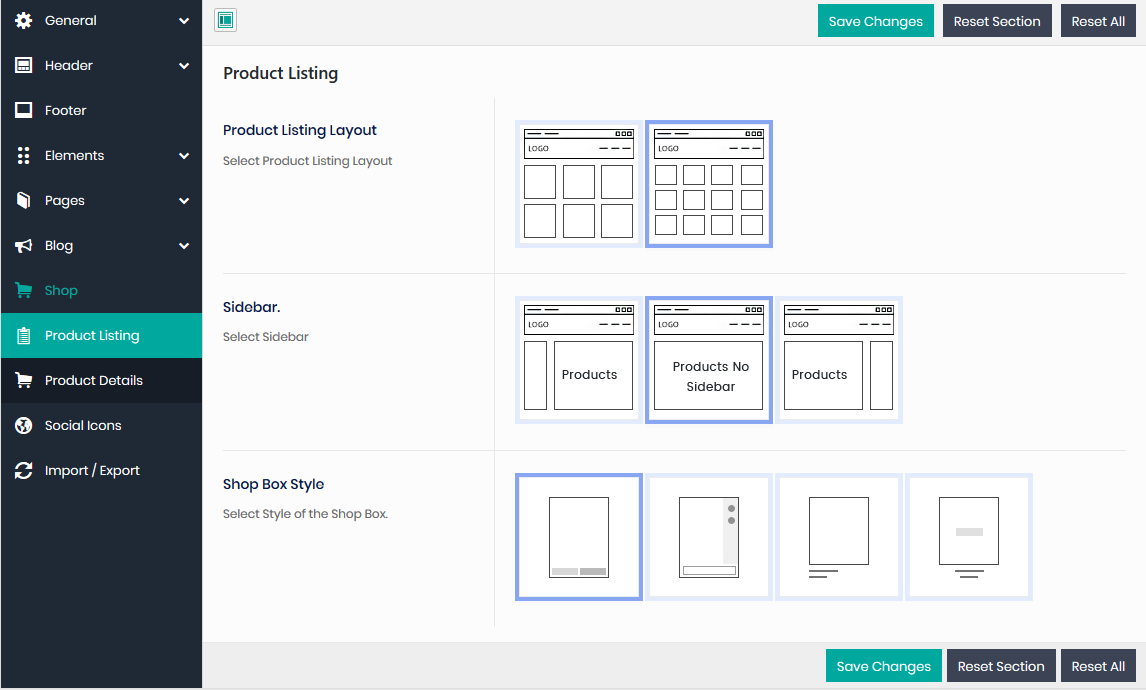
Product Listing Layout: You will get 2 different styles of ‘Product Listing’ which will show on ‘Shop’ page. You can select any of them.
Sidebar: You will get 3 different styles of ‘Sidebar’ i.e; Left Sidebar, No Sidebar and Right Sidebar for ‘Shop’ page. You can select any of them.
Shop Box Style: You will get different styles of Product boxes. You can select any of them.
Product Details
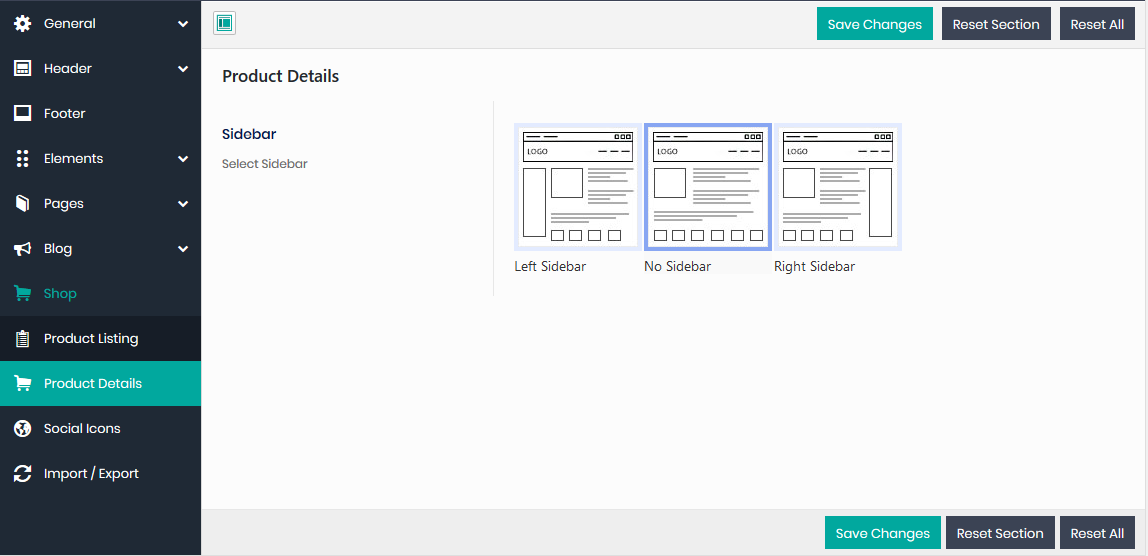
You will get 3 different styles of ‘Sidebar’ i.e; Left Sidebar, No Sidebar and Right Sidebar for ‘Shop Details’ page. You can select any of them.
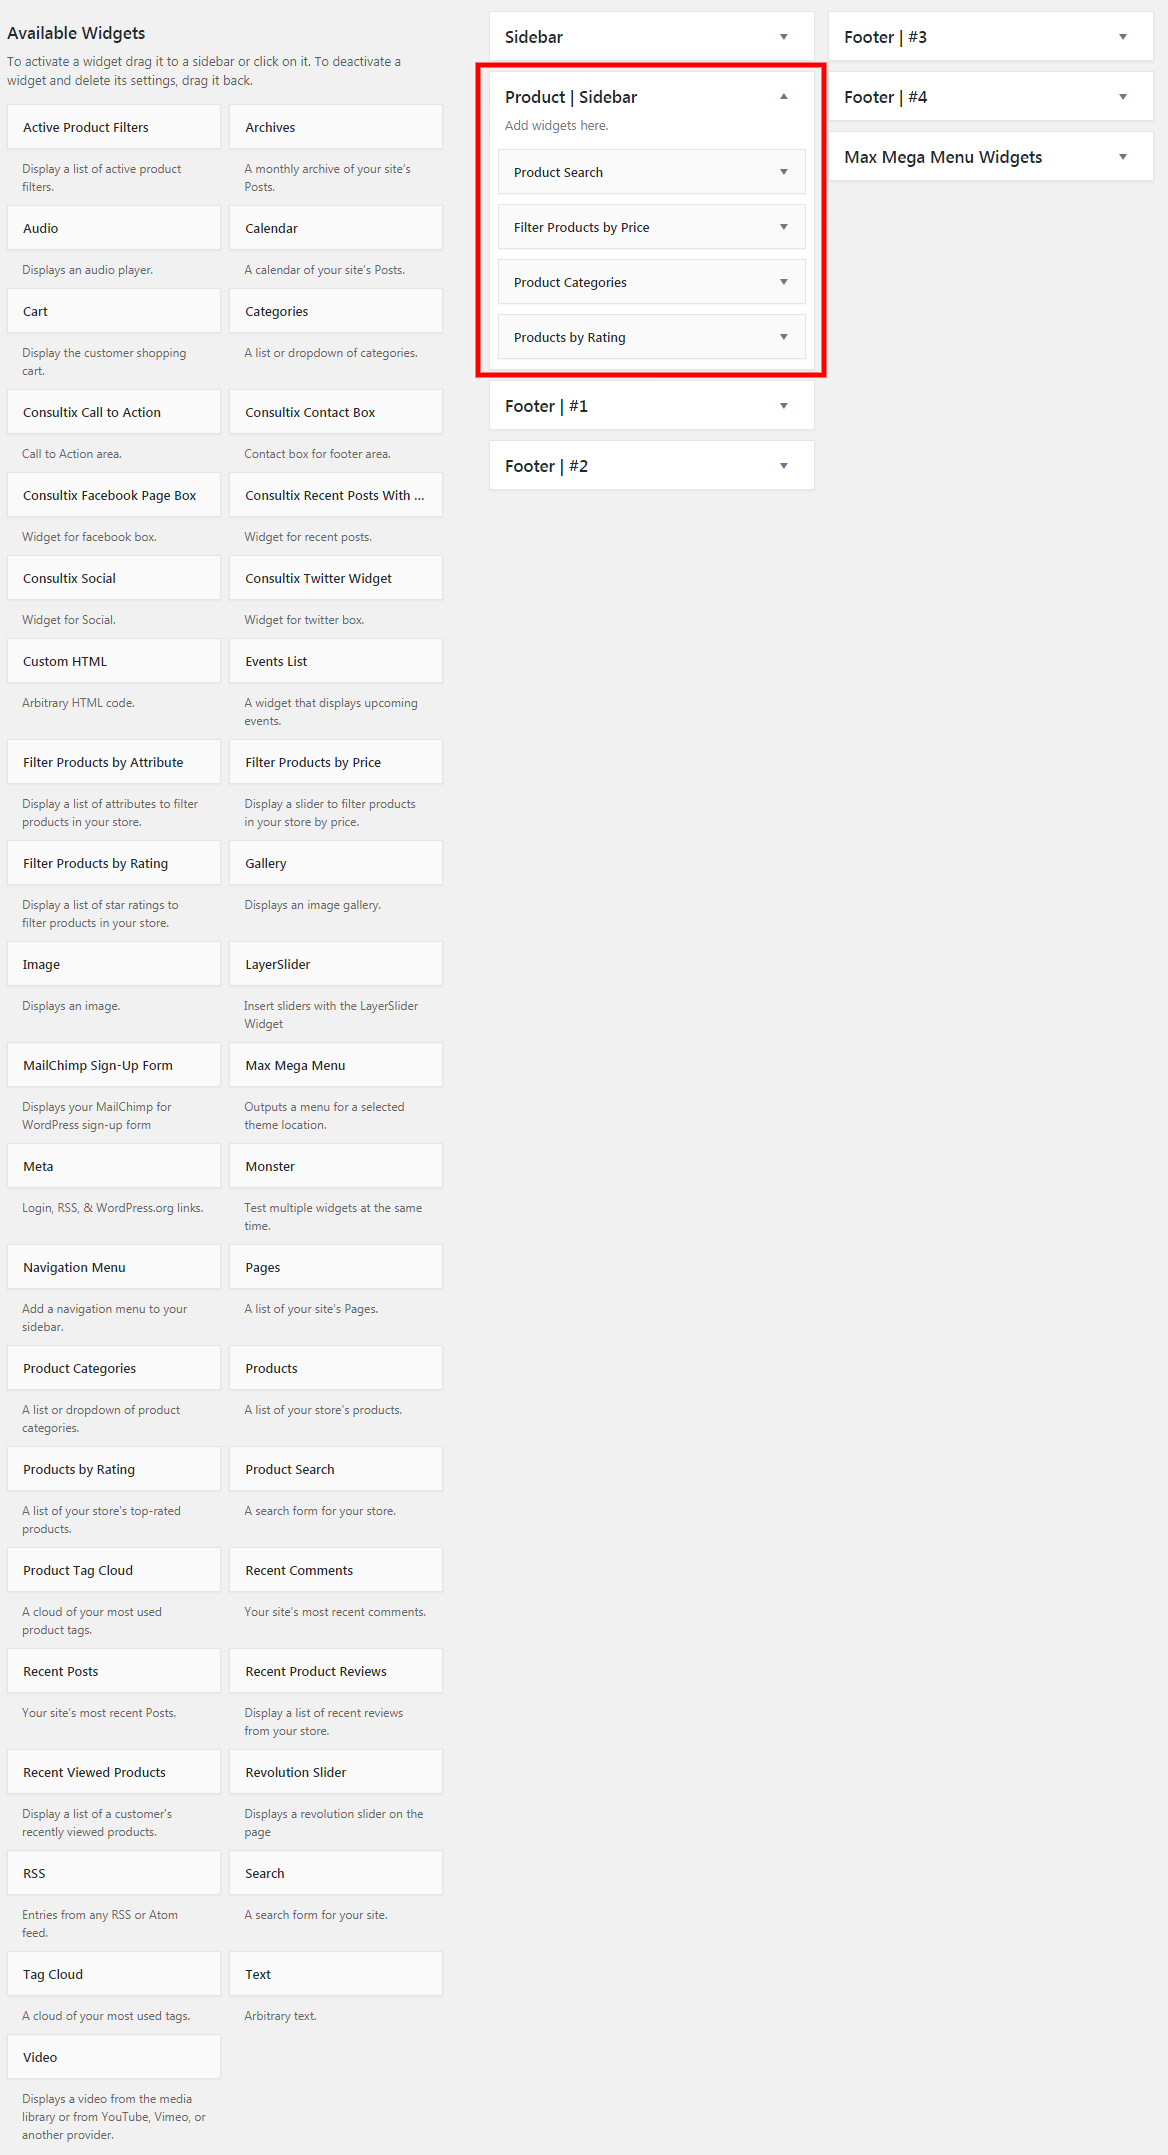
For both ‘Shop’ page and ‘Shop Details’ page, same sidebar is visible. So, you can manage the sidebar in both the places by managing ‘Product | Sidebar’ from “Appearance > Widgets”.
Social Icons
![]()
Here, you can add all your social links. If you leave any social link blank, then that social icon will not show on the site.
Choose ‘On’, if you want to open your social link on a new window, on ‘Open links in new window’ field.
Import/Export
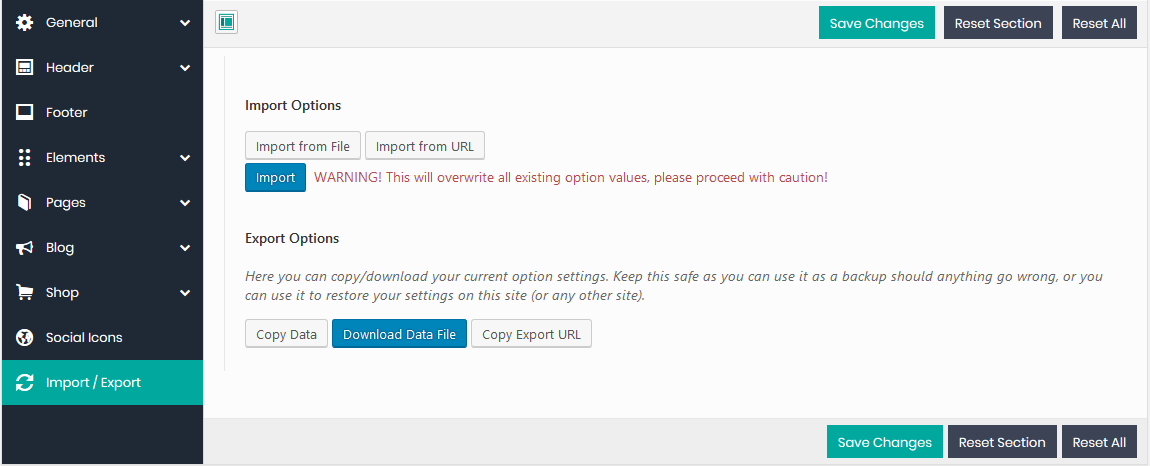
You can Import/Export all the values of ‘Theme Options’ from here. In any case, if you want to restore/download the entire "Theme Options”, you can do it easily from the Import/Export section.
You can copy/download your current ‘option settings’ from ‘Export Options’ and can import this on ‘Import Options’.
Elements
While creating a page with “WpBakery Page Builder”, you will view ‘Radiant Elements’. This is the most important feature of your site as you can add almost all sections from here. You can add any element from ‘Radiant Elements’ in the page, Blog post, Team and Portfolio. You can add a section by clicking on that specific element of ‘Radiant Elements’. For example, if you want to add a ‘Blog’ section in your page, then you need to click on the ‘Blog’ element, for automatically creating that particular section.
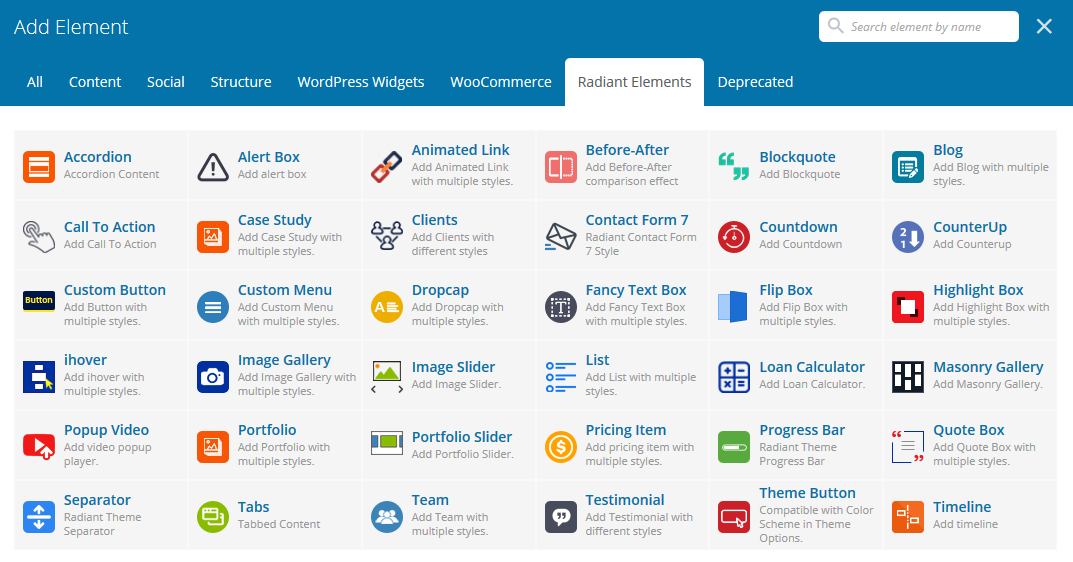
By following this tutorial you can easily manage all of your elements.
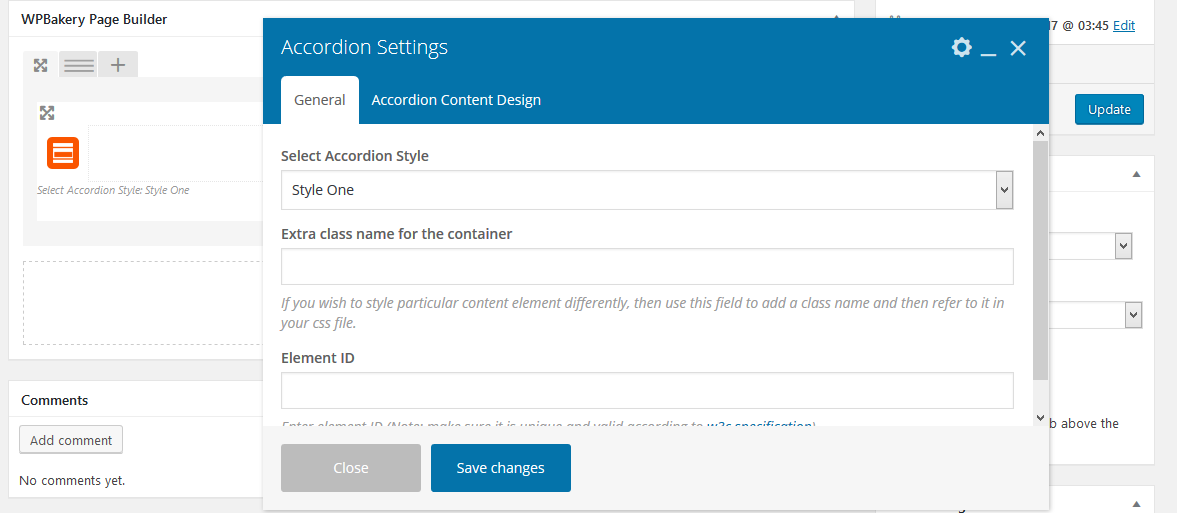
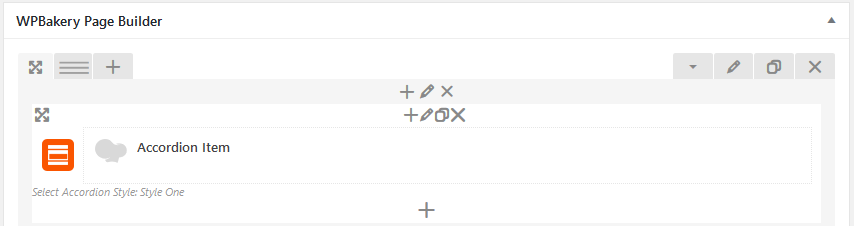
Accordion
From ‘Accordion’ element, you can add an accordion or toggle with title and description.
Follow the steps to add an Accordion element---
- Click on ‘Accordion’. Select any Style out of different styles. If you require, you can add 2 specific fields, viz; ‘Extra class’ , ‘Element ID’.
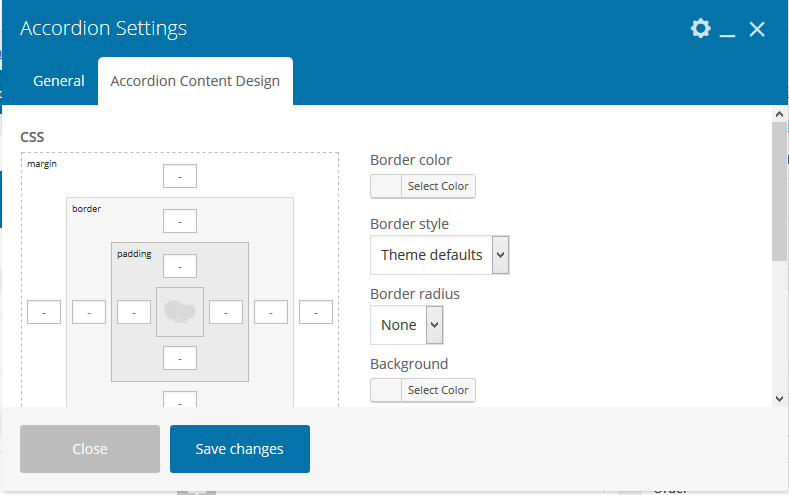
- You can add your own CSS styles in the Tab - ‘Accordion Content Design’.
- After providing all the details, click on ‘Save Changes’ to save. Now, to add accordion items, click on “plus(+)” sign.
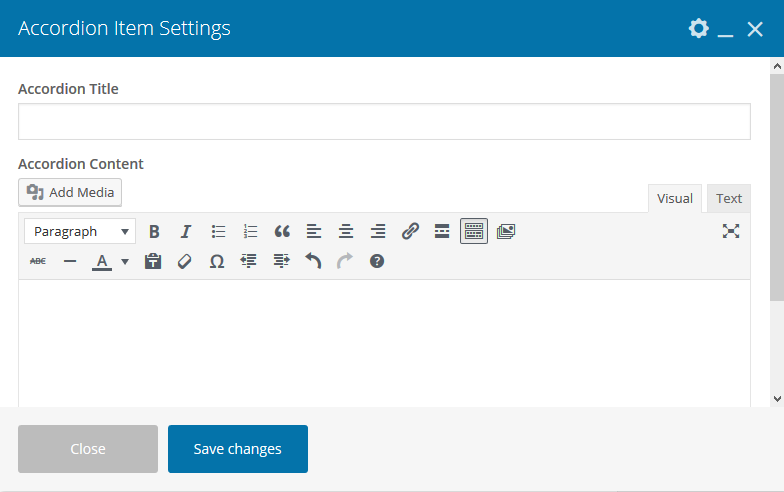
- To add an item, click on ‘Accordion Item’.
- Provide title and content - (You can use HTML tags) for that particular item.
- To add more items, you can go accordingly with the same process or you can add additional items by duplicating that existing item.


Alert Box
By using ‘Alert Box’ element, you can add an alert box with content.
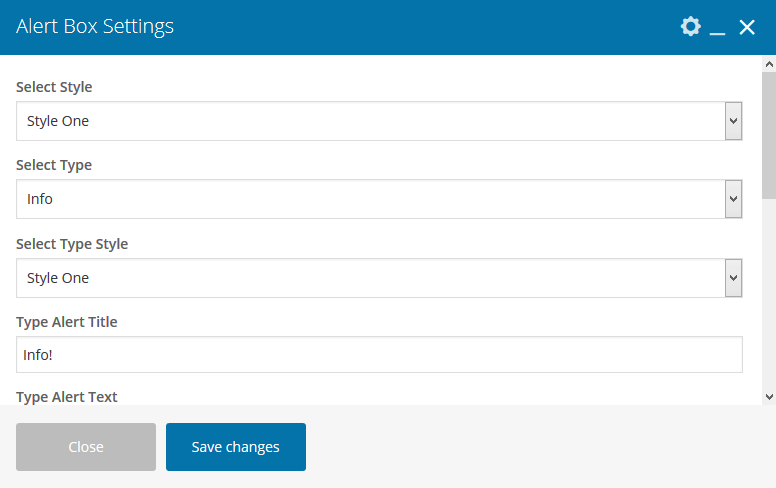
Attributes:
- Select Style: Select any Style out of different styles.
- Select Type: Select which type of alert you want to display.
- Select Type Style: Choose the style of the alert type, right here.
- Type Alert Title: Provide the title of the alert, right here.
- Type Alert Text: Provide the content of the alert, right here.
- Animation Style: A myriad of animation styles are available for the button. You can select any one of them or just leave without animation.
- Extra class name for the container: You can put an extra CSS class name, if required.
- Element ID: You can put an Element ID, if required.
Animated Link
By using ‘Animated Link’ element, you can create Animated Link. Here, you will get 2 tabs: viz; i) General ii) Design Options

Attributes for General:
- Animated Link Style: Select any Animated Link Style out of different styles.
- Link: Provide button url, right here.
- Animation Style: A myriad of animation styles are available for the button. You can select any one of them or just leave without animation.
- Extra class name for the container: You can put an extra CSS class name, if required.
- Element ID: You can put an Element ID, if required.

Design Options:
Here you can change the CSS style of the whole Animated Link.
Before-After
By using ‘Before-After’ element, you can add a section with ‘before image’ and ‘after image’.
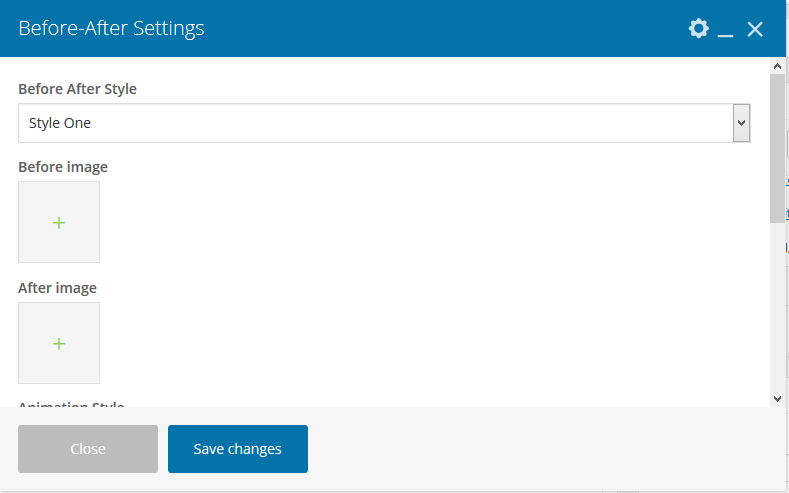
Attributes:
- Before After Style: Select any Style out of different styles.
- Before image: You need to provide the ‘Before Image’, right here.
- After image: You need to provide the ‘After Image’, right here.
- Animation Style: A myriad of animation styles are available for the ‘before-after’ box. You can select any one of them or just leave without any animation.
- Extra class name for the container: You can put an extra CSS class name, if required.
- Element ID: You can put an Element ID, if required.
Blockquote
By using ‘Blockquote’ element, you can create a Blockquote box with content and a Blockquote icon. Here, you will get 2 tabs: viz; i) General ii) Typography & Color.
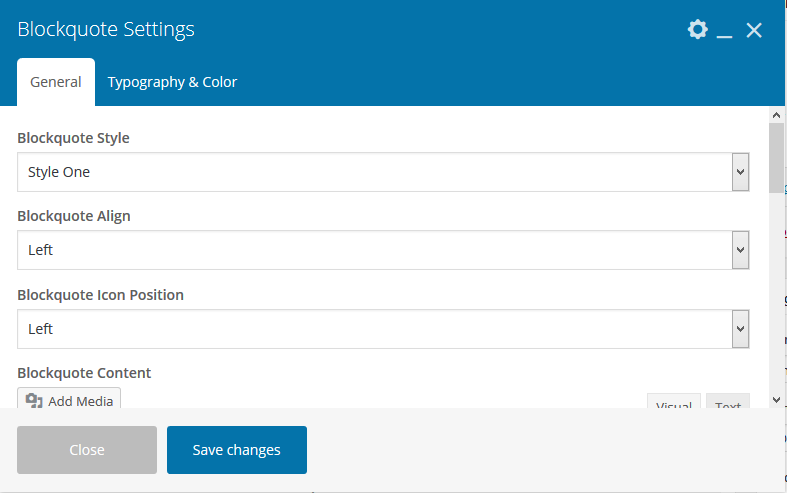
Attributes for General:
- Blockquote Style: As there is only one style by-default, you don’t have to select any.
- Blockquote Align: Choose text alignment.
- Blockquote Icon Position: Choose position of the blockquote icon.
- Blockquote Content: You can add your content here. You can use HTML tags.
- Animation Style: A myriad of animation styles are available for the ‘Blockquote’ box. You can select any one of them or just leave without animation.
- Extra class name for the container: You can put an extra CSS class name, if required.
- Element ID: You can put an Element ID, if required.
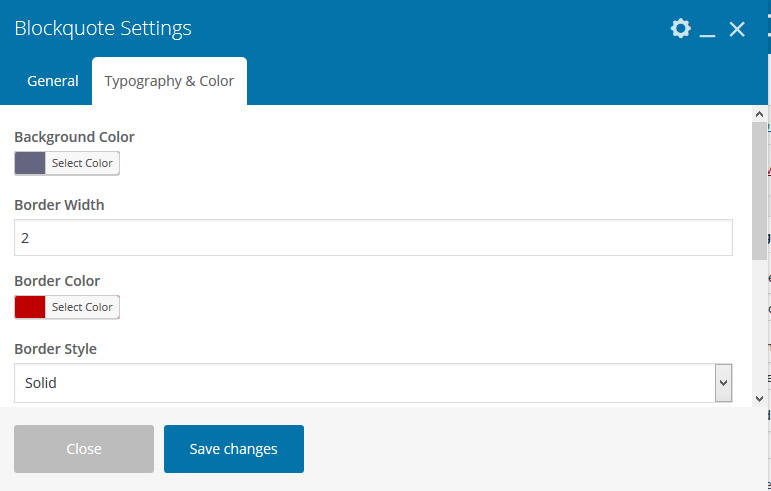
Attributes for Typography & Color:
- Background Color: Specify Background Color of blockquote box.
- Border Width: Provide Border Width of blockquote box.
- Border Color: Specify Border Color of blockquote box.
- Border Style: Select Border Style of blockquote box.
- Border Radius: Select Border Radius of blockquote box.
- Color: Choose text color.
- Icon Color: Specify blockquote icon color.
Blog
By using ‘Blog’ element, you can add a blog section with blog posts.
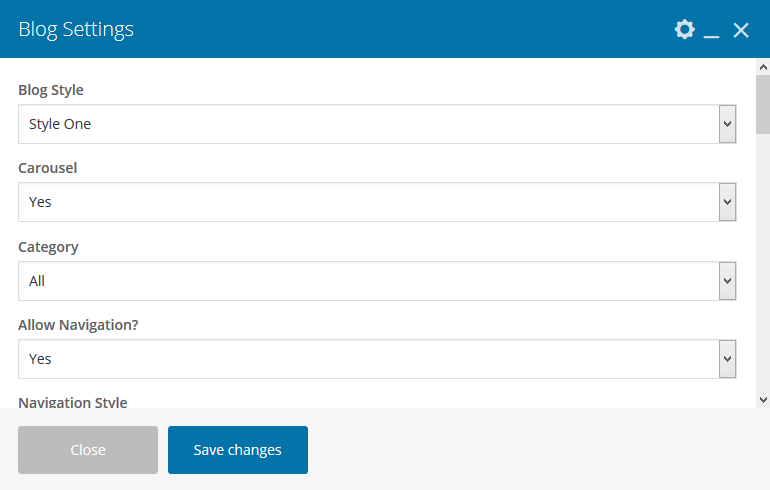
Attributes:
- Blog Style: Select any Style out of different styles.
- Carousel: Choose, whether or not, you want to activate carousel. If you choose ‘No’, then the options, viz; ‘Allow Navigation?’, ‘Navigation Style’, ‘Allow Dots for Navigation?’, ‘Navigation Dot Style’, ‘Allow Loop’, ‘Allow Autoplay?’ and ‘Autoplay Timeout (in milliseconds)’ will be deactivated and if you choose “Yes”, then these options would stay and the Carousel would operate/function properly.
i) Allow Navigation?: Choose, if you want to show or hide navigation. If you choose ‘No’, then ‘Navigation Style’ option will be deactivated and if you choose “Yes”, then this option would stay and the navigation would operate/function properly.
ii) Navigation Style: Choose from navigation styles for showing different styles for arrow.
iii) Allow Dots for Navigation? : Choose, if you want to show dots for navigation. If you choose ‘No’, then the ‘Navigation Dot Style’ option will be deactivated and if you choose “Yes”, then this option would stay and the dots for navigation would operate/function properly.
iv) Navigation Dot Style: Choose style for showing ‘Navigation Dot Style’.
v) Allow Loop: Choose, if you want to enable the loop or not. If you have 5 posts, and if you choose ‘No’, the loop will stop after showing those 5 specific posts and if you select “Yes”, the loop will continue to run.
vi) Allow Autoplay?: Choose, if you want to autoplay your carousel or not. If you choose ‘No’, then ‘Autoplay Timeout (in seconds)’ option will be deactivated and if you choose “Yes”, then this option would stay and the Autoplay would operate/function properly.
vii) Autoplay Timeout (in milliseconds): Specify the number of milliseconds for an autoplay timeout, i.e: the duration after which the scroll will start.
- Category: If you want to display posts for a specific category, then choose that particular category or choose ‘All’ for showing posts for all categories.
- Order: Choose order for showing posts, i.e: Ascending or Descending.
- Order By: Choose the order of Posts.
- Count: Specify the number of posts you wish to show.
- Number of Posts on Desktop: Specify the number of posts you wish to show in a single row for the Desktop version.
- Number of Posts on Tab: Specify the number of posts you wish to show in a single row for the Tab version.
- Number of Posts on Mobile: Specify the number of posts you wish to show in a single row for the Mobile version.
- Extra class name for the container: You can put an extra CSS class name, if required.
- Element ID: You can put an Element ID, if required.
Call To Action
By using ‘Call To Action’ element, you can add a ‘call to action’ section with text and button. Here, you will get 3 tabs: viz; i) General ii) Typography & Color iii) Button Design.
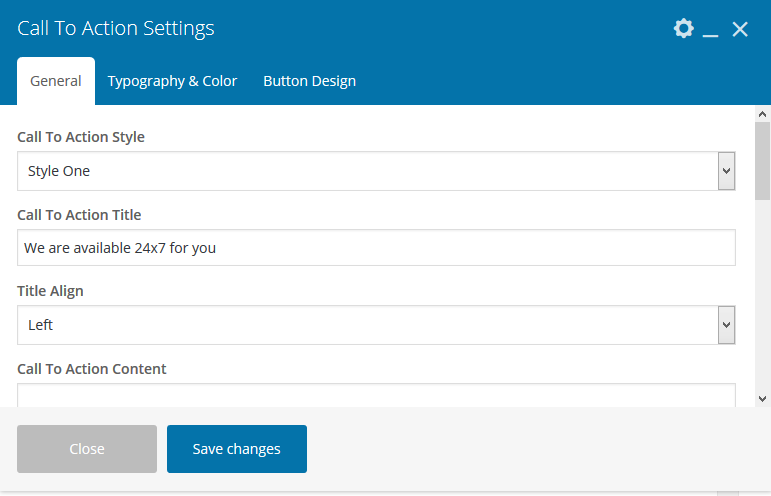
Attributes for General:
- Call To Action Style: Select any Style out of different styles.
- Call To Action Title : You need to provide the title, right here.
- Title Align: Choose alignment of the title, right here.
- Call To Action Content: You need to provide content, right here.
- Call To Action Subtitle: You need to provide the subtitle, right here.
- Subtitle Align: You need to choose alignment of the subtitle, right here.
- Button Title: You need to provide the button title, right here.
- Button Link: You need to provide the button link, right here.
- Extra class name for the container: You can put an extra CSS class name, if required.
- Element ID: You can put an Element ID, if required.
Typography & Color:
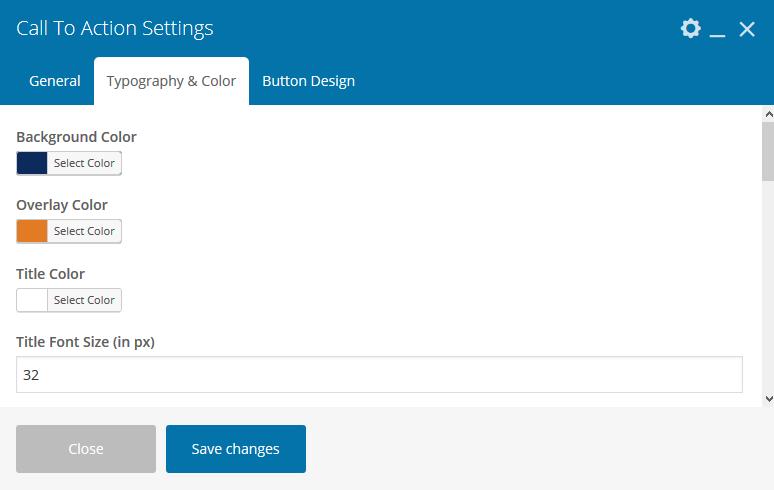
Here, you can change Background Color of call to action box, Overlay Color of call to action box, Title Color, Title Font Size (in px), Title Line Height (in px), Content Color, Content Font Size (in px), Content Line Height (in px), Subtitle Color, Subtitle Font Size (in px), Subtitle Line Height (in px), Button Title Color, Button Title Hover Color, Button Background Hover Color, Button Font Size (in px) and Button Font Weight.
Button Design:
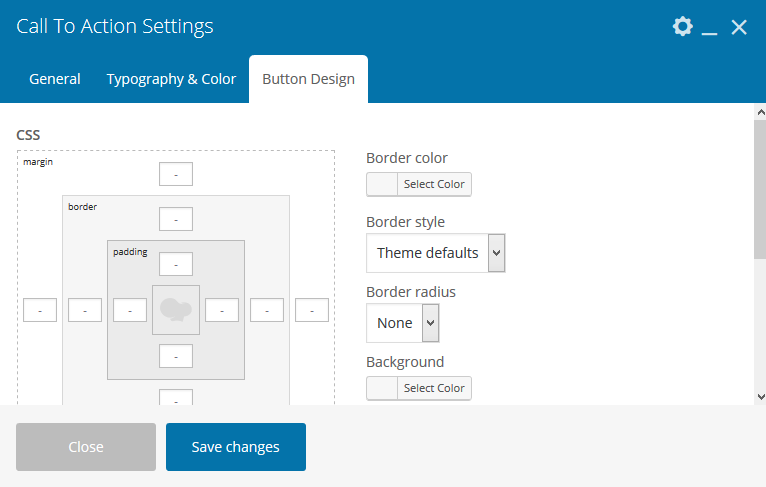
Here you can manage the CSS style of button.
Case Study
By using ‘Case Study’, you can add a Project section with Case Study items. Here, you will get 2 tabs: viz; i) General ii) Looping
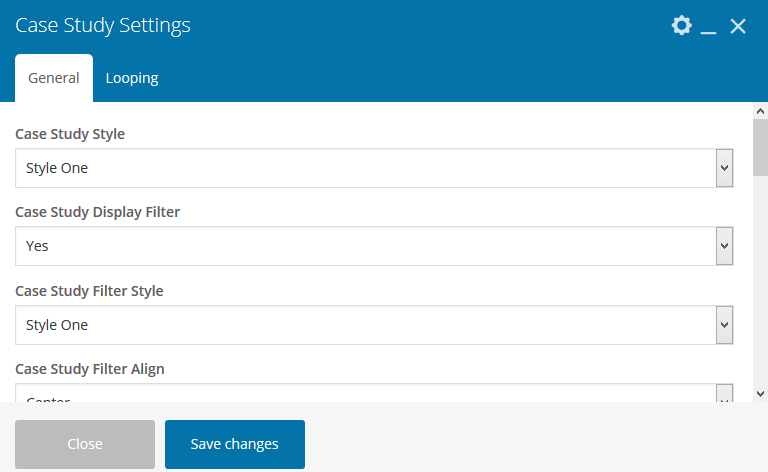
Attributes for General:
- Case Study Style: Select any Style out of different styles.
- Case Study Display Filter: If you want to filter your 'Case Study items' with 'Case Study categories', then check ‘Yes’. After marking as ‘Yes’, these fields will be activated:
If you choose 'No', this field will be activated:
i) Case Study Filter Style: Choose from 6 different styles.
ii) Case Study Filter Align: Choose alignment of the filter.
No of Case Studies: Specify the number of Case Studies you wish to show.
- Case Study Box Align: Choose alignment of the Case Study Box.
- Case Study Box Number: Specify the number of Case Studies you wish to show in a grid.
- Enable Zoom?: If you choose ‘Yes’ here, then Case Studies will not be linked to Case Study details, but instead Case Studies will only “zoom”. If you choose ‘No’, then Case Studies will be linked to their “details page” and this field will be activated:
i) Enable Link Button?: If you want to enable the button on Case Study with a link, then check ‘Yes’. After marking ‘Yes’, you can also provide text in button on ‘Link Button Text’ field.
- Spacing between Case Study Items: Provide spacing between 2 Case Study items.
- Extra class name for the container: You can put an extra CSS class name, if required.
- Element ID: You can put an Element ID, if required.
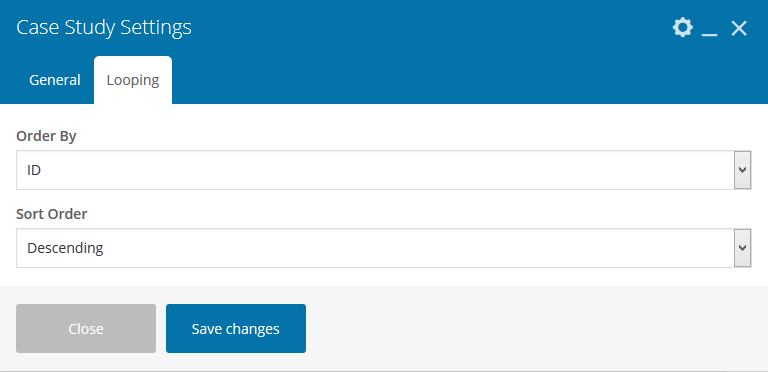
Attributes for Looping:
Here, you can select ‘Order By’ and ‘Sort Order’ of Case Study items.
Clients
By using ‘Clients’ element, you can add a clients section with clients items.
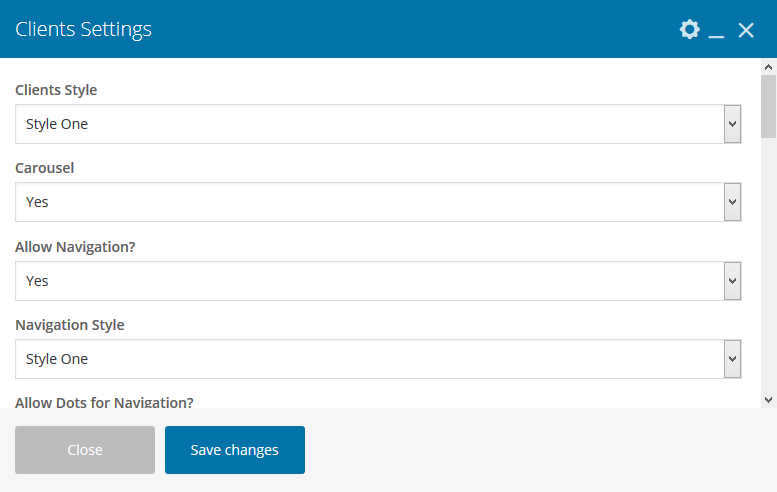
Attributes:
- Clients Style: Select any Style out of different styles.
- Carousel: Choose, whether or not, you want to activate carousel. If you choose ‘No’, then the options, viz; ‘Allow Navigation?’, ‘Navigation Style’, ‘Allow Dots for Navigation?’, ‘Navigation Dot Style’, ‘Allow Loop’, ‘Allow Autoplay?’ and ‘Autoplay Timeout (in milliseconds)’ will be deactivated and if you choose “Yes”, then these options would stay and the Carousel would operate/function properly.
i) Allow Navigation?: Choose, if you want to show or hide navigation. If you choose ‘No’, then ‘Navigation Style’ option will be deactivated and if you choose “Yes”, then this option would stay and the navigation would operate/function properly.
ii) Navigation Style: Choose from navigation styles for showing different styles for arrow. iii) Allow Dots for Navigation? : Choose, if you want to show dots for navigation. If you choose ‘No’, then the ‘Navigation Dot Style’ option will be deactivated and if you choose “Yes”, then this option would stay and the dots for navigation would operate/function properly.
iv) Navigation Dot Style: Choose style for showing ‘Navigation Dot Style’.
v) Allow Loop: Choose, if you want to enable the loop or not. If you have 5 items, and if you choose ‘No’, the loop will stop after showing those 5 specific items and if you select “Yes”, the loop will continue to run.
vi) Allow Autoplay?: Choose, if you want to autoplay your carousel or not. If you choose ‘No’, then ‘Autoplay Timeout (in seconds)’ option will be deactivated and if you choose “Yes”, then this option would stay and the Autoplay would operate/function properly.
vii) Autoplay Timeout (in milliseconds): Specify the time in milliseconds for an autoplay timeout, i.e: the duration after which the scroll will start.
- Order: Choose order for showing clients items, i.e: Ascending or Descending.
- Order By: Choose the order of clients items.
- Count: Specify the number of clients items you wish to show.
- Number of Posts on Desktop: Specify the number of clients items you wish to show in a single row for the Desktop version.
- Number of Posts on Tab: Specify the number of clients items you wish to show in a single row for the Tab version.
- Number of Posts on Mobile: Specify the number of clients items you wish to show in a single row for the Mobile version.
- Add Animation?: A myriad of animation styles are available for the team items. You can select any one of them or just leave without animation.
- Extra class name for the container: You can put an extra CSS class name, if required.
- Element ID: You can put an Element ID, if required.
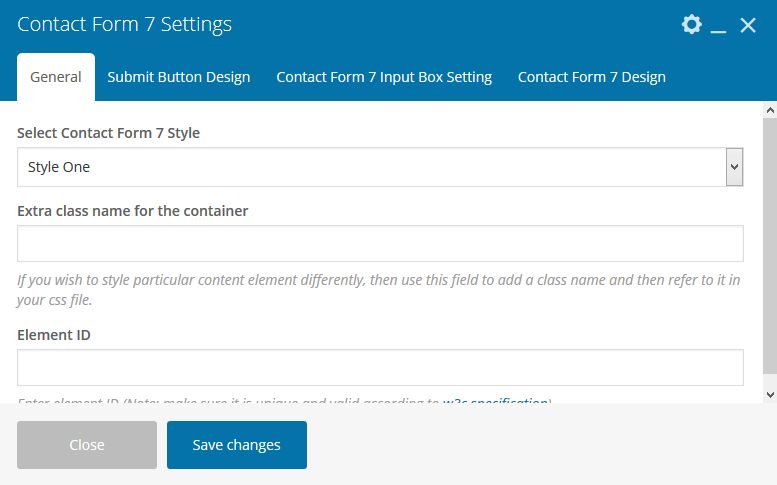
Contact Form 7
By using ‘Contact Form 7’ element, you can add a contact form.
Follow the steps to add a contact form---
- Click on ‘Contact Form 7’. Select any Style out of different styles. If you require, you can add 2 specific fields, viz; ‘Extra class’, ‘Element ID’.
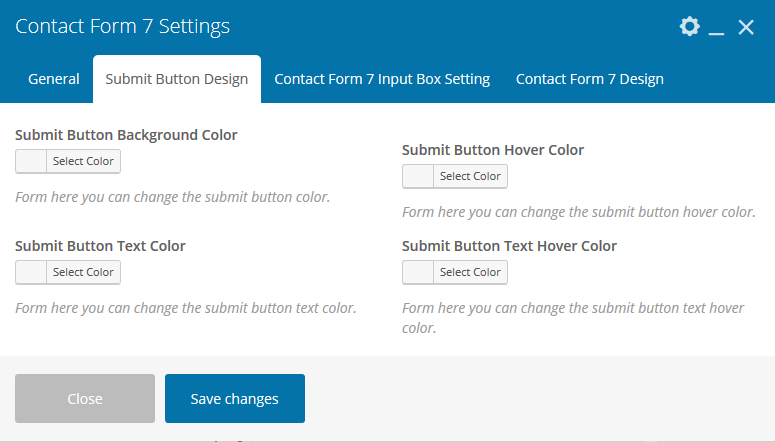
- You can add your own CSS style for ‘submit’ button in the Tab - ‘Submit Button Design’.
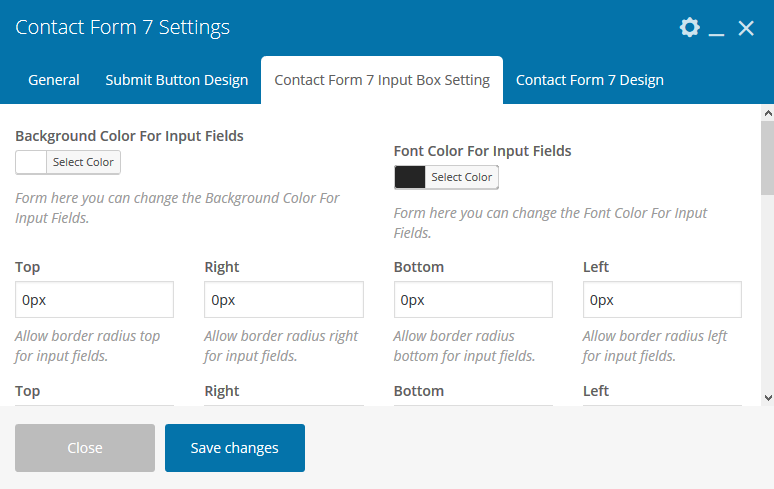
- You can add your own CSS style for ‘contact form 7 input field’ in the Tab - ‘Contact Form 7 Input Box Setting’.
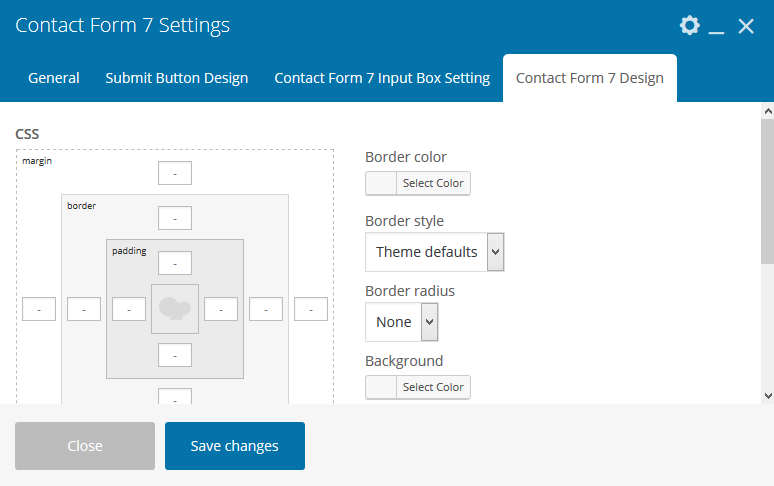
- You can add your own CSS style for ‘contact form 7 box’ in the Tab - ‘Contact Form 7 Design’.
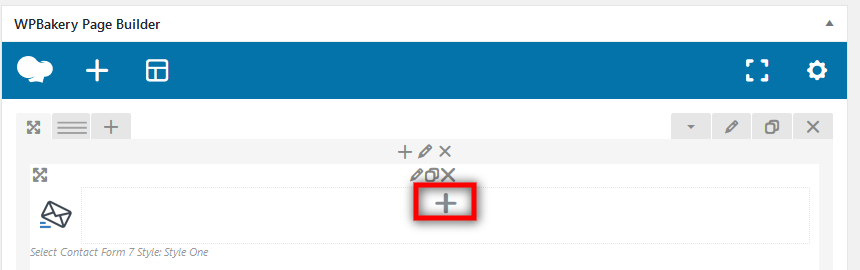
- After providing all the details, click on ‘Save Changes’ to save. Now, to add a contact form, click on “plus(+)” sign.
- To choose a contact form, click on ‘Contact Form 7’.
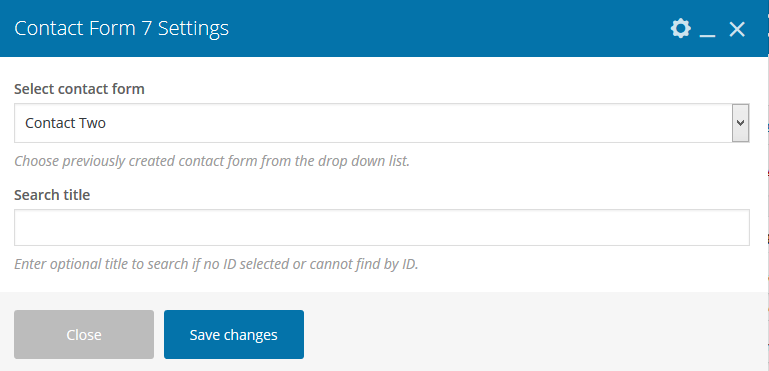
- Select contact form, from ‘Select contact form’ field and if you want a title then provide it on ‘Search title’ field.

Countdown
By using ‘Countdown’ element, you can add a countdown timer.
Attributes:
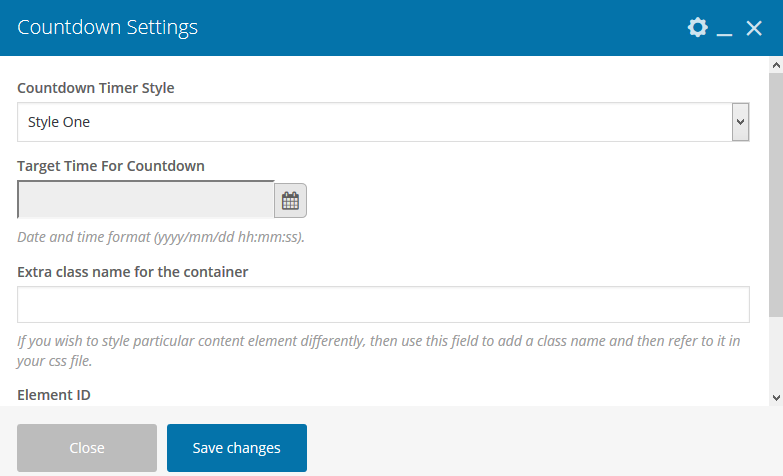
- Countdown Timer Style: As there is only one style by-default, you don’t have to select any.
- Target Time For Countdown: Provide the date and time, right here.
- Extra class name for the container: You can put an an extra CSS class name, if required.
- Element ID: You can put an Element ID, if required.
CounterUp
By using ‘CounterUp’ element, you can add a counter. Here, you will get 2 tabs: viz; i) General ii) Typography

Attributes for General:
- Counterup Style: As there is only one style by-default, you don’t have to select any.
- Counterup Value: Enter the value for counting, in numeric style; right here.
- Counterup Time: Enter the time in milliseconds as to how long the counting will run, right here.
- Counterup Delay: Mention, after how long, counting will start in milliseconds.
- Extra class name for the container: You can put an an extra CSS class name, if required.
- Element ID: You can put an Element ID, if required.
Typography:
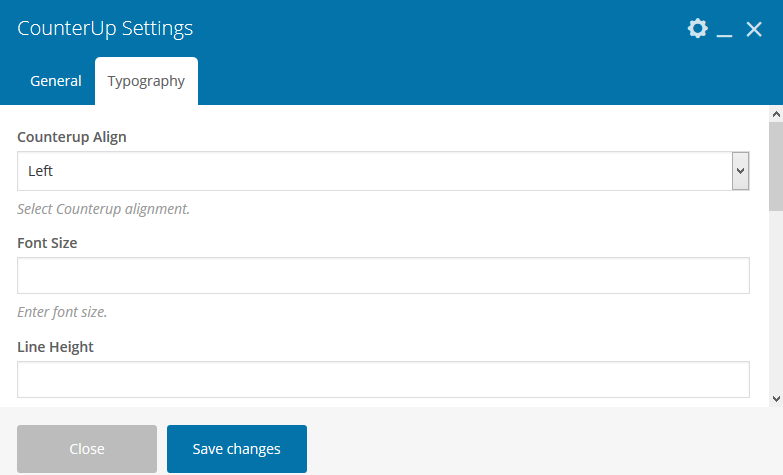
From ‘Typography’, you can change all the CSS style of the counter.
Custom Button
If you want a totally different button, then you can do the same with ‘Custom Button’ element. Here, you will get 4 tabs: viz; i) General ii) Typography iii) Button Design and iv) Button Hover
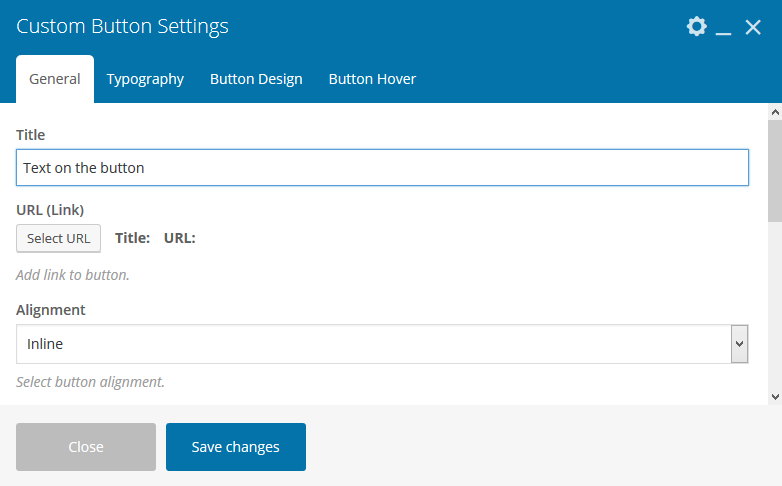
Attributes for General:
- Title: Provide the button title, right here.
- URL (Link): Provide button url, right here.
- Alignment: Choose button alignment, right here.
- Add icon?: By marking ‘Yes’ in the check box, you can add an icon with button.
- Animation Style: A myriad of animation styles are available for the button. You can select any one of them or just leave without animation.
- Extra class name for the container: You can put an extra CSS class name, if required.
- Element ID: You can put an Element ID, if required.

Typography: From ‘Typography’, you can change all the CSS style for the text in the button.
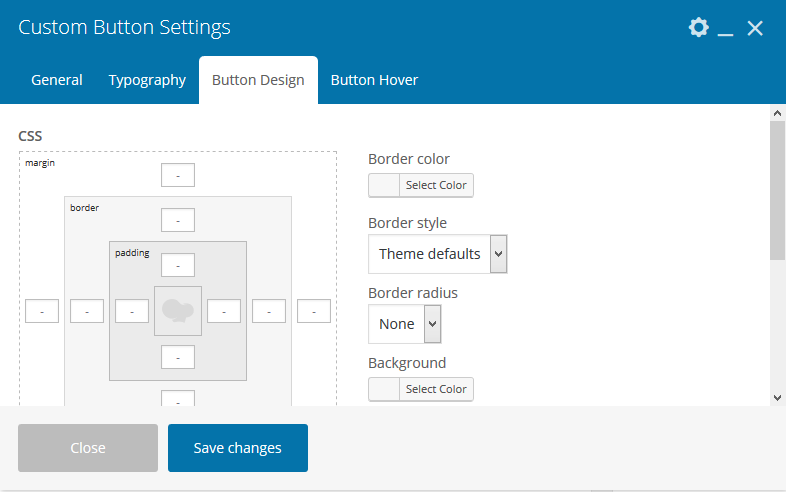
Button Design: From ‘Button Design’, you can change the CSS style of the whole button.

Button Hover: From ‘Button Hover’, you can change the colors of button hover.
Custom Menu
By using ‘Custom Menu’ element, you can add a menu section.
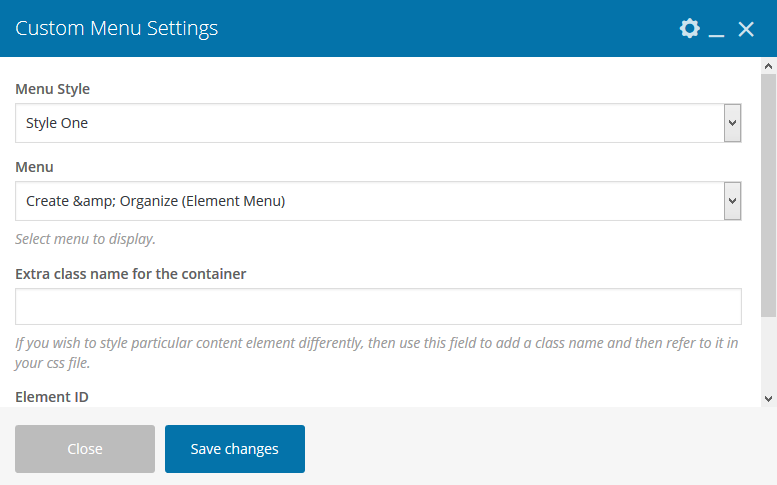
Attributes:
- Menu Style: As there is only one style by-default, you don’t have to select any.
- Menu: Choose menu to display.
- Extra class name for the container: You can put an extra CSS class name, if required.
- Element ID: You can put an Element ID, if required.
Dropcap
By using ‘Dropcap’ element, you can add text with dropcap.
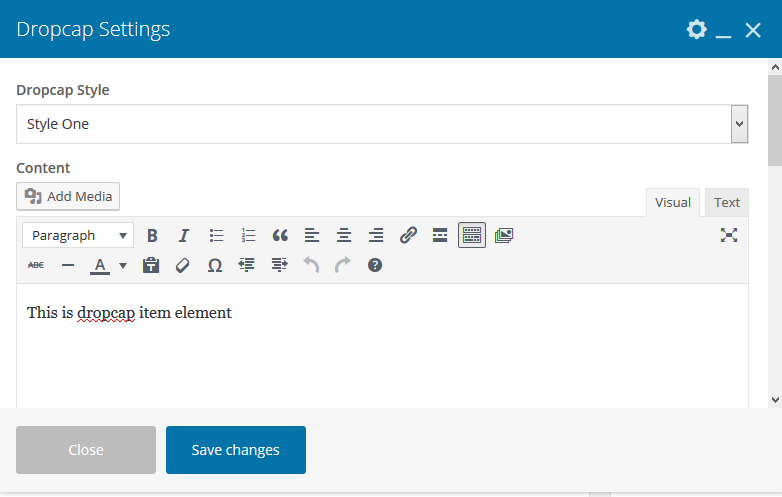
Attributes:
- Dropcap Style: Select any Style out of different styles.
- Content: You can add your content here. You can use HTML tags.
- Dropcaps Direction: Choose direction of dropcap.
- Background Color: Specify Background Color of dropcap.
- Border Color: Choose Border Color of dropcap.
- Text Color: Provide text color, right here.
- Extra class name for the container:You can put an extra CSS class name, if required.
- Element ID:You can put an Element ID, if required.
Fancy Text Box
By using ‘Fancy Text Box’ element, you can add different types of text box. Here, you will get 2 tabs: viz; i) General ii) Fancy Text Box Design
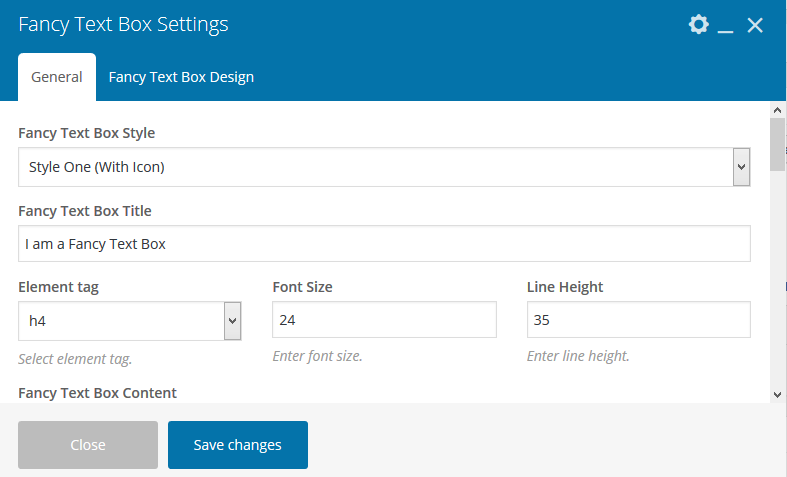
Attributes for General:
- Fancy Text Box Style: Select any Style out of different styles.
- Fancy Text Box Title: Provide title, right here.
- Element tag: You can choose Title Tag, right here.
- Font Size: Provide font size of the title, right here.
- Line Height: Provide line height for the title, right here.
- Fancy Text Box Content : Provide content, right here.
If you have chosen ‘style with Icon’, then you will get these fields--
i) Icon library: Select, what type of icon library you require.
ii) Icon: Select icon from here.
If you have chosen ‘style with image’, then you will get this field--
iii) Add Image: Add image from here.
- Alignment: Select fancy box icon alignment, right here.
- Enable Box Shadow?: Specify box shadow, right here.
- Do You want Button?: If you need button, then check ‘Yes’ and provide button title on ‘Button Text’ field and provide button url on ‘URL (Link)’ field.
- Animation Style: A myriad of animation styles are available for the text box. You can select any one of them or just leave without animation.
- Extra class name for the container:You can put an extra CSS class name, if required.
- Element ID:You can put an Element ID, if required.
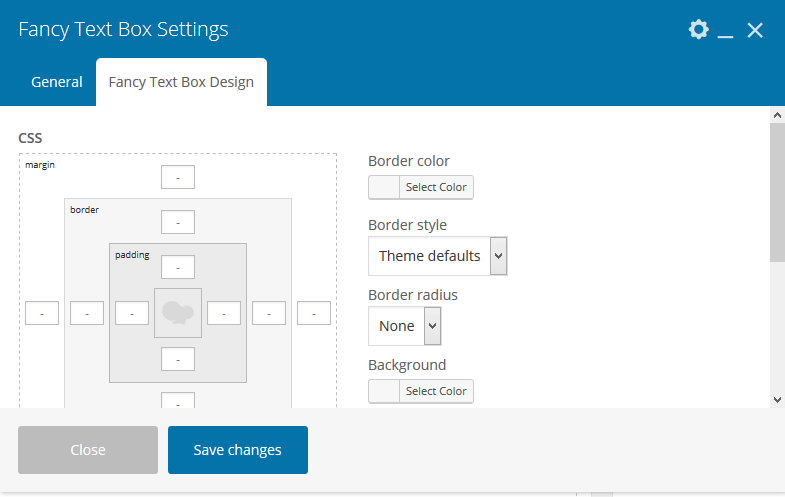
Fancy Text Box Design:
Here you can change the CSS style of the whole text box.
Flip Box
By using ‘Flip Box’ element, you can add different types of flip box. Here, you will get 3 tabs: viz; i) General ii) First Card iii) Second Card
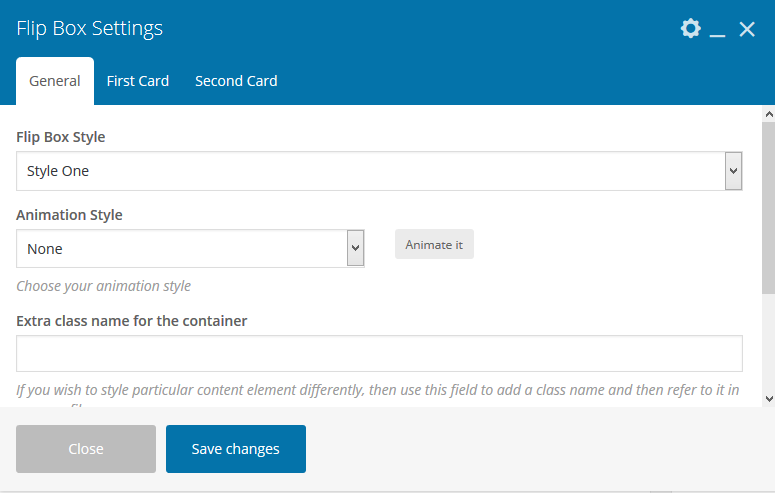
Attributes for General:
- Flip Box Style: As there is only one style by-default, you don’t have to select any.
- Flip Box Axis: Select Axis of the Flip Box.
- Animation Style: A myriad of animation styles are available for the text box. You can select any one of them or just leave without animation.
- Extra class name for the container:You can put an extra CSS class name, if required.
- Element ID:You can put an Element ID, if required.
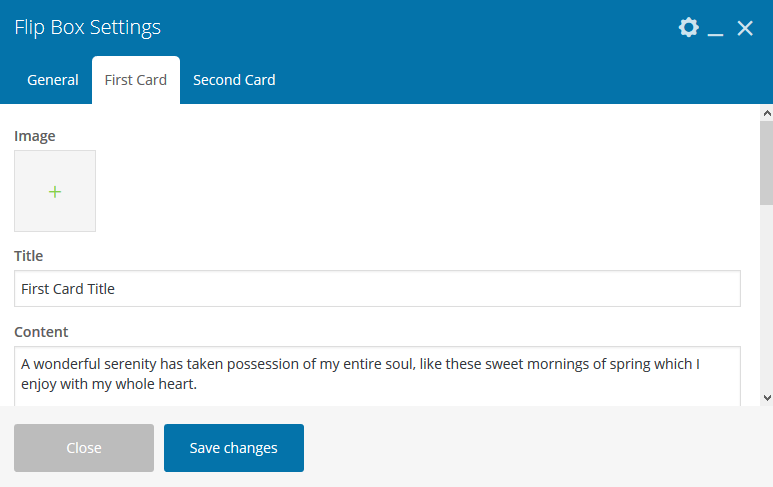
Attributes for First Card:
- Image: Upload image for First Cart, from this field.
- Title: Provide title, right here.
- Content: Provide Content, right here.
- Customizer: Here you can change the CSS style of the whole flip box for First Card.
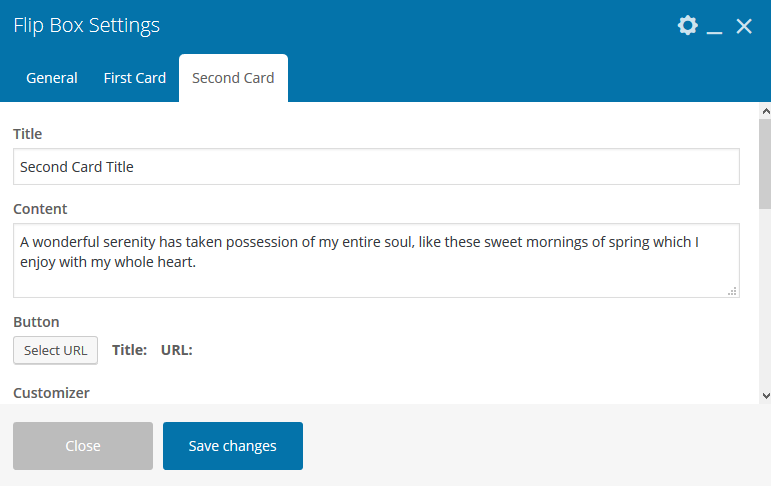
Attributes for Second Card:
- Title: Provide title, right here.
- Content: Provide Content, right here.
- Button: Provide Button details, right here.
- Customizer: Here you can change the CSS style of the whole flip box for Second Card.
Highlight Box
By using ‘Highlight Box’ element, you can add different types of Highlight Box. Here, you will get 2 tabs: viz; i) General ii) Design Options
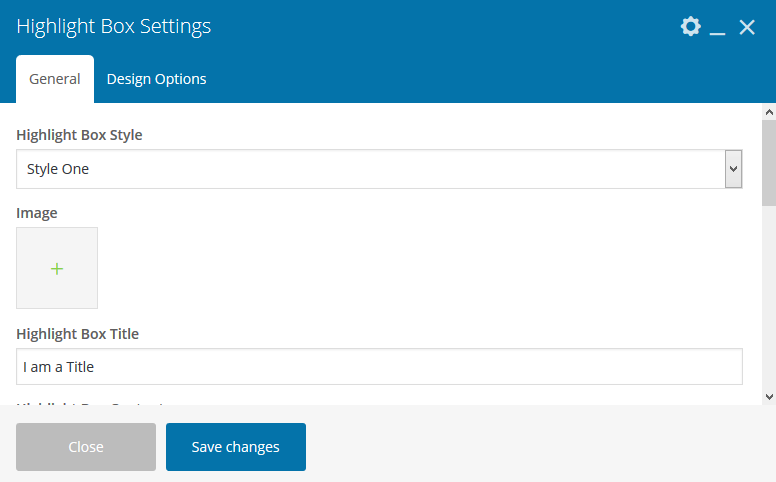
Attributes for General:
- Highlight Box Style: Select any Style out of different styles.
- Image: Upload image for box, from this field.
- Highlight Box Title: Provide title, right here.
- Highlight Box Content: Provide Content, right here.
- Highlight Box Link: Provide button url, right here.
- Animation Style: A myriad of animation styles are available for the text box. You can select any one of them or just leave without animation.
- Extra class name for the container:You can put an extra CSS class name, if required.
- Element ID:You can put an Element ID, if required.

Design Options:
Here you can change the CSS style of the whole highlight box.
ihover
By using ‘ihover’ element, you can add different types of ihover Box with content. Here, you will get 2 tabs: viz; i) General ii) Design Options
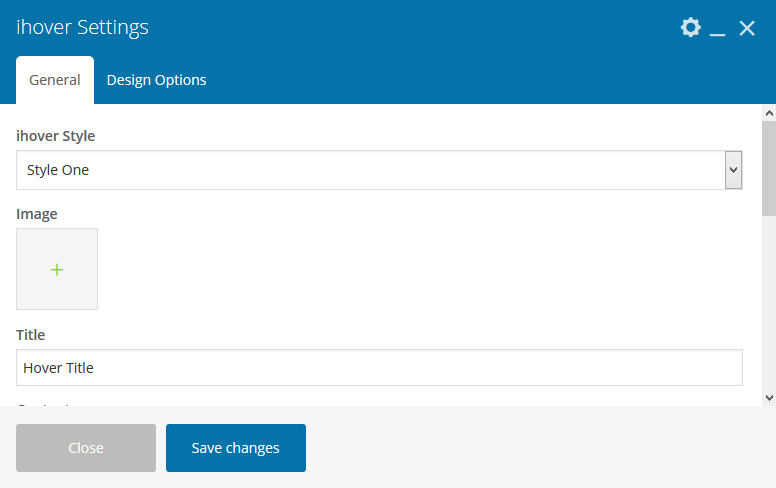
Attributes for General:
- ihover Style: Select any Style out of different styles.
- Image: Upload image for box, from this field.
- Title: Provide title, right here.
- Content: Provide Content, right here.
- Animation Style: A myriad of animation styles are available for the text box. You can select any one of them or just leave without animation.
- Extra class name for the container:You can put an extra CSS class name, if required.
- Element ID:You can put an Element ID, if required.
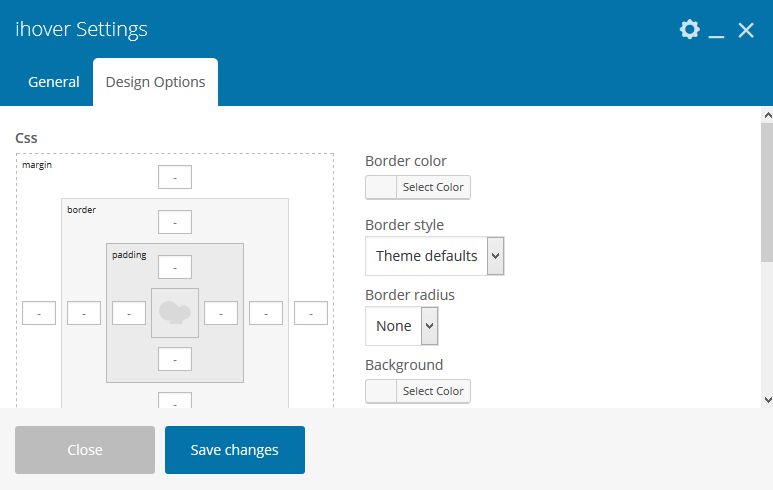
Design Options:
Here you can change the CSS style of the whole highlight box.
Image Gallery
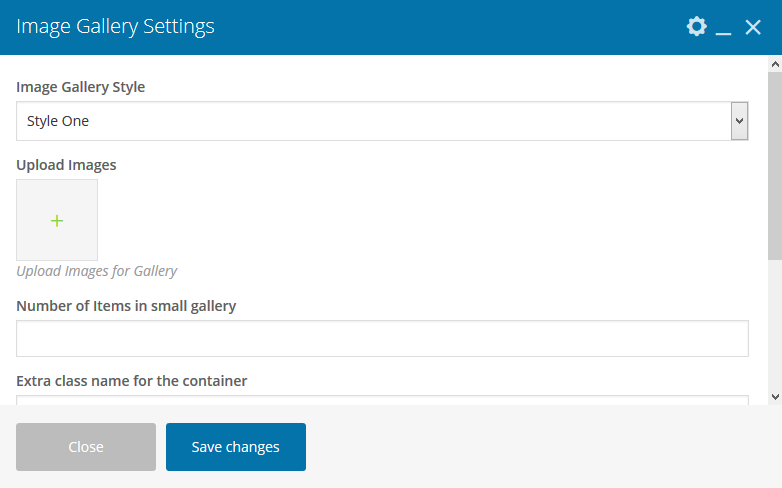
Attributes:
- Image Gallery Style: As there is only one style by-default, you don’t have to select any.
- Upload Images: Upload image for gallery, from this field.
- Number of Items in small gallery: Specify the number of images you wish to show in small gallery as ‘thumbnail’.
- Extra class name for the container: You can put an extra CSS class name, if required.
- Element ID:You can put an Element ID, if required.
Image Slider
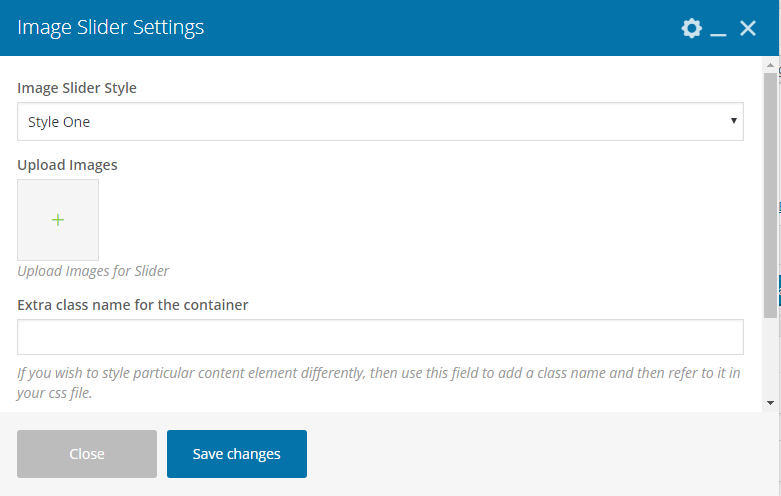
Attributes:
- Image Slider Style: As there is only one style by-default, you don’t have to select any.
- Upload Images: Upload image for slider, from this field.
- Extra class name for the container: You can put an extra CSS class name, if required.
- Element ID:You can put an Element ID, if required.
List
By using ‘List’ element, you can add a listbox with different styles. Here, you will get 2 tabs: viz; i) General ii) Design Options
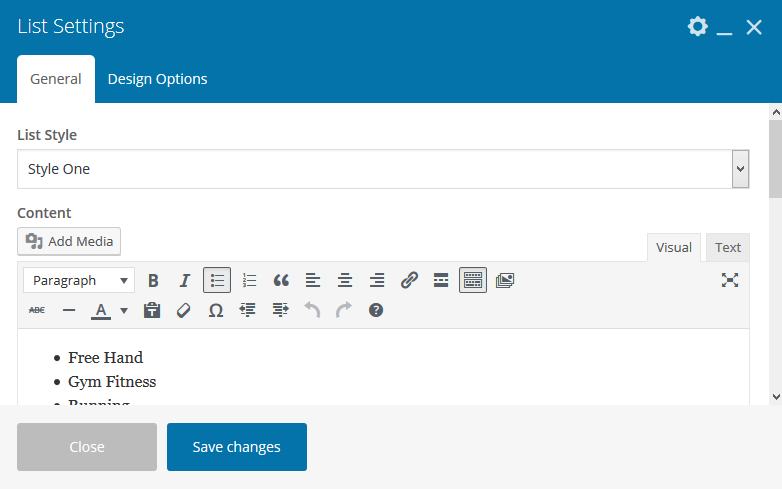
Attributes for General:
- List Style: Select any Style out of different styles.
- Content: Provide content with ul/li structure as screenshot, right here.
- List Icon Color : Provide the icon color of list, right here.
- Animation Style : A myriad of animation styles are available for the list box. You can select any one of them or just leave without animation.
- Extra class name for the container: You can put an extra CSS class name, if required.
- Element ID: You can put an Element ID, if required.
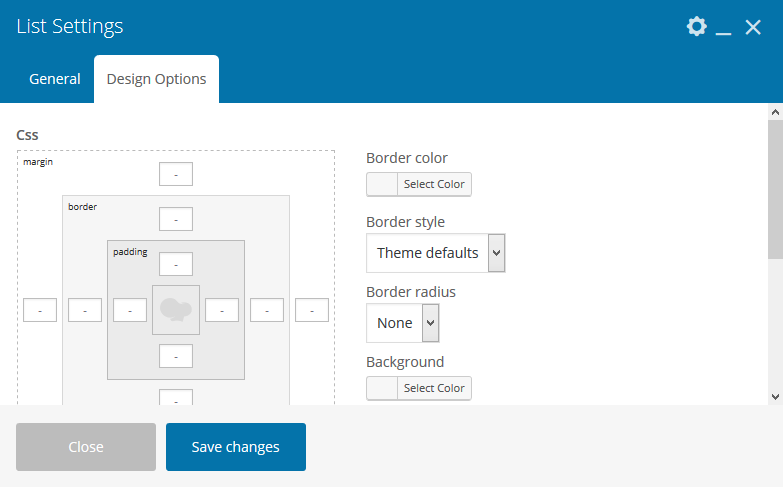
Design Options:
Here you can change the CSS style of the whole list box.
Loan Calculator
By using ‘Loan Calculator’ element, you can add a Loan Caculator. Here, you will get 2 tabs: viz; i) General ii) Design Options
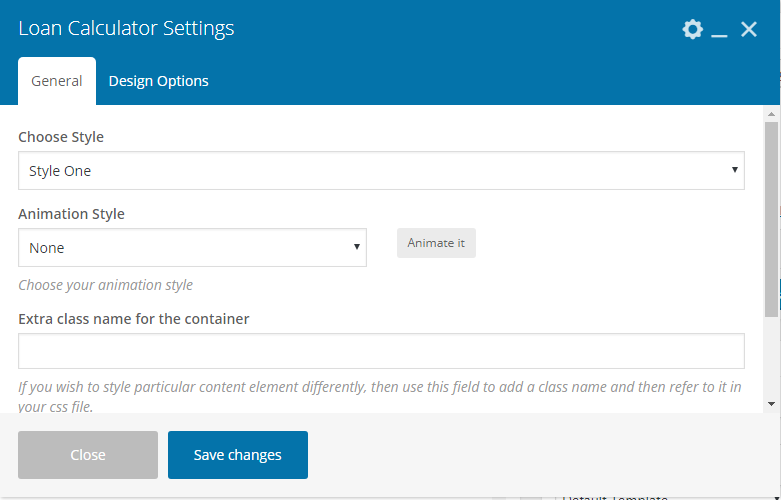
Attributes for General:
- Choose Style: As there is only one style by-default, you don’t have to select any.
- Animation Style : A myriad of animation styles are available for the list box. You can select any one of them or just leave without animation.
- Extra class name for the container: You can put an extra CSS class name, if required.
- Element ID: You can put an Element ID, if required.

Design Options:
Here you can change the CSS style of the whole Loan Calculator box.
Masonry Gallery
By using ‘Masonry Gallery’ element, you can add a Masonry Gallery. Here, you will get 2 tabs: viz; i) General ii) Hover Layer
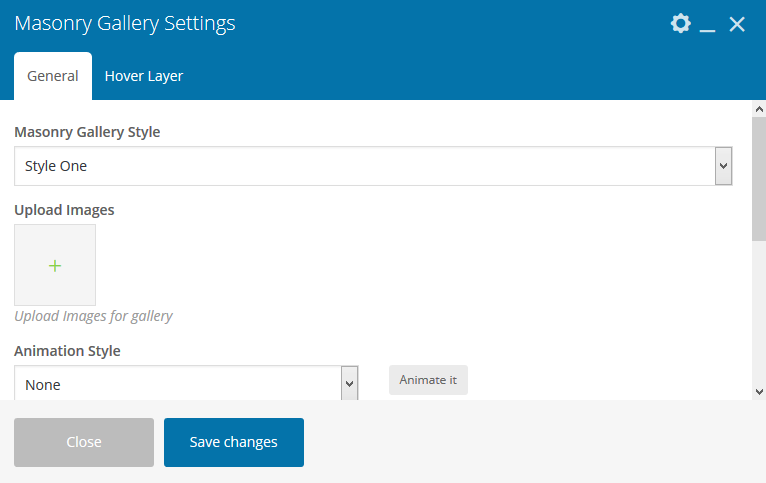
Attributes for General:
- Masonry Gallery Style: As there is only one style by-default, you don’t have to select any.
- Upload Images: Upload images for gallery, from this field.
- Animation Style : A myriad of animation styles are available for the list box. You can select any one of them or just leave without animation.
- Extra class name for the container: You can put an extra CSS class name, if required.
- Element ID:You can put an Element ID, if required.
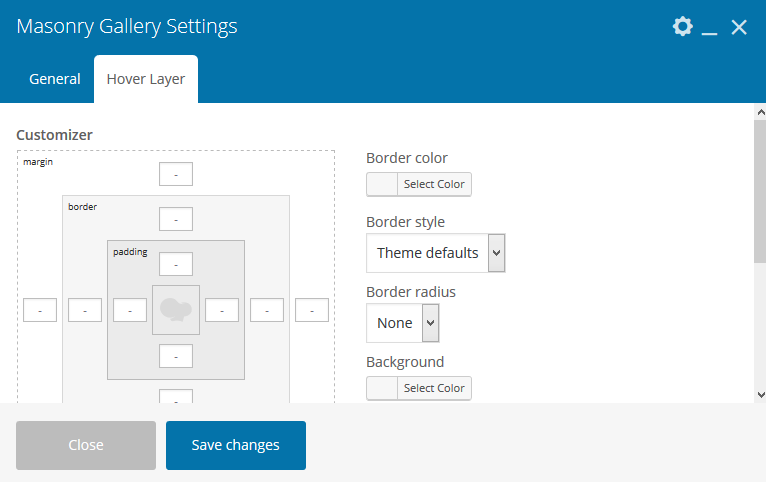
Hover Layer:
Here you can change the CSS style of the Hover Layer for the gallery.
Popup Video
By using ‘Popup Video’ element, you can add a video from Youtube Or Vimeo.
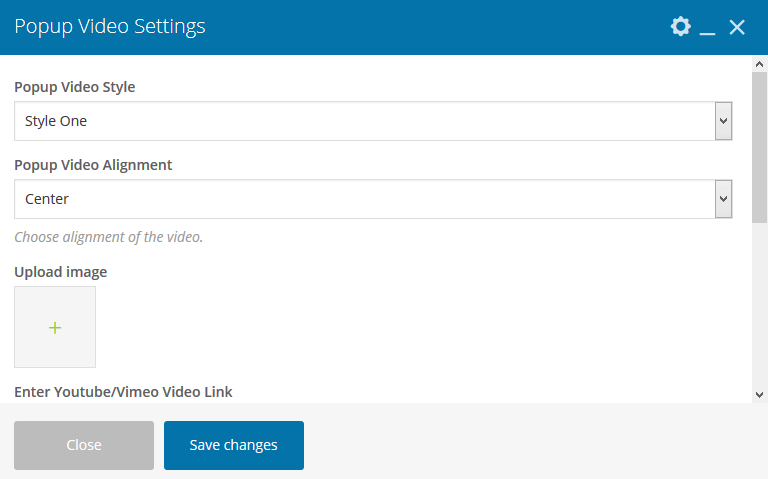
Attributes:
- Popup Video Style: As there is only one style by-default, you don’t have to select any.
- Popup Video Alignment: Choose Alignment of the video.
- Upload image : Upload thumbnail image for the video.
- Enter Youtube/Vimeo Video Link : Enter video link.
- Extra class name for the container: You can put an extra CSS class name, if required.
- Element ID:You can put an Element ID, if required.
Portfolio
By using ‘Portfolio’, you can add a portfolio section with portfolio posts. Here, you will get 2 tabs: viz; i) General ii) Looping
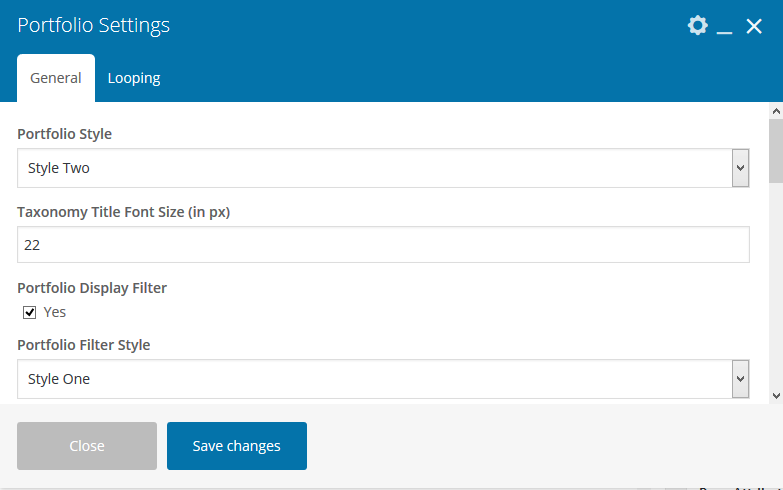
Attributes for General:
- Portfolio Style: Select any Style out of different styles.
- Taxonomy Title Font Size (in px): Provide the font size of ‘category title’.
- Portfolio Display Filter: If you want to filter your portfolio posts with portfolio categories, then check ‘Yes’. After marking as ‘Yes’, these fields will be activated:
i) Portfolio Filter Style: Choose from 3 different styles.
ii) Portfolio Filter Align: Choose alignment of the filter.
- Portfolio Box Align: Choose alignment of the portfolio box.
- Portfolio Box Number: Specify the number of portfolios you wish to show in a grid.
- Enable Zoom?: If you choose ‘Yes’ here, then portfolios will not be linked to portfolio details, but instead portfolios will only “zoom”. If you choose ‘No’, then portfolios will be linked to their “details page” and it will also get to this below mentioned field:
i) Enable Link Button?: If you want to enable the button on portfolio with link, then check ‘Yes’. After marking ‘Yes’, you can also provide text in button on ‘Link Button Text’ field.
- Spacing between Portfolio Items: Provide the spacing between 2 portfolio items.
- Extra class name for the container: You can put an extra CSS class name, if required.
- Element ID: You can put an Element ID, if required.
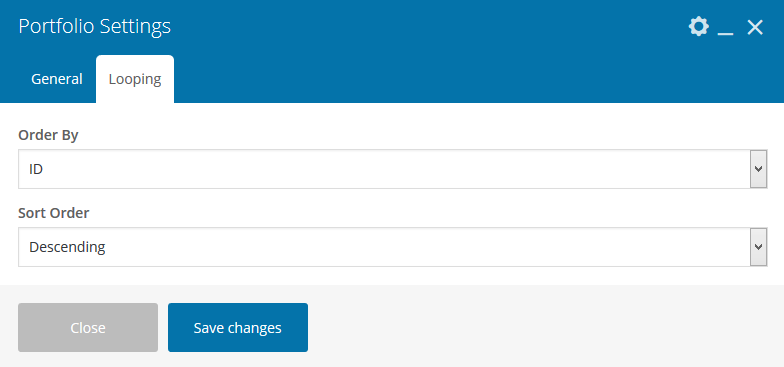
Attributes for Looping:
Here, you can select ‘Order By’ and ‘Sort Order’ of the portfolio items.
Portfolio Slider
By using ‘Portfolio Slider’, you can add a Slider with portfolio posts. Here, you will get 2 tabs: viz; i) General ii) Looping
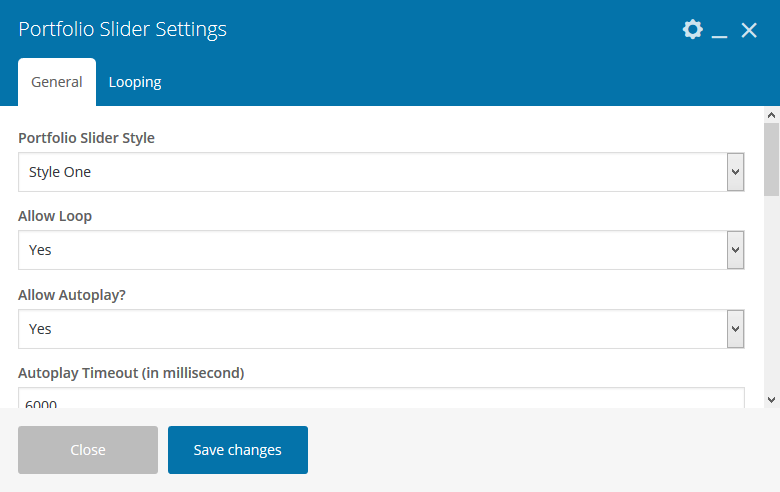
Attributes for General:
- Portfolio Slider Style: Select any Style out of different styles.
- Allow Loop: Choose, if you want to enable the loop or not. If you have 5 portfolio posts, and if you choose ‘No’, the loop will stop after showing those 5 specific portfolio posts and if you select “Yes”, the loop will continue to run.
- Allow Autoplay?: Choose, if you want to autoplay your carousel or not. If you choose ‘No’, then ‘Autoplay Timeout (in seconds)’ option will be deactivated and if you choose “Yes”, then this option would stay and the Autoplay would operate/function properly.
- Autoplay Timeout (in milliseconds): Specify the time in milliseconds for an autoplay timeout, i.e: the duration after which the scroll will start.
- Number of Items on Desktop: Specify the number of portfolio items you wish to show in a single row for the Desktop version.
- Number of Items on Tab: Specify the number of portfolio items you wish to show in a single row for the Tab version.
- Number of Items on Mobile: Specify the number of portfolio items you wish to show in a single row for the Mobile version.
- Enable Zoom?: Choose, if you want to Zoom your portfolio posts or not.
- Extra class name for the container: You can put an extra CSS class name, if required.
- Element ID: You can put an Element ID, if required.

Attributes for Looping:
Here, you can select ‘Order By’ and ‘Sort Order’ of the portfolio items.
Pricing Item
By using ‘Pricing Item’ element, you can add a pricing box.
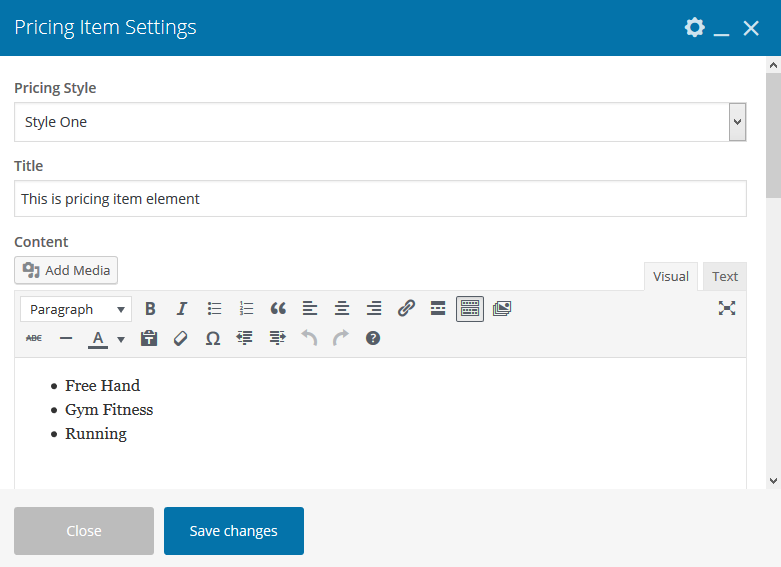
Attributes:
- Pricing Style: Select any Style out of different styles.
- Title: Provide pricing title, right here.
- Content: Provide pricing content with ul/li structure like this above mentioned screenshot, right here.
- Price with Currency : Provide your price with currency, right here.
- Period: Set period, right here.
- Button | Title: Set button text, right here.
- Button | Link : Set button link, right here.
- Highlight: If you want this item to be highlighted, then choose ‘Yes’.
- Animation Style: A myriad of animation styles are available for the pricing item. You can select any one of them or just leave without animation.
- Extra class name for the container: You can put an extra CSS class name, if required.
- Element ID: You can put an Element ID, if required.
Progress Bar
By using ‘Progress Bar’ element, you can add Progress bar.
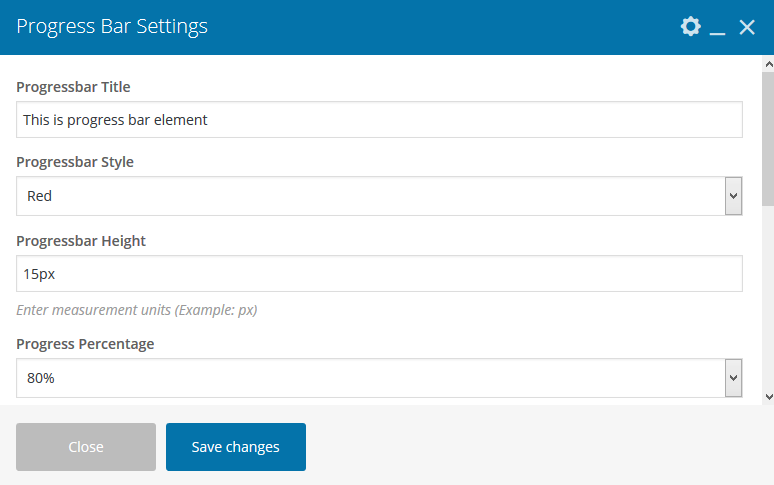
Attributes:
- Progressbar Title: Provide title, right here.
- Progressbar Style: Select any Style out of different styles.
- Progressbar Height: Provide height, right here.
- Progress Percentage: Provide percentage, right here.
- Progressbar Animation: Choose ‘true’ to bring animation effect for the stripe.
- Progressbar Striped: Choose ‘true’ to bring stripe on progressbar.
- Extra class name for the container: You can put an extra CSS class name, if required.
- Element ID: You can put an Element ID, if required.
Quote Box
By using ‘Quote Box’ element, you can add a Quote Box. Here, you will get 2 tabs: viz; i) General ii) Customizer
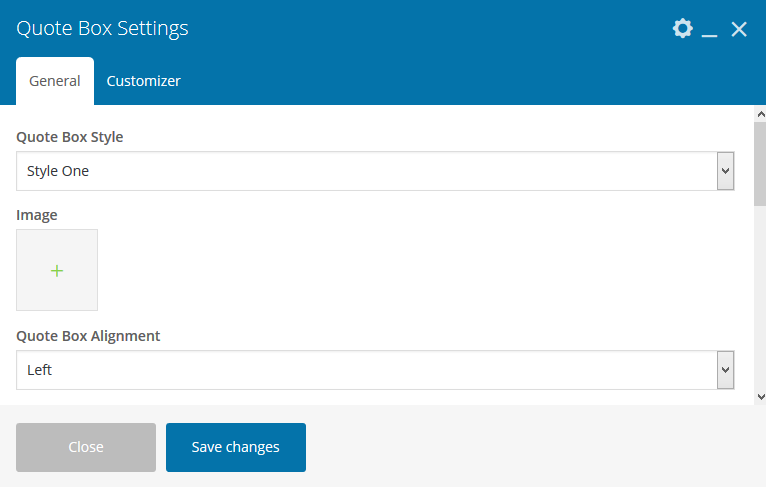
Attributes for General:
- Quote Box Style: As there is only one style by-default, you don’t have to select any.
- Image: Upload images for the Quote Box, from this field.
- Quote Box Alignment: Choose Alignment of the Quote Box.
- Quotation: Provide Quote content.
- Name: Provide Quote name.
- Animation Style : A myriad of animation styles are available for the list box. You can select any one of them or just leave without animation.
- Extra class name for the container: You can put an extra CSS class name, if required.
- Element ID: You can put an Element ID, if required.
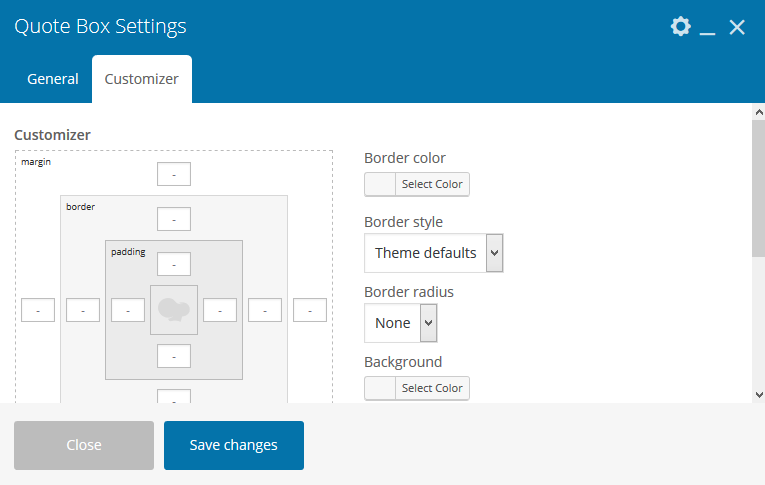
Customizer:
Here you can change the CSS style of the whole Quote Box.
Separator
By using ‘Separator’ element, you can add a separator.
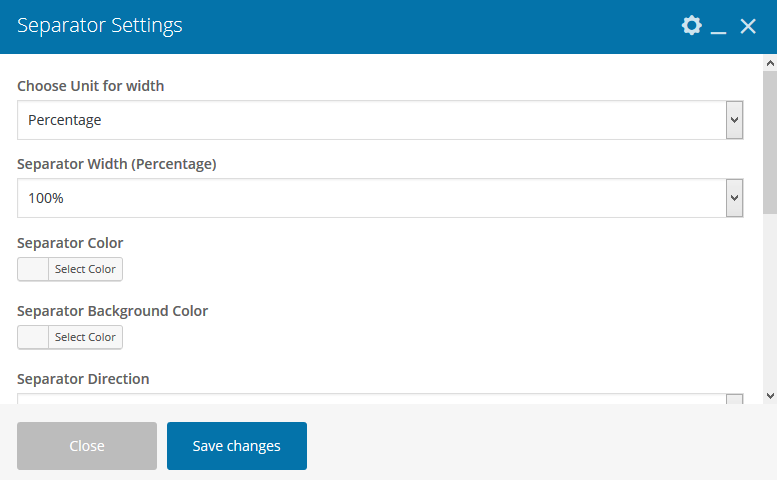
Attributes:
- Choose Unit for width: Specify the unit for separator width. If you have chosen ‘Percentage’, then you will get ‘Separator Width (Percentage)’ field, and you need to choose separator width, right there. If you have chosen ‘Pixel’, then you will get ‘Separator Width (Pixel) eg. 250’ field, and you need to choose separator width, right there.
- Separator Color: Provide color for separator, right here.
- Separator Background Color: Provide Background Color of separator, right here.
- Separator Direction: Choose direction for separator icon.
- Separator Style: Select any Style out of different styles.
- Extra class name for the container: You can put an extra CSS class name, if required.
- Element ID: You can put an Element ID, if required.
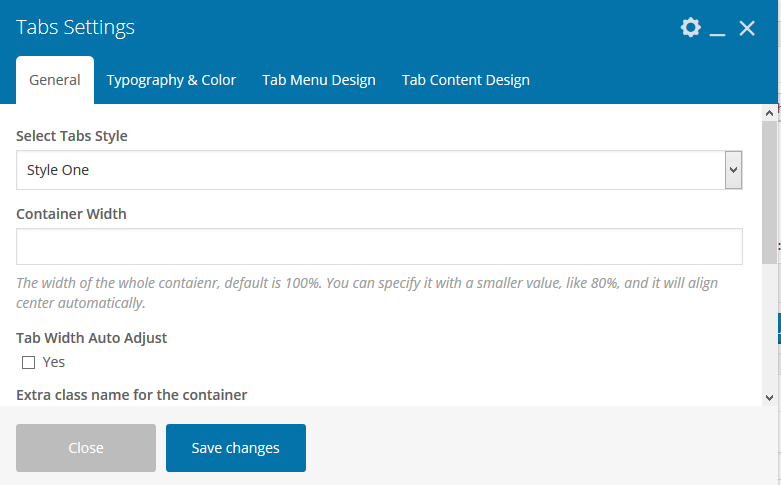
Tabs
By using ‘Tabs’ element, you can add a tab with content.
Follow the steps to add a tab---
- Click on ‘Tabs’. Select any Style out of different styles. Provide width of the whole container, on ‘Container Width’ field. If you choose ‘Yes’ on ‘Tab Width Auto Adjust’, then the width of the container will be adjusted automatically. If you need, you can add 2 specific fields, viz; ‘Extra class’ and ‘Element ID’.
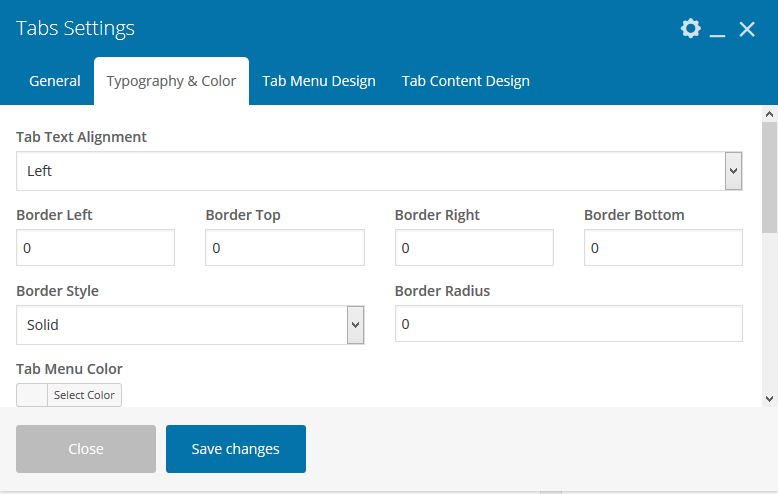
- You can add your own CSS style for the whole tab container on ‘Typography & Color’.
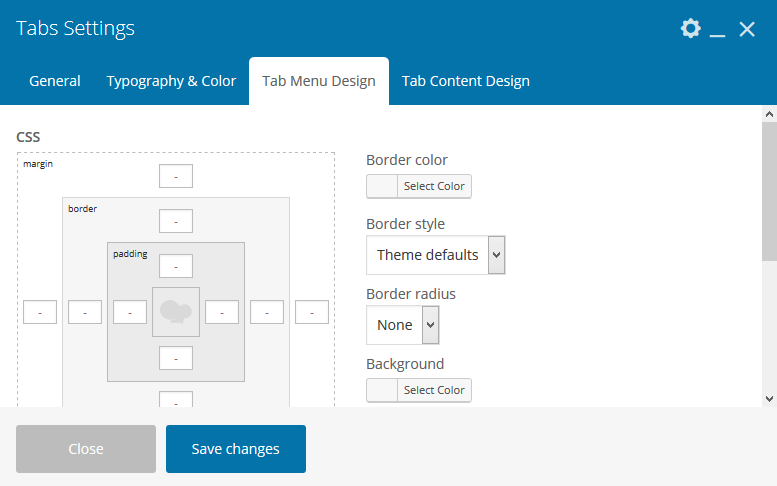
- You can add your own CSS style for the Tab title i.e. menu of the tabs on ‘Tab Menu Design’.
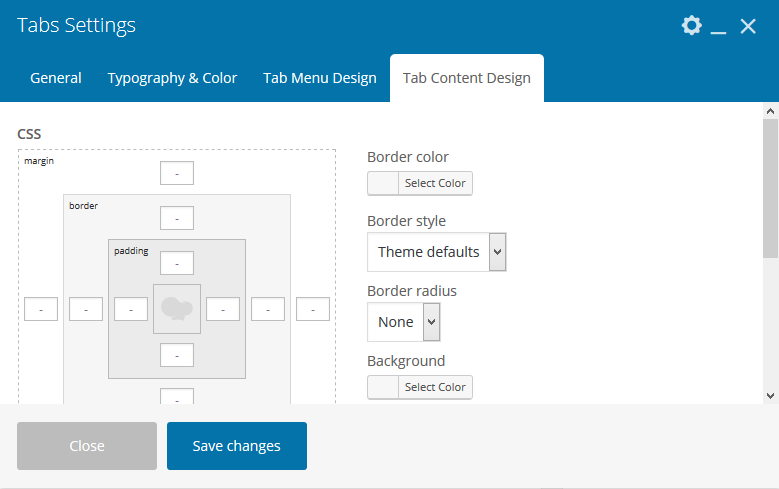
- You can add your own CSS style for the tab content on ‘Tab Content Design’.
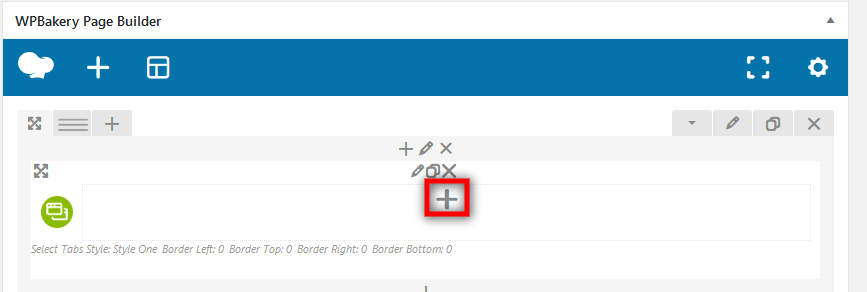
- After providing all the details, click on ‘Save Changes’ to save. Now, to add tab item, click on “plus(+)” sign.
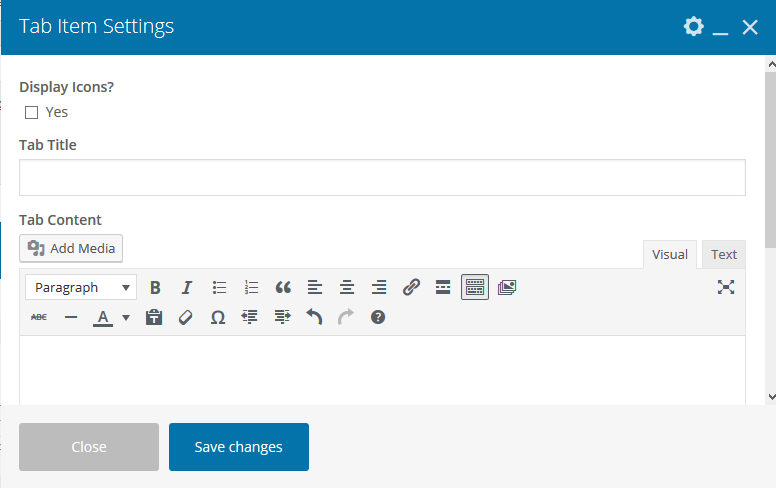
- To add a tab item, click on ‘Tab Item’.
- If you want icon with tab title, then click ‘Yes’ on ‘Display Icons?’ field and provide your icon. Provide title on ‘Tab Title’ field and provide content on ‘Tab Content’ field.

Team
By using ‘Team’ element, you can add a team section with team items.
Follow the steps to add a tab---
Attributes:
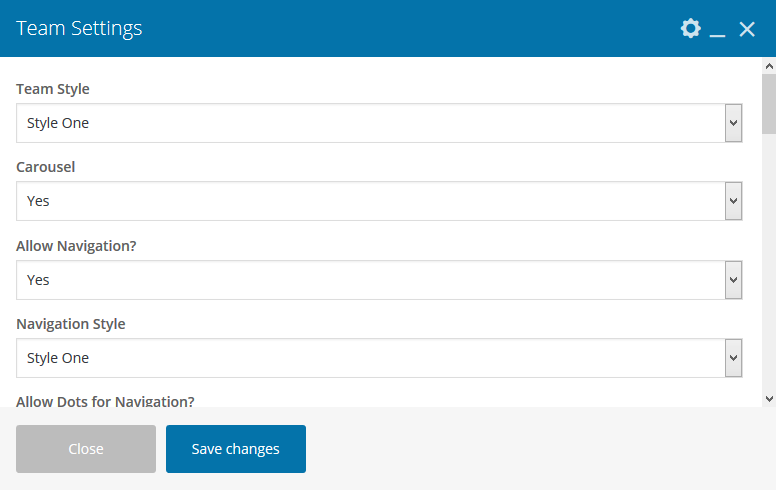
- Team Style: Select any Style out of different styles.
- Carousel: Choose, whether or not, you want to activate carousel. If you choose ‘No’, then the options, viz; ‘Allow Navigation?’, ‘Navigation Style’, ‘Allow Dots for Navigation?’, ‘Navigation Dot Style’, ‘Allow Loop’, ‘Allow Autoplay?’ and ‘Autoplay Timeout (in milliseconds)’ will be deactivated and if you choose “Yes”, then these options would stay and the Carousel would operate/function properly.
i) Allow Navigation?: Choose, if you want to show or hide navigation. If you choose ‘No’, then ‘Navigation Style’ option will be deactivated and if you choose “Yes”, then this option would stay and the navigation would operate/function properly.
ii) Navigation Style: Choose from navigation styles for showing different styles for arrow.
iii) Allow Dots for Navigation? : Choose, if you want to show dots for navigation. If you choose ‘No’, then the ‘Navigation Dot Style’ option will be deactivated and if you choose “Yes”, then this option would stay and the dots for navigation would operate/function properly.
iv) Navigation Dot Style: Choose style for showing ‘Navigation Dot Style’.
v) Allow Loop: Choose, if you want to enable the loop or not. If you have 5 items, and if you choose ‘No’, the loop will stop after showing those 5 specific items and if you select “Yes”, the loop will continue to run.
vi) Allow Autoplay?: Choose, if you want to autoplay your carousel or not. If you choose ‘No’, then ‘Autoplay Timeout (in seconds)’ option will be deactivated and if you choose “Yes”, then this option would stay and the Autoplay would operate/function properly.
vii) Autoplay Timeout (in milliseconds): Specify the time in milliseconds for an autoplay timeout, i.e: the duration after which the scroll will start.
- Order: Choose order for showing team items, i.e: Ascending or Descending.
- Order By: Choose the order of team items.
- Count: Specify the number of team items you wish to show.
- Number of Posts on Desktop: Specify the number of team items you wish to show in a single row for the Desktop version.
- Number of Posts on Tab: Specify the number of team items you wish to show in a single row for the Tab version.
- Number of Posts on Mobile: Specify the number of team items you wish to show in a single row for the Mobile version.
- Add Animation?: A myriad of animation styles are available for the team items. You can select any one of them or just leave without animation.
- Extra class name for the container: You can put an extra CSS class name, if required.
- Element ID: You can put an Element ID, if required.
Testimonial
By using ‘Testimonial’ element, you can add a testimonial section with testimonial items. Here, you will get 2 tabs: i) General and ii) Testimonial Content Typography
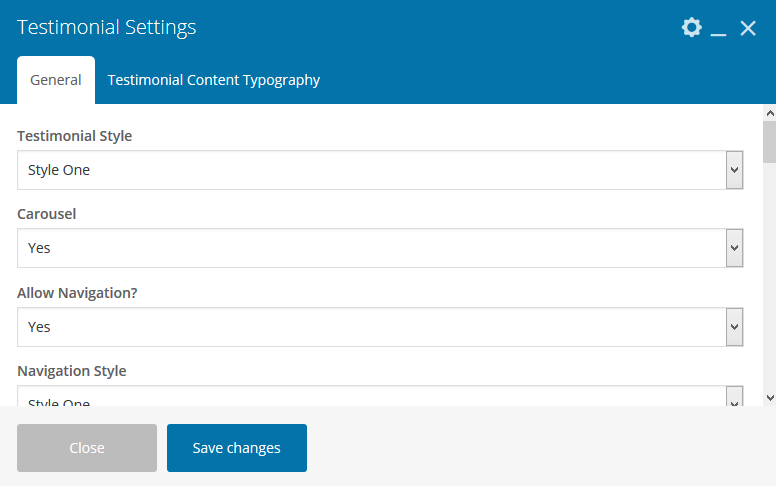
Attributes for General:
- Testimonial Style: Select any Style out of different styles.
- Carousel: Choose, whether or not, you want to activate carousel. If you choose ‘No’, then the options, viz; ‘Allow Navigation?’, ‘Navigation Style’, ‘Allow Dots for Navigation?’, ‘Navigation Dot Style’, ‘Allow Loop’, ‘Allow Autoplay?’ and ‘Autoplay Timeout (in milliseconds)’ will be deactivated and if you choose “Yes”, then these options would stay and the Carousel would operate/function properly.
i) Allow Navigation?: Choose, if you want to show or hide navigation. If you choose ‘No’, then ‘Navigation Style’ option will be deactivated and if you choose “Yes”, then this option would stay and the navigation would operate/function properly.
ii) Navigation Style: Choose from navigation styles for showing different style for arrow.
iii) Allow Dots for Navigation? : Choose, if you want to show dots for navigation. If you choose ‘No’, then the ‘Navigation Dot Style’ option will be deactivated and if you choose “Yes”, then this option would stay and the dots for navigation would operate/function properly.
iv) Navigation Dot Style: Choose style for showing ‘Navigation Dot Style’.
v) Allow Loop: Choose, if you want to enable the loop or not. If you have 5 items, and if you choose ‘No’, the loop will stop after showing those 5 specific items and if you select “Yes”, the loop will continue to run.
vi) Allow Autoplay?: Choose, if you want to autoplay your carousel or not. If you choose ‘No’, then ‘Autoplay Timeout (in seconds)’ option will be deactivated and if you choose “Yes”, then this option would stay and the Autoplay would operate/function properly.
vii) Autoplay Timeout (in milliseconds): Specify the time in milliseconds for an autoplay timeout, i.e: the duration after which the scroll will start.
- Order: Choose order for showing testimonial items, i.e: Ascending or Descending.
- Order By: Choose the order of testimonial items.
- Count: Specify the number of testimonial items you wish to show.
- Number of Posts on Desktop: Specify the number of testimonial items you wish to show in a single row for the Desktop version.
- Number of Posts on Tab: Specify the number of testimonial items you wish to show in a single row for the Tab version.
- Number of Posts on Mobile: Specify the number of testimonial items you wish to show in a single row for the Mobile version.
- Add Animation?: A myriad of animation styles are available for the testimonial items. You can select any one of them or just leave without animation.
- Extra class name for the container: You can put an extra CSS class name, if required.
- Element ID: You can put an Element ID, if required.
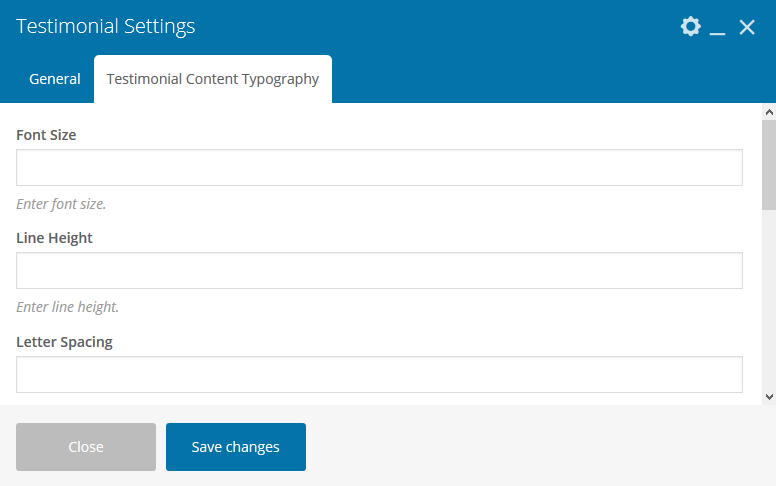
Testimonial Content Typography:
Here you can change the CSS style of the testimonial content.
Theme Button
By using ‘Theme Button’ element, you can create common button for the theme.
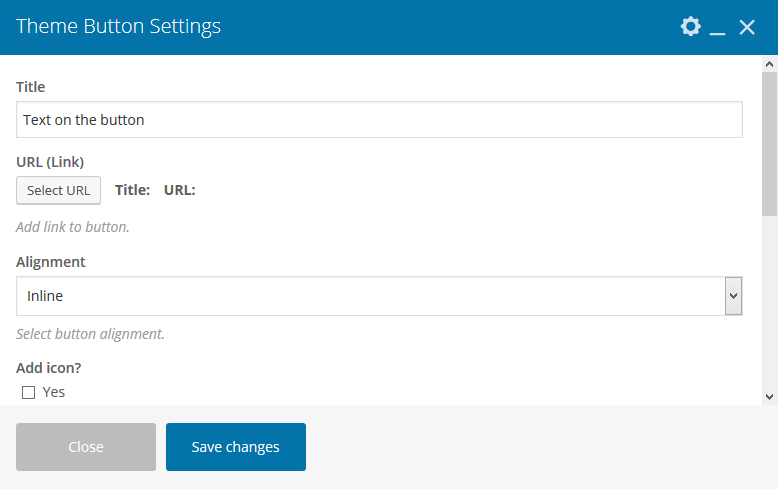
Attributes:
- Title: Provide the button title, right here.
- URL (Link): Provide button url, right here.
- Alignment: Choose button alignment, right here.
- Add icon?: By marking ‘Yes’, you can add icon with button.
- Animation Style: A myriad of animation styles are available for the button. You can select any one of them or just leave without animation.
- Extra class name for the container: You can put an extra CSS class name, if required.
- Element ID: You can put an Element ID, if required.
TimeLine
From ‘Timeline’ element, you can add content with timeline style.
Follow the steps to add a Timeline element---
- Click on ‘Timeline’. As there is only one style by-default for Timeline, you don’t have to select any. If you require, you can add 2 specific fields, viz; ‘Extra class’ , ‘Element ID’.
- You can add your own CSS styles in the Tab - ‘Design’.
- After providing all the details, click on ‘Save Changes’ to save. Now, to add timeline items, click on “plus(+)” sign.
- To add an item, click on ‘Timeline Item’.
- Provide Timeline Image, Timeline Title and Timeline Content (You can use HTML tags) for that particular item.
- To add more items, you can go accordingly with the same process or you can add additional items by duplicating that existing item.
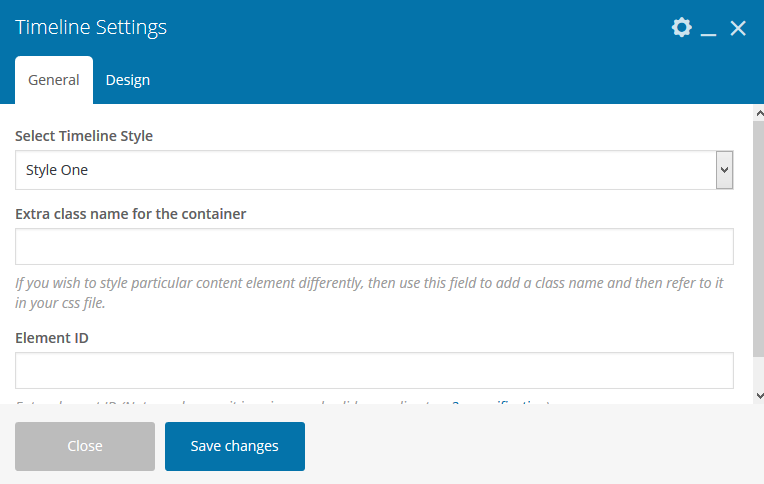
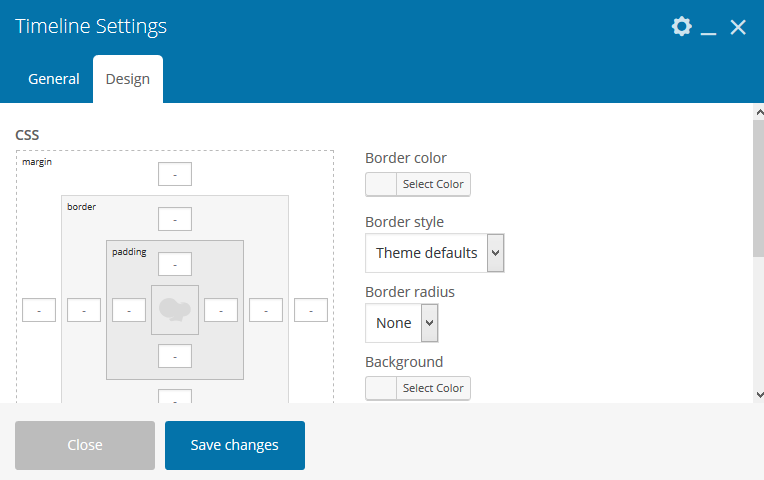
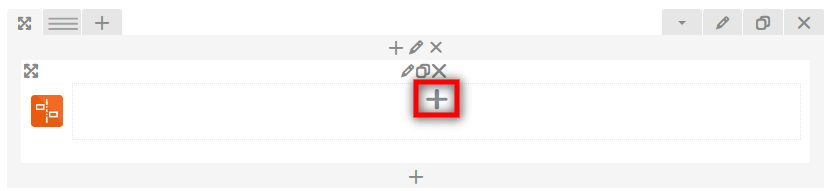
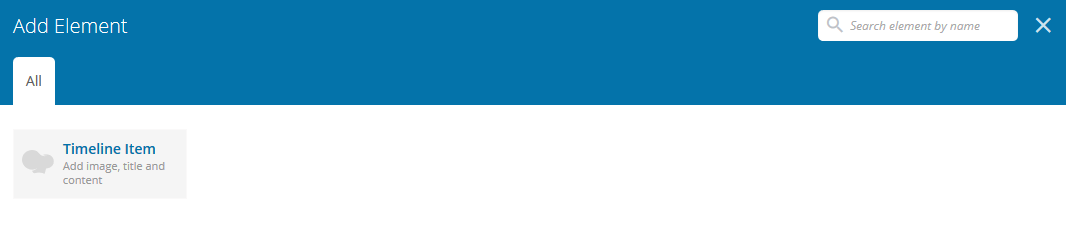
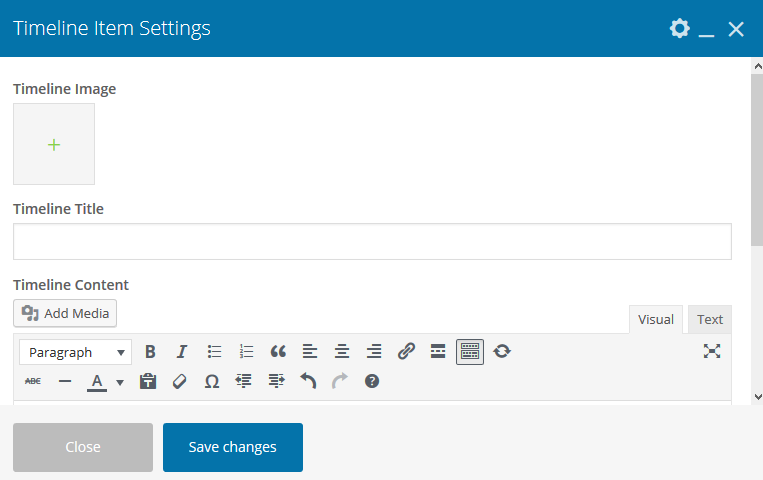

Menu
To add your own menu(s), follow the following steps--
- Navigate Appearance > Menus
- Type Your menu name on ‘Menu Name’ field and click, ‘Create Menu’.
- Choose position for menu in ‘Display Location’.
- Click on ‘Save Menu’ to save everything.
You can add Pages, Posts and Custom links from blocks on the left side. Now, if you want to add special items such as ‘Portfolio’, ‘Portfolio Categories’, ‘Clients’, etc. then click on “Screen Options” button in the top right hand corner to add those additional menus.
To get more information about creating menu(s), go to - //en.support.wordpress.com/menus
RadiantThemes Mega Menu
First, you need to create a menu and make that "Primary". It is only after that, you can make the menu which has been created as ‘MEGA MENU’ (opt for it only if you need it).
Please go through the following points to know how to create RadiantThemes Mega Menu:
- Login to WordPress admin panel (URL should be www.yourdomain.com/wp-admin ).
- Navigate to "Appearance > Menus".
- From drop-down, select the menu you want to make "Primary", and then click on "Select" button.
- Now, click on menu items where you want to enable the mega menu.
- Click on the checkbox “Use as Mega Menu”
- Now select “Column” or “Tab” under “Use Submenus as:” dropdown option.
- Navigate to "Appearance > Widgets".
- Place any available widgets under “Widgets in Menu” widget position.
- Navigate to "Appearance > Menus" again.
- Click on “Screen Options” at the top right and check “Megamenu Setting” and “Widgets” if they are already not checked.
- Click on “Widgets” tab in the left side, you will see all the created widgets that you placed under “Widgets in Menu” widget position in Step 8 here.
- Select the available widgets by checking them and then click on “Add to Menu” button.
- Place the above widgets under the menu where you have selected “Use as Mega Menu”
- Then click on “Save Menu” button in the bottom right.

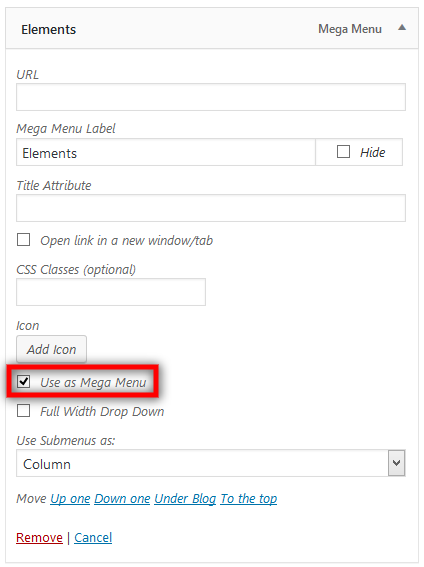

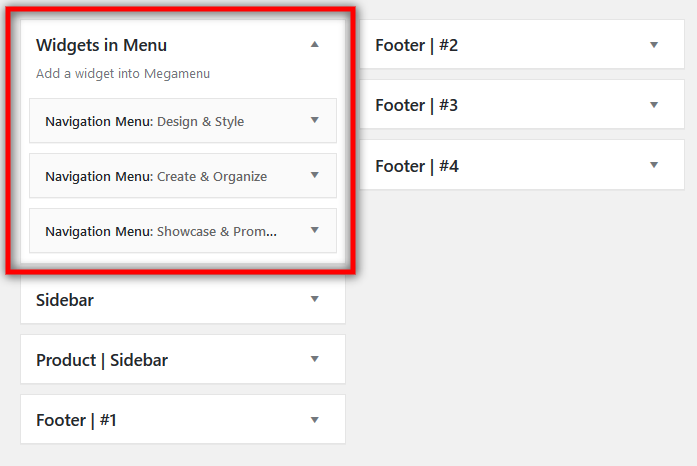

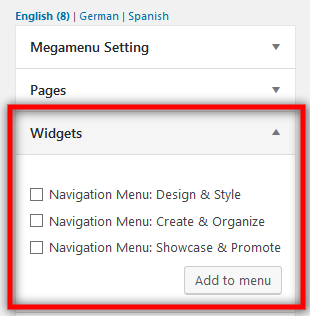
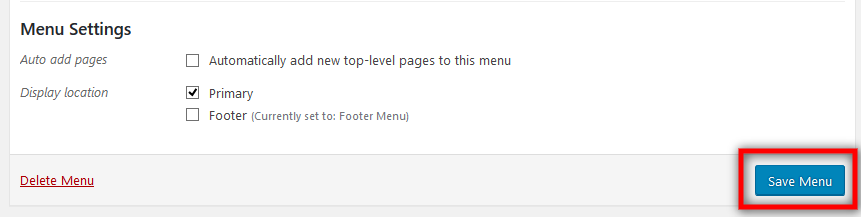
E-Commerce
You can enable e-commerce on your site with WooCommerce plugin. Consultix is fully compatible with the WooCommerce plugin.
Install WooCommerce and setup default shop pages
If your site doesn’t have WooCommerce installed already, then you need to install the WooCommerce plugin first. To do the same, navigate to ‘Plugins’ > ‘Add new’ and then type ‘WooCommerce’ into the search field. Now install the plugin by clicking on “Install Now” button. After that, click on “Activate” button to activate the plugin. After activating, you will get notification to install WooCommerce pages. So, install default WooCommerce pages from there. To get more information about WooCommerce, click on this link-- WooCommerce Documentation
How to add new product
Navigate to Products > Add New. Now, put all the essential details to add a new product. You will get all the details on how to manage products from here---
https://docs.woocommerce.com/document/managing-products/Blog Posts
Please go through the points given below to understand how to create a new blog post--
- Login to WordPress admin panel.
- Navigate to "Posts > Add New"
- Provide a suitable title for your blog post.
- On the below area, you have to write content for your blog post. You can also add content with WPBakery Page Builder.
- As short contents for blog post element are coming from ‘Excerpt’, so you need to provide content on ‘Excerpt’ too. If you’re not getting ‘Excerpt’ option on your post, then click on “Screen Options” button in the top right hand corner and check ‘Excerpt’ to get the option.
- On the right hand side, you will find "Featured Image" section. Here, you can provide an image for your blog post.
- From "Categories" box, you can put your blog post under a suitable category or create a new category for that.
- Finally, click on "Publish" button to publish your blog post.
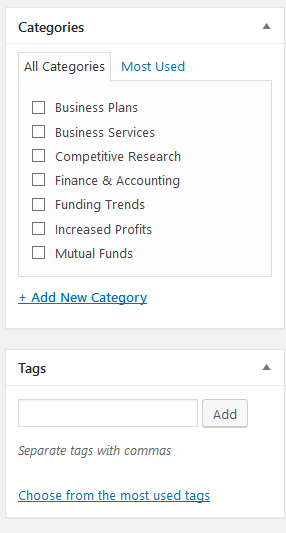
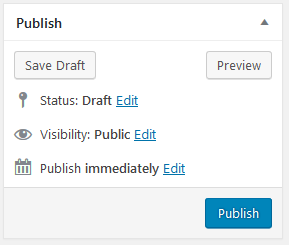
Testimonial Items
Please go through the points given below to understand how to create a new testimonial item---
- Login to WordPress admin panel.
- Navigate to "Testimonials > Add New Testimonial"
- Provide a suitable title for your testimonial item.
- On the below area, you have to write content for your testimonial item.
- As short contents for testimonial element are coming from ‘Excerpt’, so you need to provide content on ‘Excerpt’ too. If you’re not getting ‘Excerpt’ option on your testimonial, then click on “Screen Options” button in the top right hand corner and check ‘Excerpt’ to get the option.
- On the right hand side, you will find "Client Hover Image" section. Here, you can provide an image for your testimonial item.
- You can add testimonial information here.
- Finally, click on "Publish" button to publish your testimonial item.
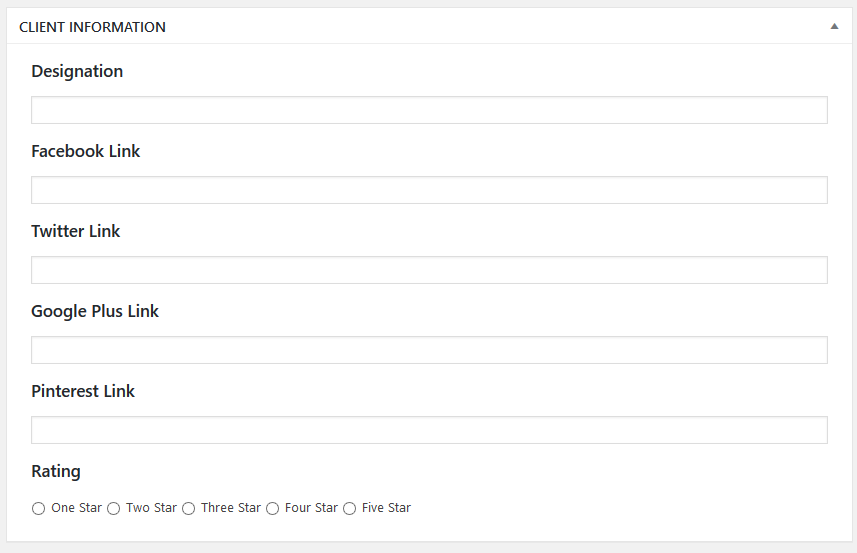
Team Items
Please go through the points given below to understand how to create a new portfolio post---
- Login to WordPress admin panel.
- Navigate to "Team > Add New Team"
- Provide a suitable title for your team item.
- On the below area, you have to write content for your team item. Also, you can add content with WPBakery Page Builder.
- As short contents for team element are coming from ‘Excerpt’, so you need to provide content on ‘Excerpt’ too. If you’re not getting ‘Excerpt’ option on your team, then click on “Screen Options” button in the top right hand corner and check ‘Excerpt’ to get the option.
- On the right hand side, you will find "Team Member Image" section. Here, you can provide an image for your team item.
- From "Professions" box, you can put your portfolio item under a suitable profession or create a new profession for that.
- You can add team information here.
- Finally, click on "Publish" button to publish your portfolio item.

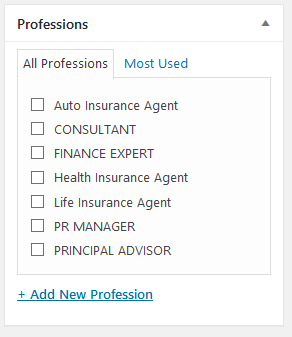
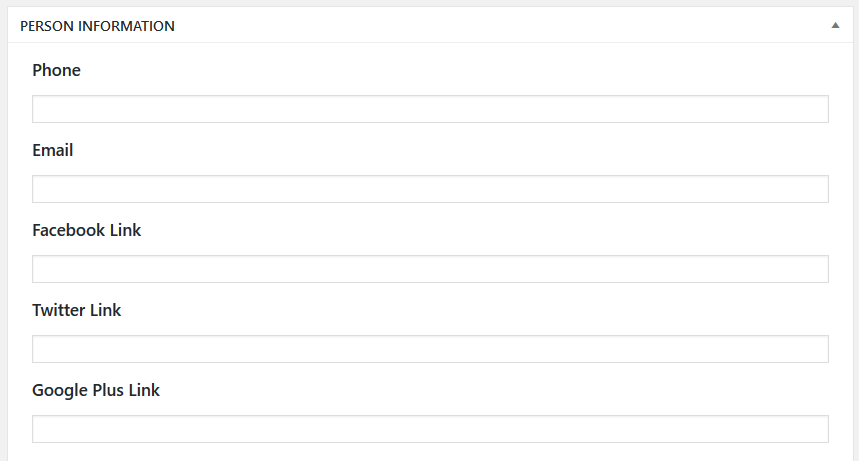
Portfolio Items
Please go through the points given below to understand how to create a new portfolio post---
- Login to WordPress admin panel.
- Navigate to "Portfolio > Add New Portfolio"
- Provide a suitable title for your portfolio item.
- On the below area, you have to write content for your portfolio item. Also, you can add content with WPBakery Page Builder.
- As short contents for portfolio element are coming from ‘Excerpt’, so you need to provide content on ‘Excerpt’ too. If you’re not getting ‘Excerpt’ option on your portfolio, then click on “Screen Options” button in the top right hand corner and check ‘Excerpt’ to get the option.
- On the right hand side, you will find "Portfolio Image" section. Here, you can provide an image for your portfolio item.
- From "Portfolio Categories" box, you can put your portfolio item under a suitable category or create a new category for that.
- Finally, click on "Publish" button to publish your portfolio item.
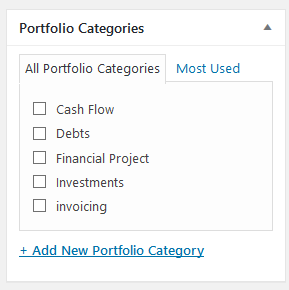
Case Study Items
Please go through the points given below to understand how to create a new Case Study item---
- Login to WordPress admin panel.
- Navigate to "Case Study > Add New Case Study"
- Provide a suitable title for your Case Study item.
- On the below area, you have to write content for your Case Study item. Also, you can add content with WPBakery Page Builder.
- As short contents for Case Study element are coming from ‘Excerpt’, so you need to provide content on ‘Excerpt’ too. If you’re not getting ‘Excerpt’ option on your Case Study, then click on “Screen Options” button in the top right hand corner and check ‘Excerpt’ to get the option.
- On the right hand side, you will find "Case Study Image" section. Here, you can provide an image for your Case Study item.
- From "Case Study Categories" box, you can put your Case Study item under a suitable category or create a new category for that.
- Finally, click on "Publish" button to publish your Case Study item.
Clients Items
Please go through the points given below to understand how to create a new client item---
- Login to WordPress admin panel.
- Navigate to "Clients > Add New Client"
- Provide a suitable title for your client item.
- On the right hand side, you will find "Client Hover Image" section. Here, you can provide an image for your client item.
- Finally, click on "Publish" button to publish your testimonial item.

MailChimp
You can manage MailChimp form by following this tutorial--
Translation & WPML
Use .mo/.po files and Poedit software
For individuals who desire translation using files included in the theme, we suggest using the .mo/.po files. These files work in ‘buddies’ or pairs, so for every language, you must have 2 files with the same name but with a different extension name altogether. For example, if you wish to translate into French language, your files would be fr_FR.mo and fr_FR.po
To make edits on these files, you have to use Poedit which is an “easy to use” software. You only need to upload the files into Poedit, edit and upload them into the"languages" folder that are included or provided in the theme.
WPML
Consultix is stringently tested on all parameters, and is completely compatible with WPML plugin. If you desire a multilingual website, this is probably the best way to do so. However, if you wish to utilize this plugin, you must buy it first, and install it into your WordPress platform. The following links contain useful WPML plugin information.
WPML DocumentationWPML Support Forum
Translating Widgets
Site Maintenance
We offer you our advice and expertise, so that you can enhance your website’s performance.
Improve Site Speed
Website loading speed is of utmost importance. Visitors don't like a slow website. We have already made the necessary changes in our theme to help your site load faster. Our theme's page speed is 90 in 'Google page speed insight test' (without this plugin). Please read the points mentioned below to know how you can improve your website loading speed.
Image Compress with TinyPNG:
You can compress images from TinyPNG website. Visit https://tinypng.com/ and compress all images before uploading them on your website. By this process, you can decrease your website loading time and provide your visitors, a better experience.
.htaccess Code For Better Website Speed:
Please copy and paste the below mentioned code to your .htaccess file (you will find this file on the root folder of your hosting directory) for improved performance of your website.
(N.B.: Please don't replace any code that already exists on the .htaccess file. It may have serious implications on your website.)
AddOutputFilterByType DEFLATE text/plain
AddOutputFilterByType DEFLATE text/html
AddOutputFilterByType DEFLATE text/xml
AddOutputFilterByType DEFLATE text/css
AddOutputFilterByType DEFLATE application/xml
AddOutputFilterByType DEFLATE application/xhtml+xml
AddOutputFilterByType DEFLATE application/rss+xml
AddOutputFilterByType DEFLATE application/javascript
AddOutputFilterByType DEFLATE application/x-javascript

## EXPIRES CACHING ##
<IfModule mod_expires.c>
ExpiresActive On
ExpiresByType image/jpg "access 1 year"
ExpiresByType image/jpeg "access 1 year"
ExpiresByType image/gif "access 1 year"
ExpiresByType image/png "access 1 year"
ExpiresByType text/css "access 1 month"
ExpiresByType text/html "access 1 month"
ExpiresByType application/pdf "access 1 month"
ExpiresByType text/x-javascript "access 1 month"
ExpiresByType application/x-shockwave-flash "access 1 month"
ExpiresByType image/x-icon "access 1 year"
ExpiresDefault "access 1 month"
</IfModule>
## EXPIRES CACHING ##
WP Fastest Cache:
WP Fastest Cache is our preferred plugin for website cache. You can install this plugin and also learn how this plugin works, by following the below mentioned steps:
- Login to WordPress admin panel (URL should be www.yourdomain.com/wp-admin ).
- Navigate to "Plugins > Add New" (see screenshot below).
- Search for "WP Fastest Cache".
- Install and activate the plugin.
- Check on “Enable”, to enable cache.
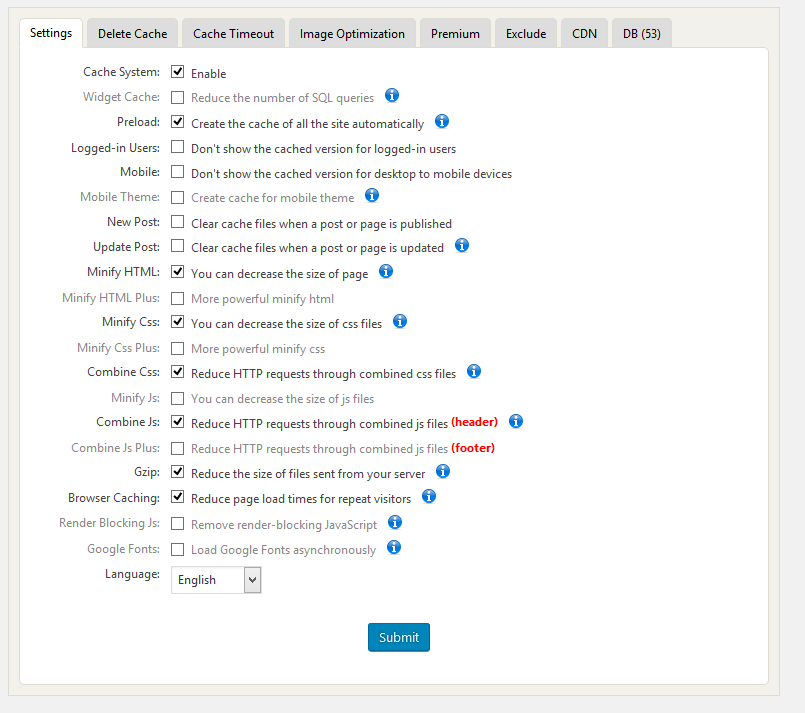
Check Website On Google Page Insights and GT Metrix:
Please follow the below mentioned steps to check your website for Google Page Speed:
- Visit https://developers.google.com/speed/pagespeed/insights/
- Type your website URL and click on "Analyze" button to know your website speed.
Please follow the below mentioned steps to check your website on GTMetrix:
- Visit https://gtmetrix.com/
- Type your website URL and click on "Analyze" button to know your website speed.